Quickstart
You should start here. These steps will guide you through the initial tool configuration and deploying your first Domino server. Subsequent use of the script will follow the same pattern, although the configuration will likely be more detailed and customized to your specific needs.
When running the script for the first time, deploy only test servers on test virtual machines.
Prerequisites
- Install Docker on your workstation.
- Create your virtual machine (VM) with Linux (the script is tested on CentOS 9 Stream, Rocky Linux 9, Ubuntu 24.04).
- Configure SSH access to the VM using a certificate. Store the parameters in
~/.ssh/configso that you do not need to specify the username and key file for every connection.
You should be able to connect to the VM with this simple command:ssh <your_vm_hostname>Example:
ssh sigma.example.com
Obtain the Script
- Clone this repository to your workstation. The best way is to use
gitcoomand:git clone https://github.com/HCL-TECH-SOFTWARE/Domino-Automation
Software Installers
-
Choose a folder on your local workstation where you will store installation packages for the products you plan to deploy (Domino, Traveler, Nomad, etc.). You can use the
software/subfolder inside the repository. -
Put the software installers into this folder.
Configure Your Inventory
-
Inventory files are stored in the
inventory/folder. -
Create your inventory file by copying the example file
inventory-example.yml. Name your file asinventory-<your_domino_domain>.yml. -
Edit your inventory file:
- Replace alpha.example.com with the hostname of your VM.
ansible_user: set the username you use for SSH connectivity to your VM.ansible_ssh_private_key_file: set the path to your SSH keys.[!NOTE] The username and key file should match the values in your
.ssh/configfile.
Configure Your Domino Server
-
Each VM has its configuration directory located in
inventory/host_vars. - Create a new directory that will contain parameters for your Domino server. The name of the directory must match the VM hostname.
You can clone the example directory sigma.example.com and edit the values.[!NOTE] There are multiple directories with example server configuration. Sigma is the simplext, with just a few mandatory parameters.
- Edit the
domino.ymlfile inside the newly created directory and replace the default values with your own.
Configure and Start Semaphore
- Edit parameters in the Semaphore config file
semaphore/.env. You need to updateSOFTWARE_DIRECTORYparameter — set it to the folder where the software installers are stored (the one from the previous section).
Changing other parameters is optional. - Start the Semaphore container:
./semaphore.sh start - Create documents in Semaphore to perform the initial project configuration and generate task documents for Domino installation:
./semaphore.sh create <your_vm_hostname>Example:
./semaphore.sh create sigma.example.com - Access the Semaphore UI. Get the URL and credentials with this command:
./semaphore.sh infoThe default URL is http://localhost:3000/.
Username and password are specified insemaphore/.env. -
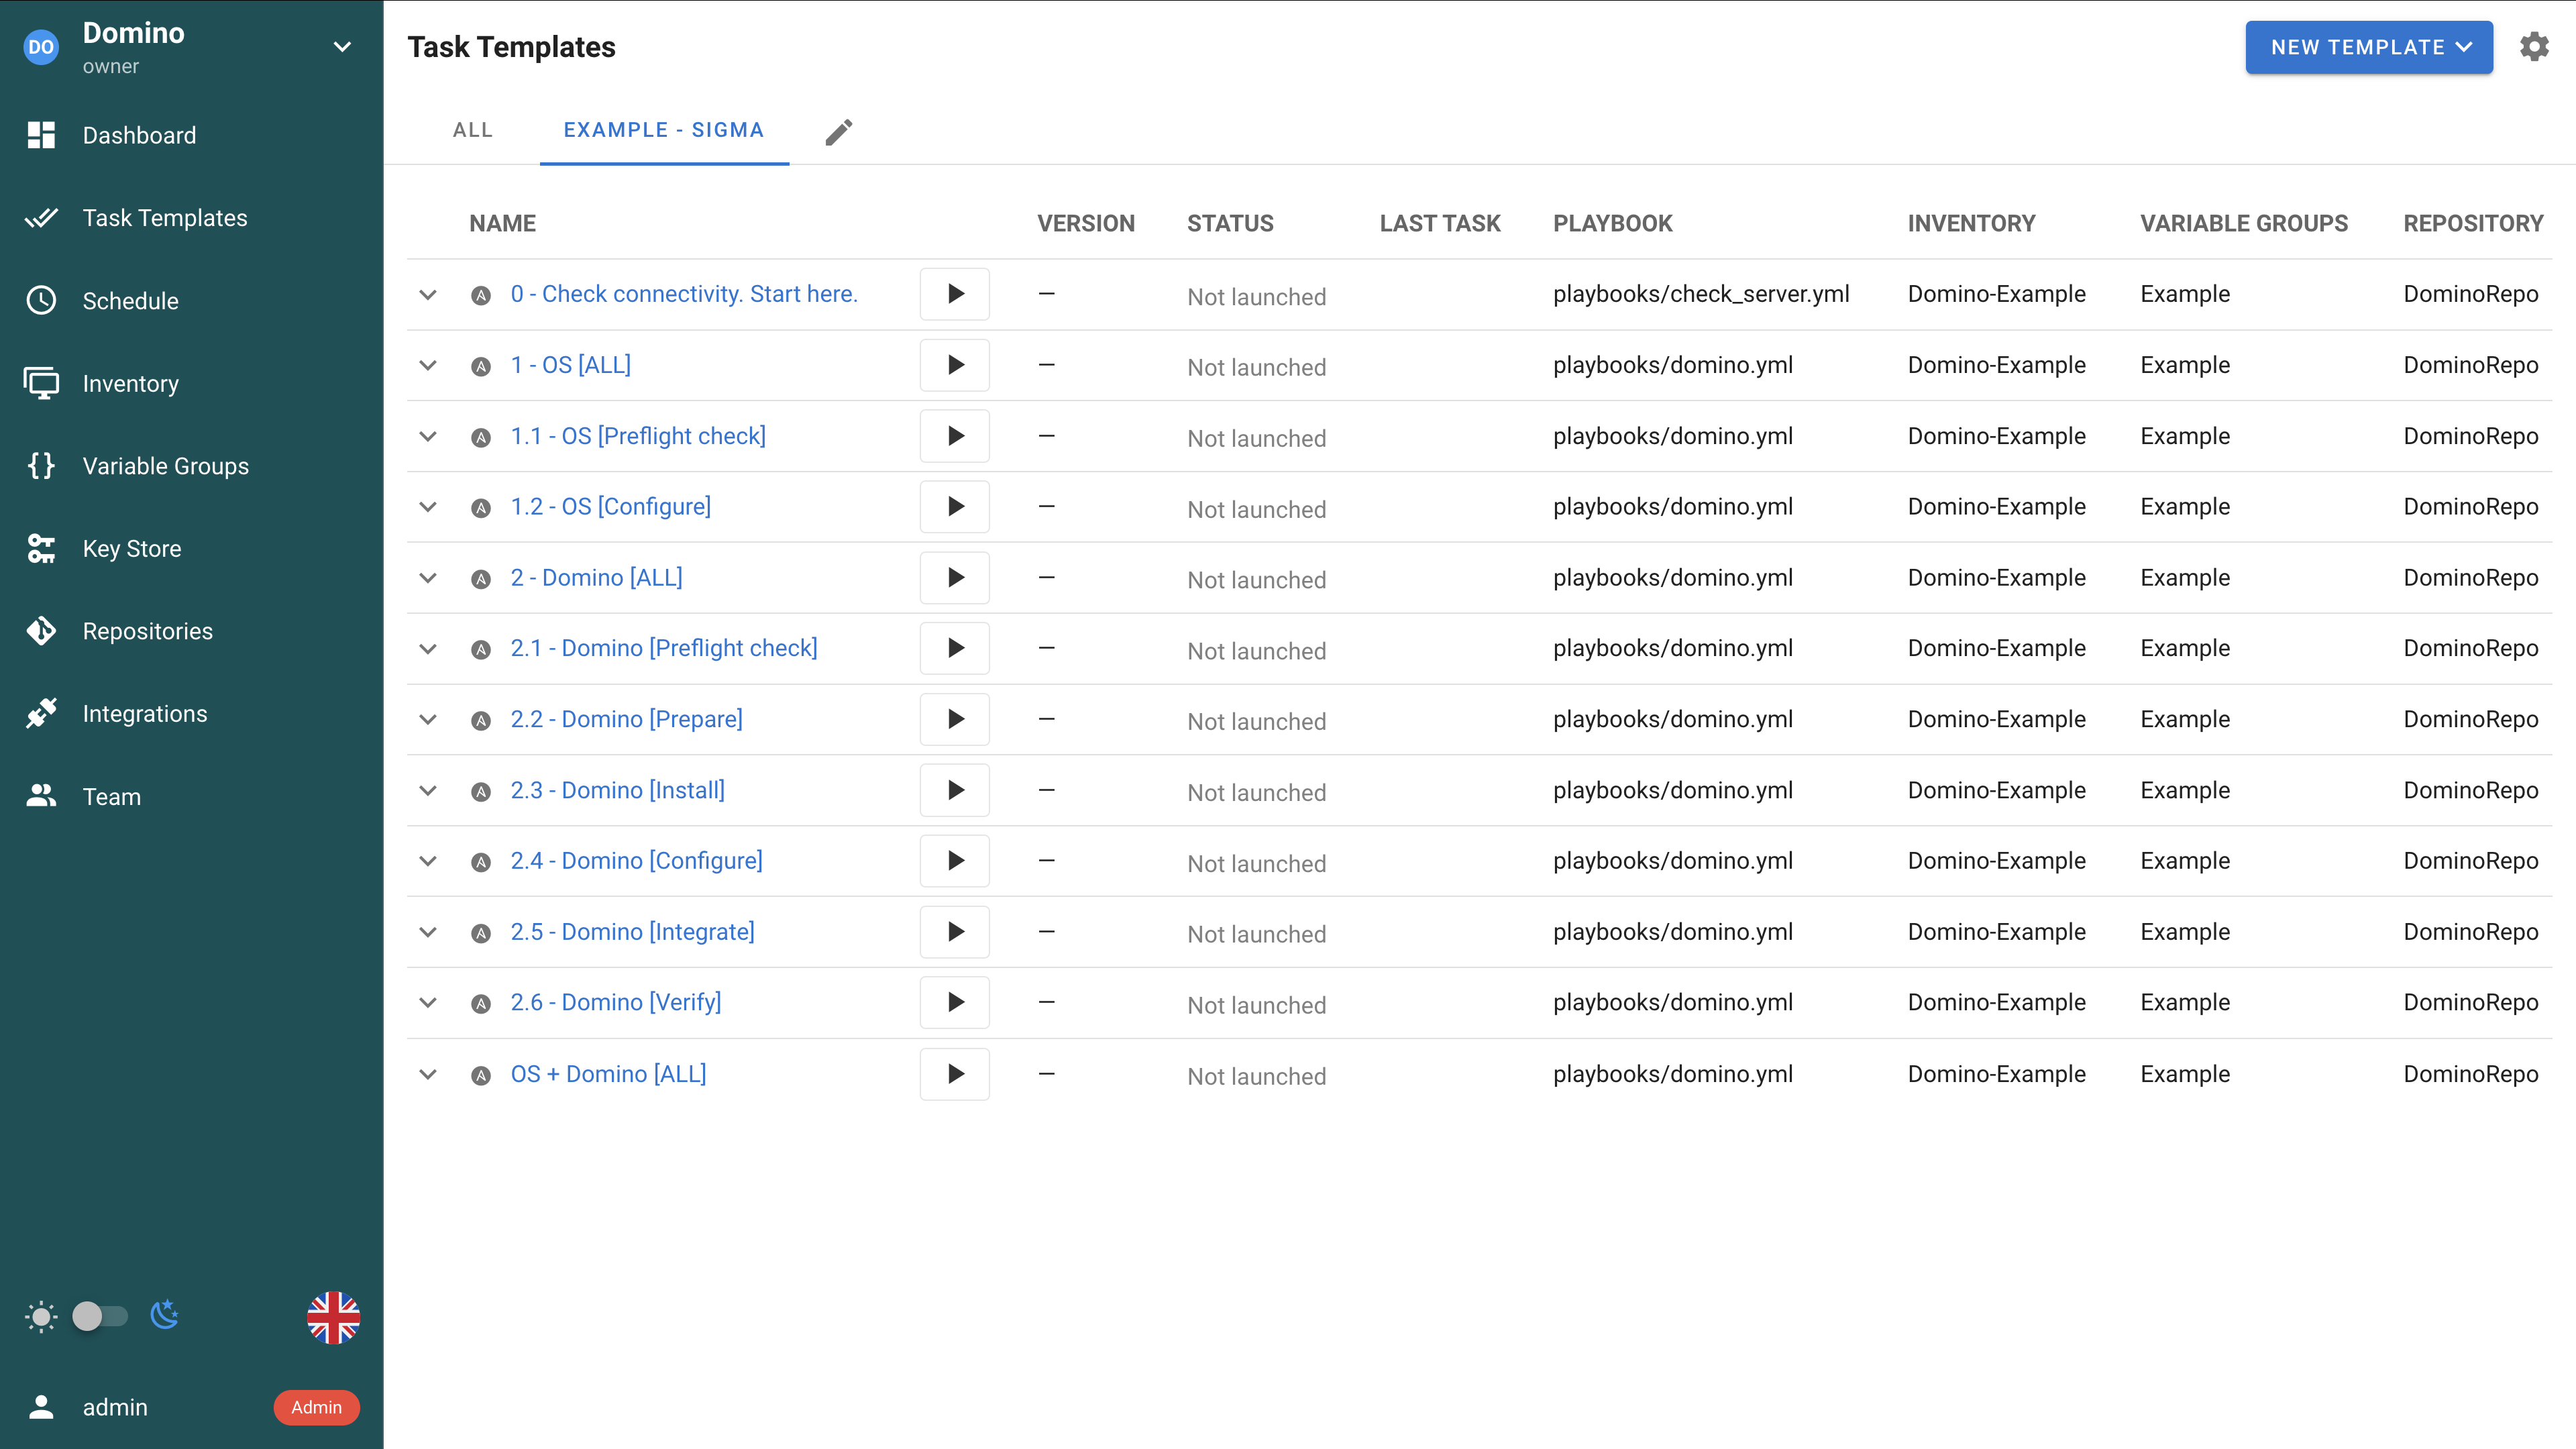
Examine the Semaphore user interface, especially the Task Templates section. It contains the task documents you will run.
[!NOTE] If needed, you can reset and recreate the Semaphore configuration — useful when tuning the initial setup. Run the following commands:
  ./semaphore.sh reset
  ./semaphore.sh start
  ./semaphore.sh create <your_vm_hostname>
Run Tasks One by One
-
In the Semaphore UI, go to Task Templates and select the view for your server (example:
EXAMPLE - SIGMA) -
Launch tasks in the specified order. Start with the task named
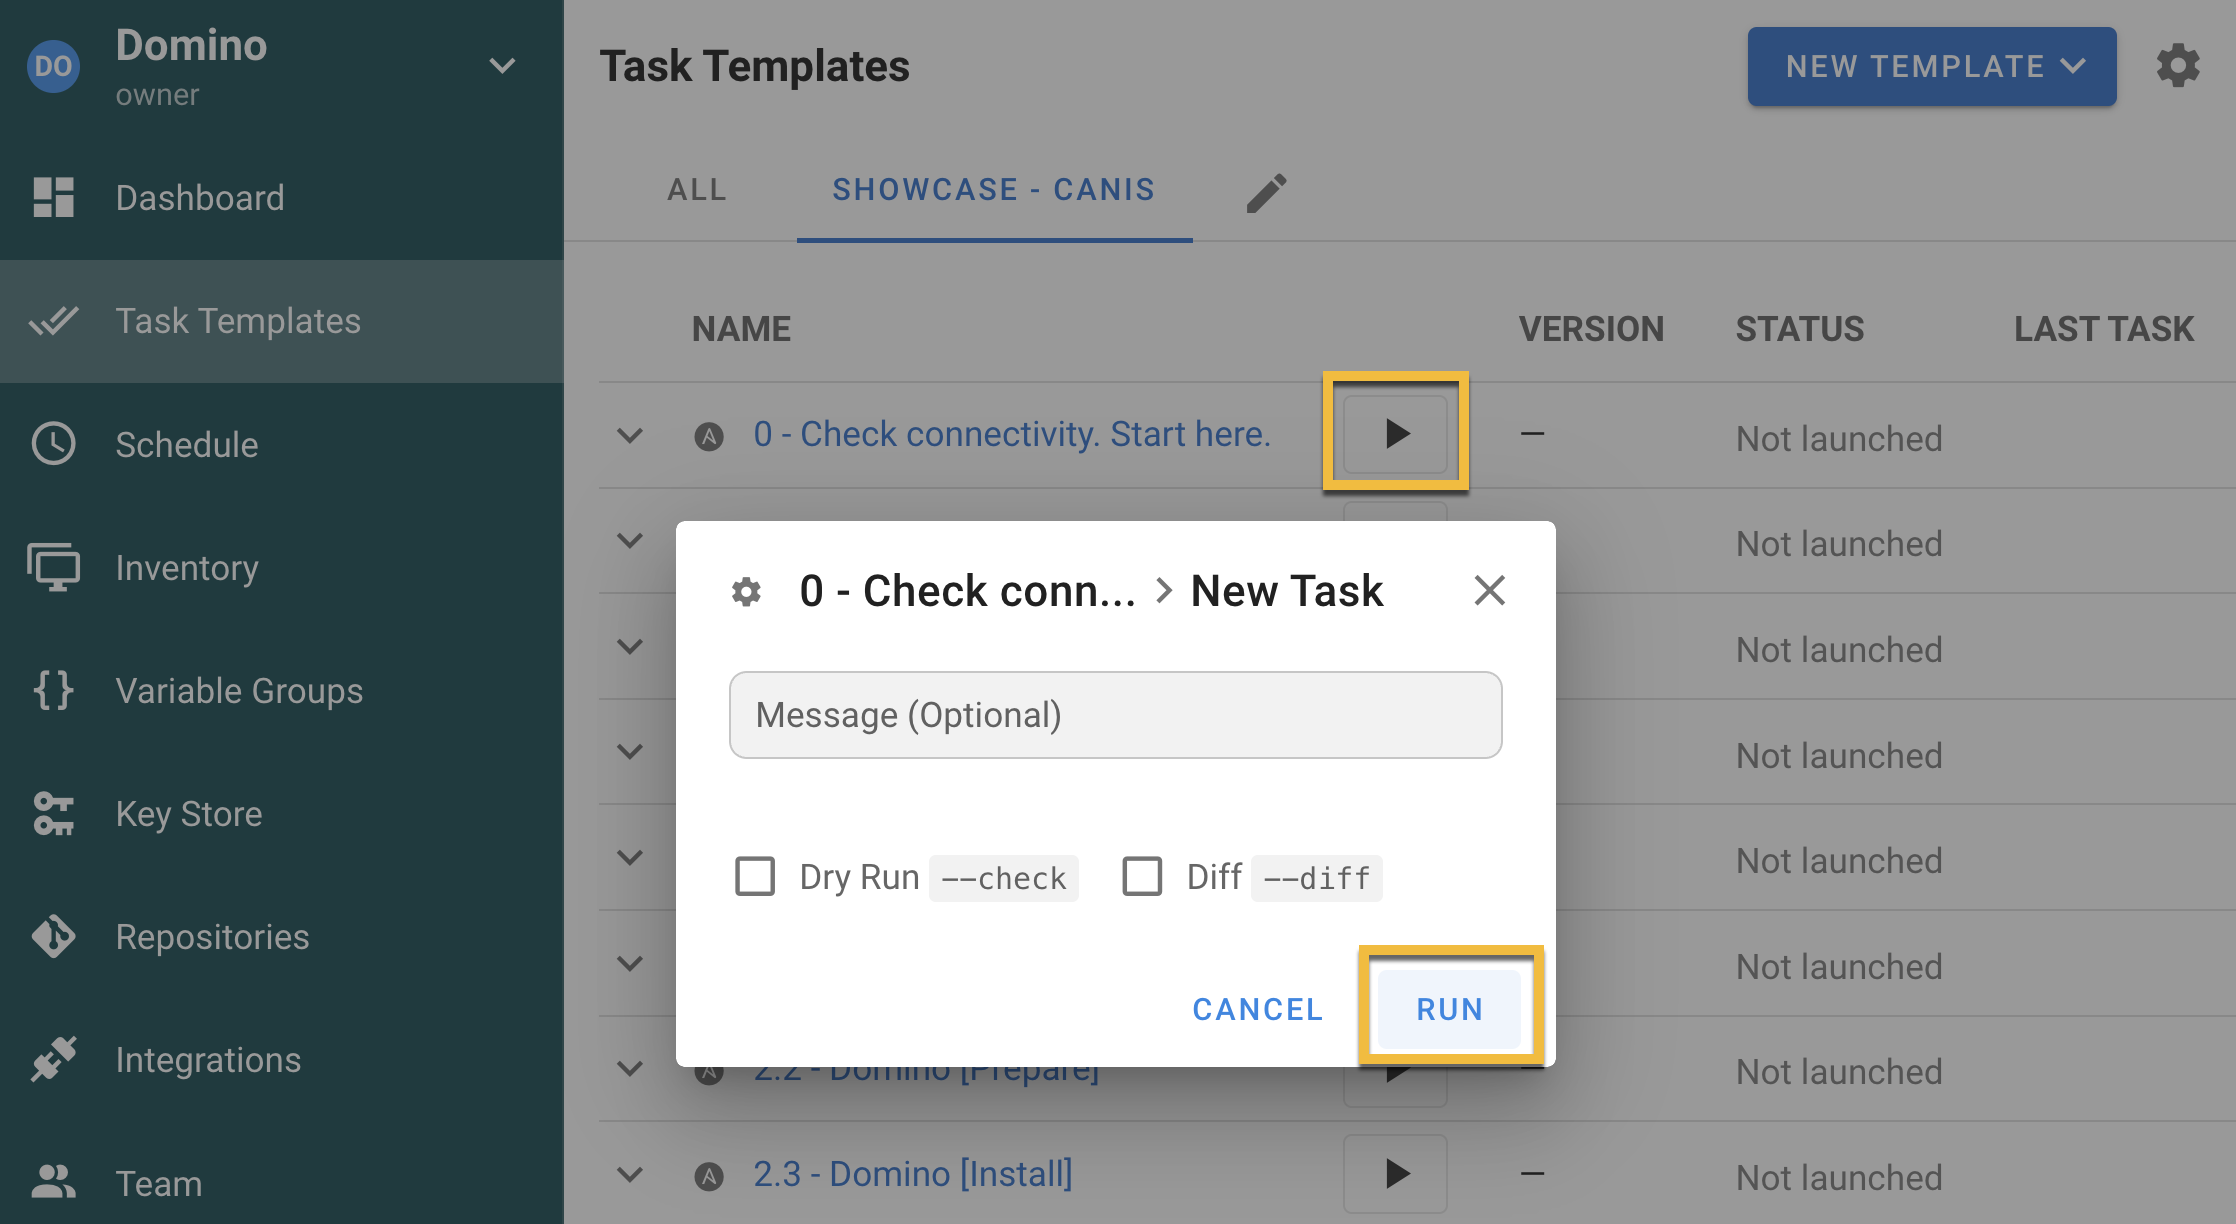
0 - Check connectivity. Start here. -
Lauch each task by clicking the arrow button and confirm with the RUN button.
-
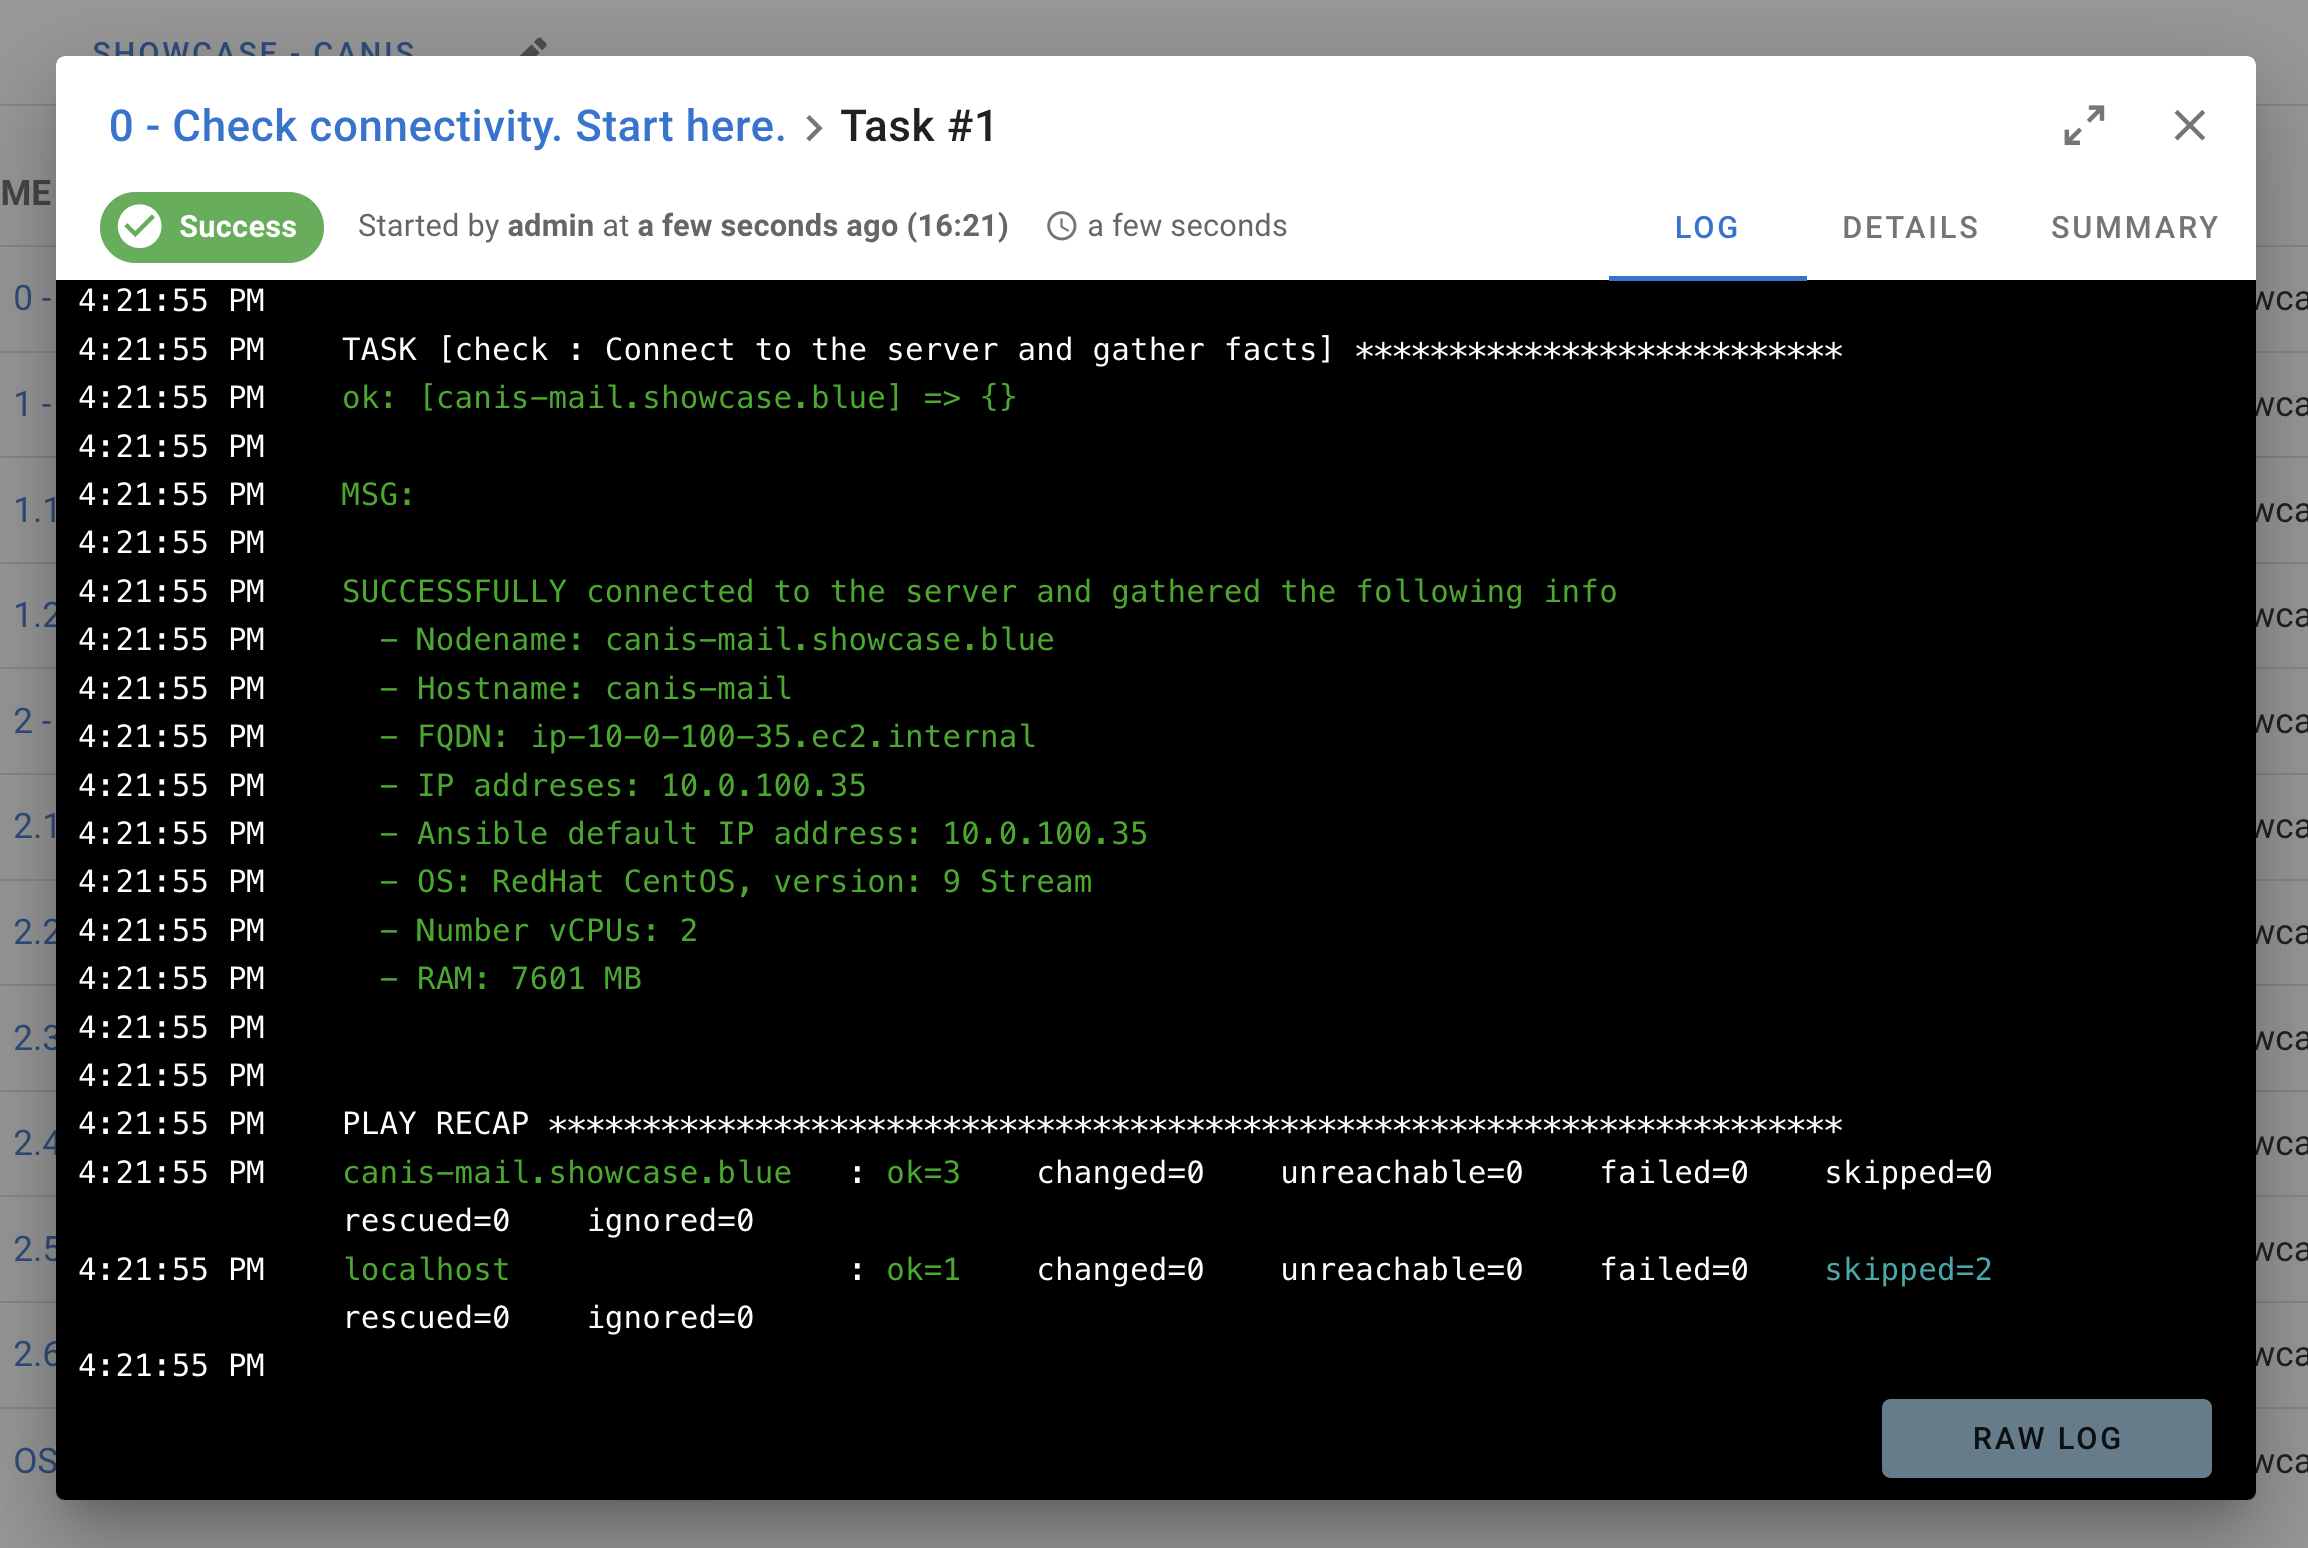
Each task runs on the frontend; you can see all the steps and their results.
-
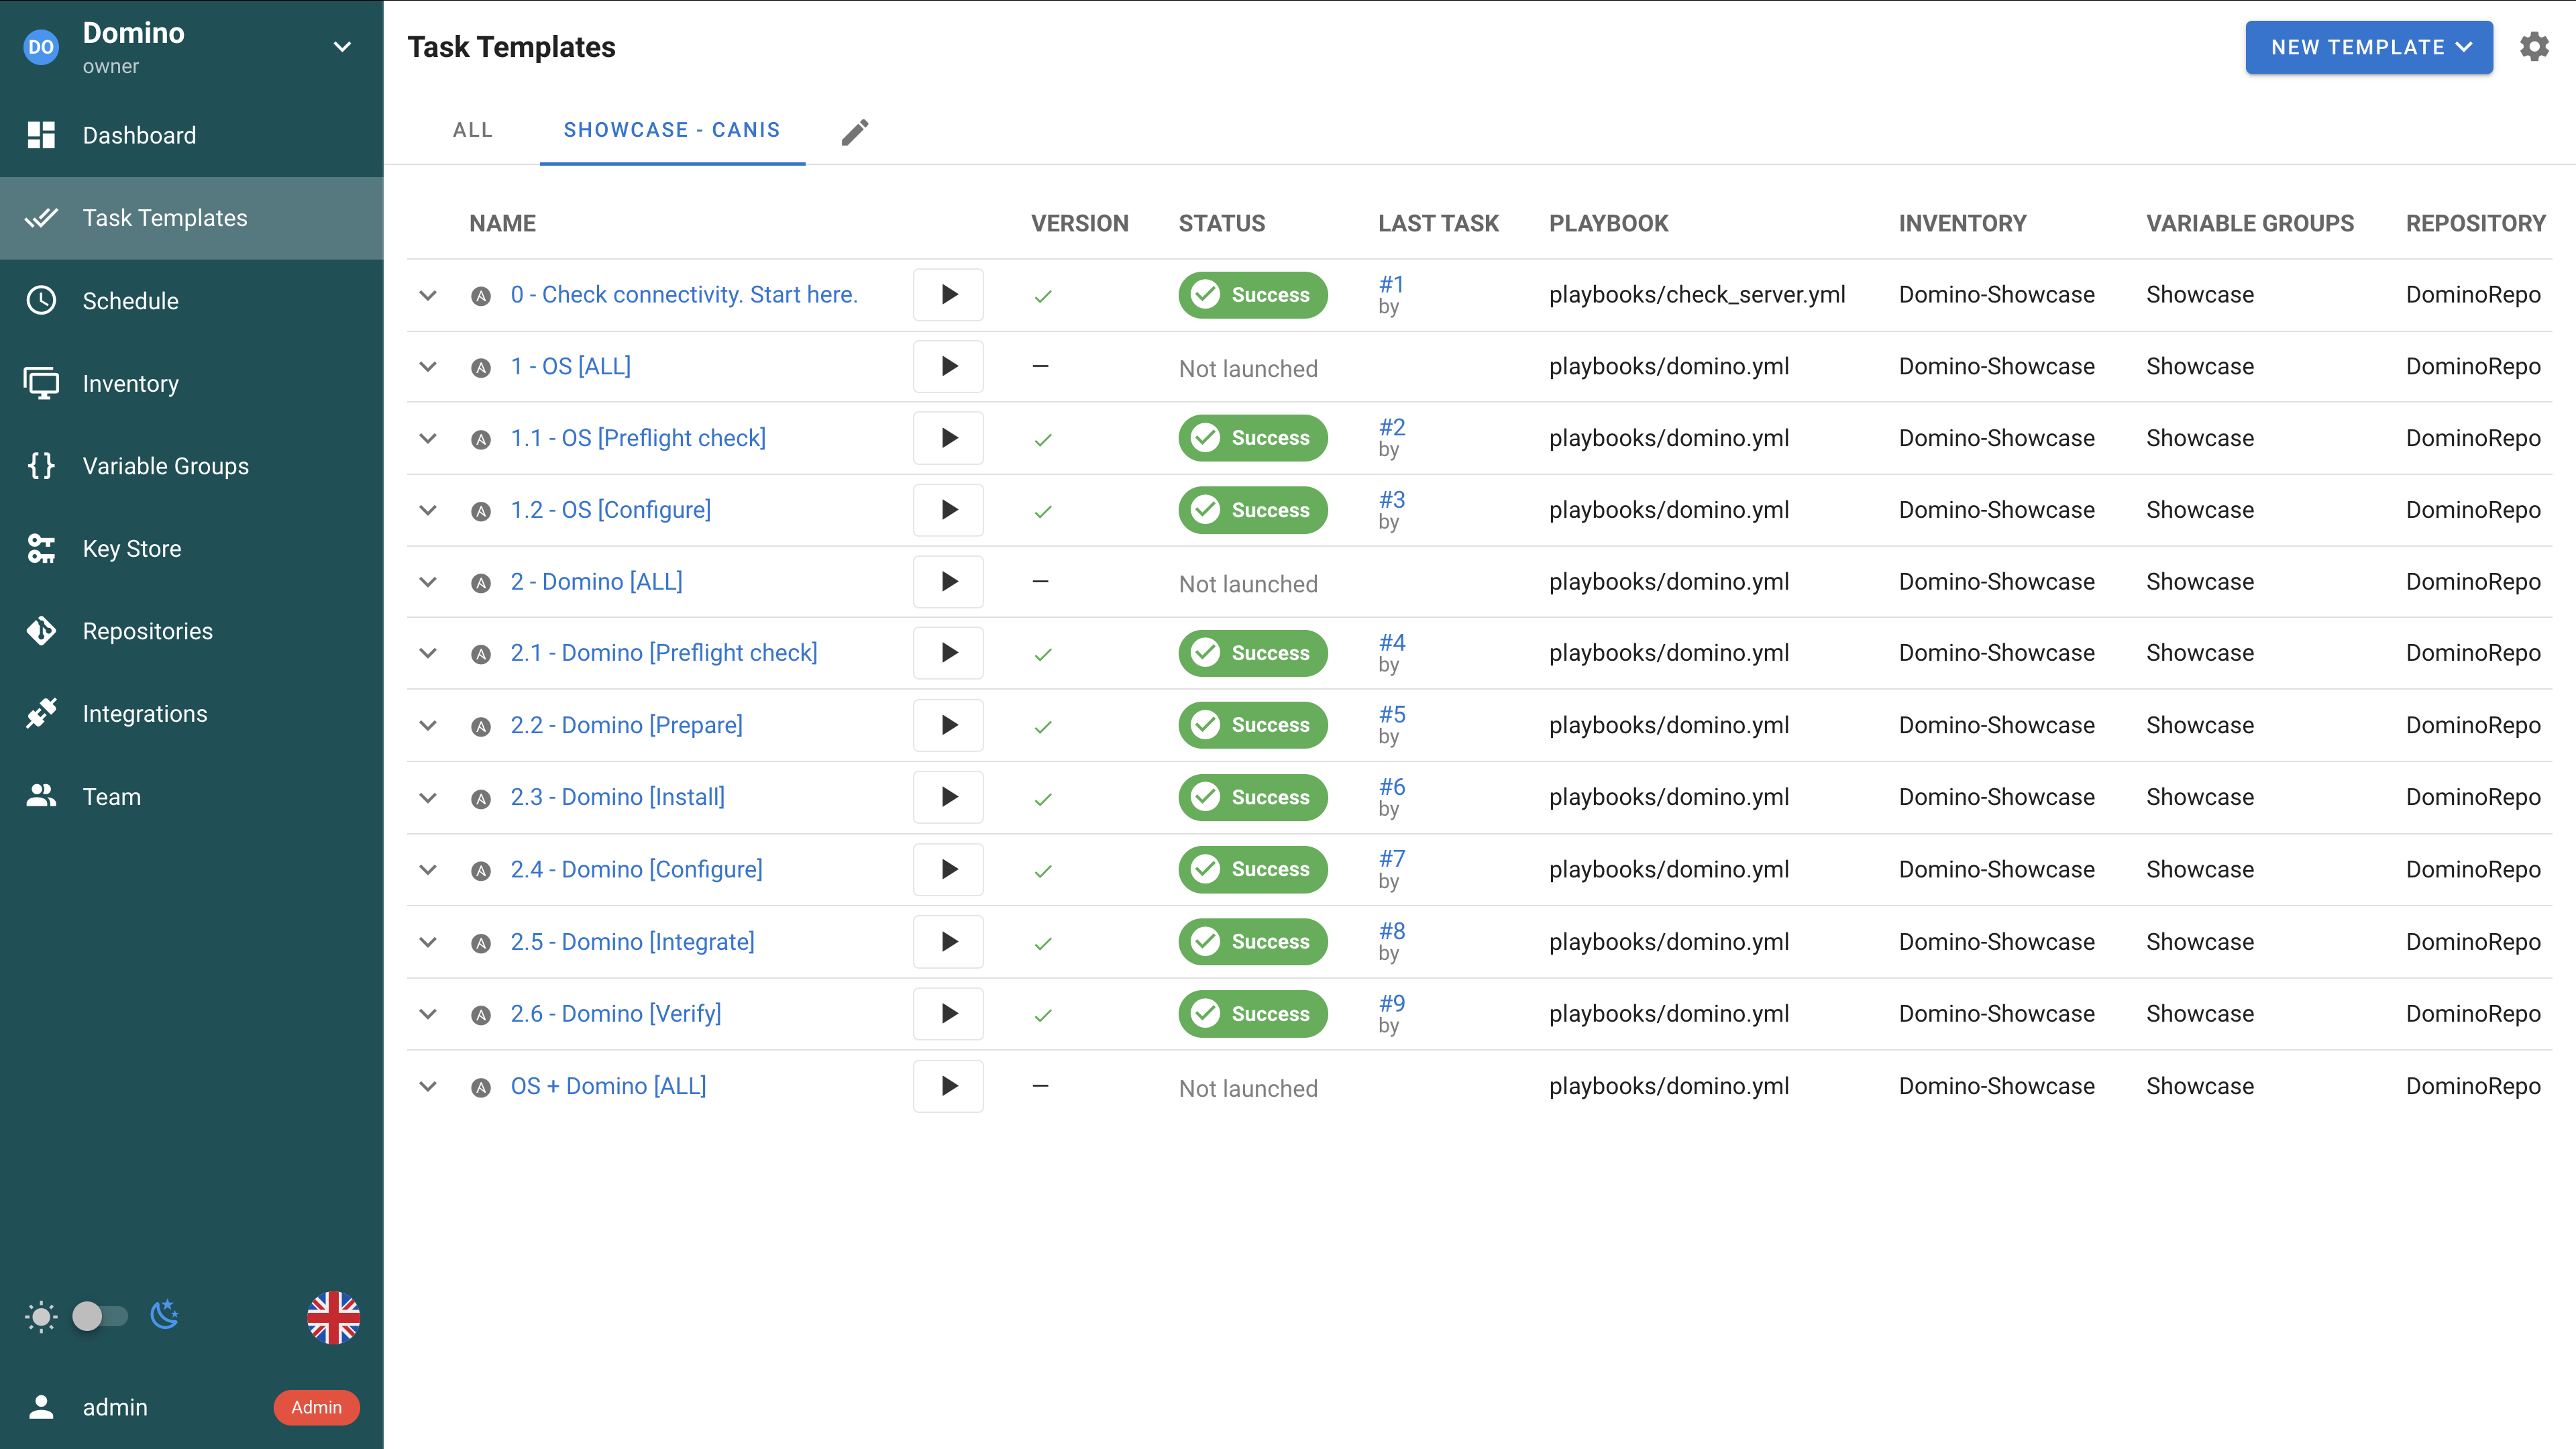
When a task finishes successfully, proceed to the next one.
Example: After task1.1run task1.2. -
When a task finishes with an error, you must fix the issue before continuing. Usually, the issue is caused by an incorrect parameter in
domino.ymlconfig file in your inventory folder. -
You can the status of each task (success / failure) in the Tasks view. Do not proceed to the next task until the previous one finishes successfully.
[!IMPORTANT] All tasks are idempotent — you can run them multiple times, and they will produce the same result each time.