You are here: Download Volt MX Foundry Installer
Pre-Installation Tasks
Download Volt MX Foundry Installer
-
Download
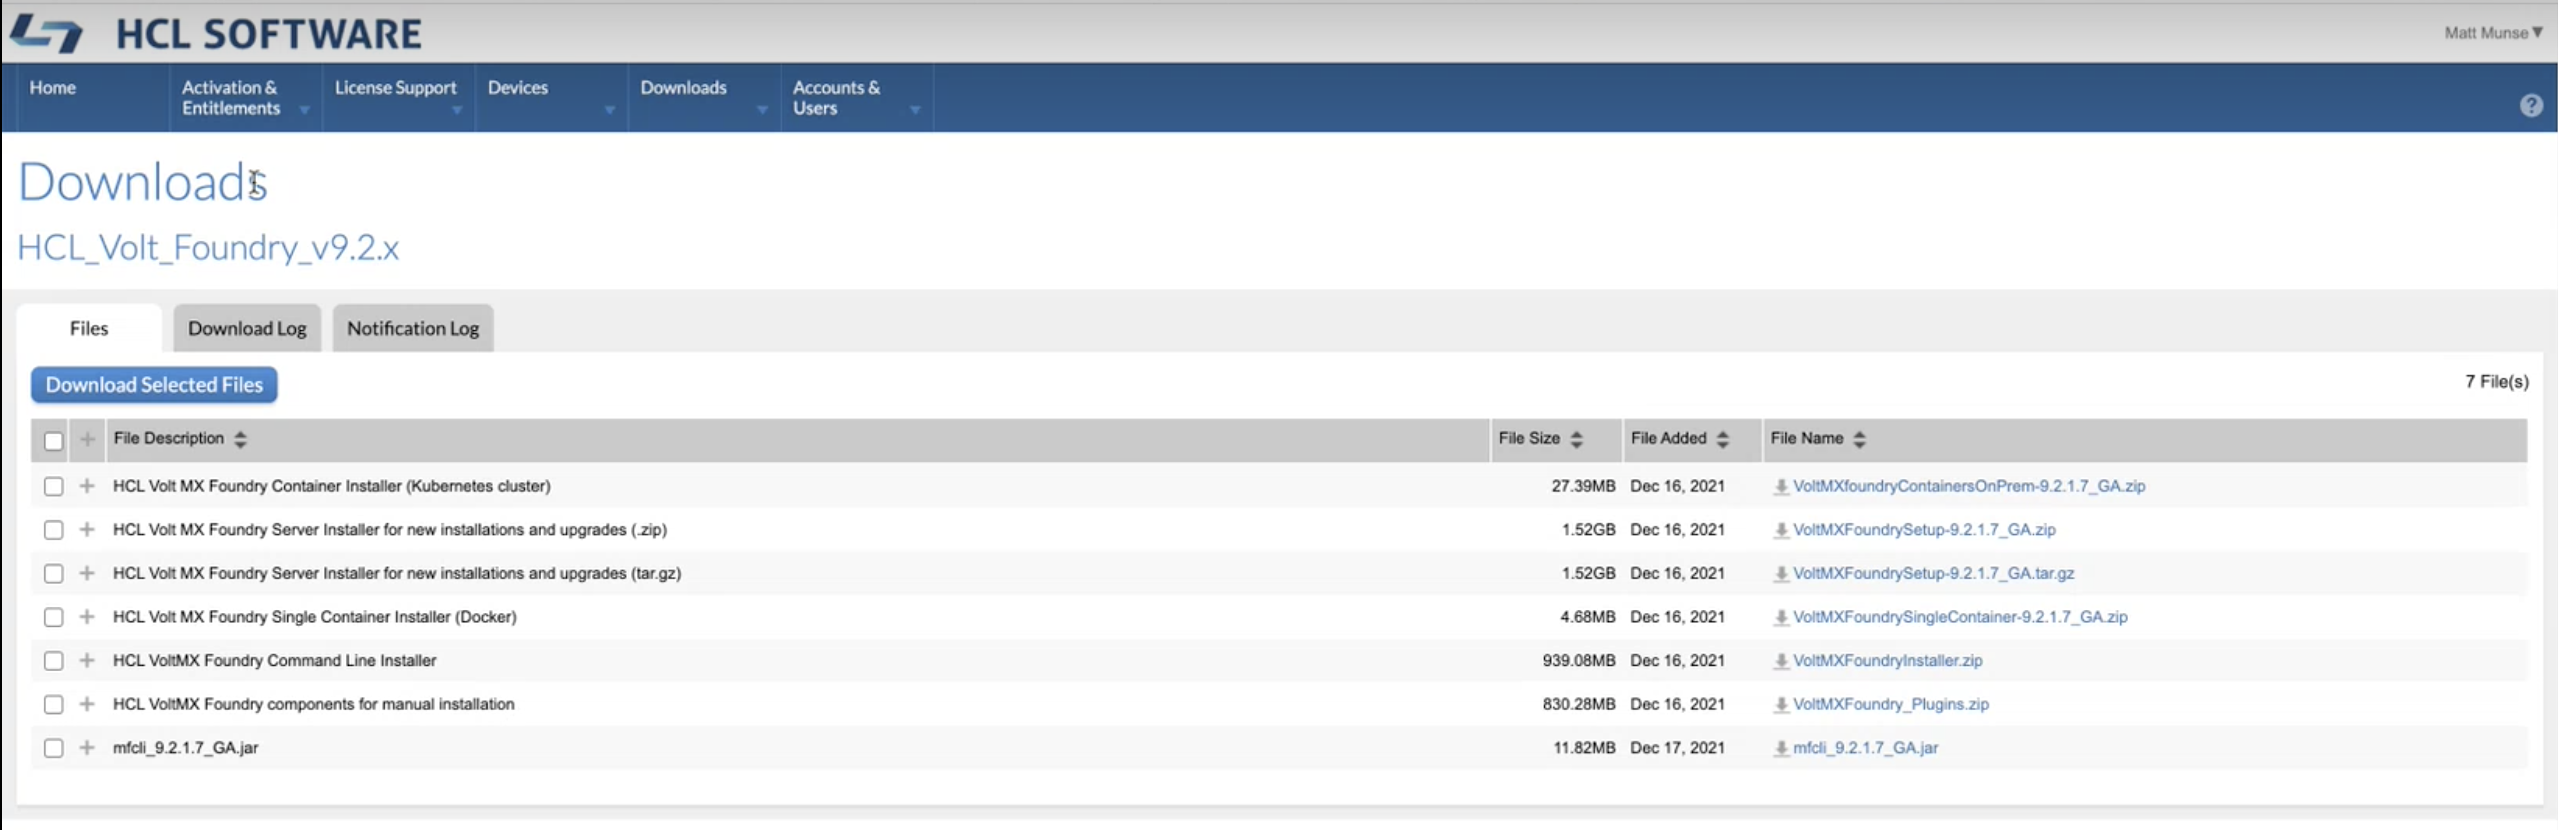
VoltMXFoundrySetup.tar.gzfile from downloads site and extract the file. To download Volt MX Foundry installer from the community portal, follow these steps:-
Log in to Downloads. You can obtain a user name and password from your sales representative or partner.
-
Click the Files tab.
-
Click on the specific file name to download the Foundry Installer file.
The
VoltMXFoundrySetup.tar.gzfile contains the following files:VoltMXFoundryInstaller-x.x.x.x_GA.bininstaller.properties- This file is required for silent installation.README.txt
-
Steps before installing (or) upgrading Volt MX Foundry with the existing database
Perform the following activities before installing (or) upgrading Volt MX Foundry with the existing database:
- Take database backup
- Make sure you have previously installed directory
- Take a backup of applications deployed at the server level. (Post installation, take backup of the changes done to the binaries).
- Post installation (or) upgrade process, replace old authService.key, workspaceService.key, and ACCOUNTS_ENCRYPTION_KEY (applicable only for identity and workspace components).
Create /tmp Folder
Volt MX Foundry Installer required a /tmp folder in Linux environment to unpack installer. When the /tmp folder is not found, the Installer shows I/O exception at the time of unpack exception, shown below:
This must specify in the pre-req of installation. Installation must required temp folder to unpack MF installer (either default / custom temp folder).
Install Memcached Server
Memcached is a high-performance, distributed memory object caching system, generic in nature, but intended for use in speeding up dynamic web applications by alleviating database load.
libevent (memcached dependency)
The libevent API provides a mechanism to execute a callback function when a specific event occurs on a file descriptor or after a timeout has been reached. Furthermore, libevent also support callbacks due to signals or regular timeouts.
libevent is meant to replace the event loop found in event driven network servers. An application just needs to call event_dispatch() and then add or remove events dynamically without having to change the event loop. Refer to http://libevent.org/
To install libevent (memcached dependency), follow these steps:
-
First, check whether
libeventis installed on your computer. To check, type the below command in your Linux terminal:whereis libevent
-
If you do not find
libeventon your system, download and install it. Downloadlibevent-1.4.8-stable.tar.gz. Refer to http://libevent.org/ -
Extract the
libevent-1.4.8-stable. -
In your Linux terminal, type the below command:
cd libevent-1.4.8-stable./configuremakemake install -
Type the below command to create a symlink to libevent
ln -s /usr/local/lib/libevent-1.4.so.2 /usr/libNow that you have installed the dependencies, install the memcahced server.
Memcached Server
To install Memcached Server, follow these steps:
- Download the memcached server.
- Extract the zip file.
- Open the Linux terminal.
- Go to
../memcachedirectory. -
Run the following command:
tar xfz memcached-1.2.6.tar.gzcd memcached-1.2.6./configuremakemake installmemcached -d -m 1024 -u root -l 127.0.0.1 -p 11211Important: Run Memcached as a daemon (d = daemon, m = memory, u = user, l = IP to listen to, p = port)
Configure Load Balancers for Sending Host Information in Multinode
When user is installing Volt MX Foundry on multinode environment, the user should check whether the parameter: proxypreserveHost is set to On in the Loadbalancer configuration file to send host in the headers.
If the proxypreserveHost is not configured, the loadbalancer will not send host in the headers. Users cannot launch Volt MX Foundry Console.
The above configuration is based on the loadbalancer.
For example:
- For Apache: preserveHost On
-
For HAProxy: preserve host flag is not required.
- Application Servers Pre-Installation Tasks