Configuration and Setup for Foundry on OpenShift
Configure the properties file
-
Extract the
FoundryKube.zipfile. The OpenShift Foundry artifacts generation zip is organized as follows:
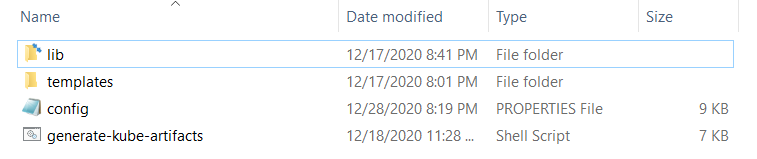
- lib: Contains dependent jars and helper bash functions
- templates: Contains the following files
- foundry-app-tmpl.yml: YAML template for Foundry deployments
- foundry-db-tmpl.yml: YAML template for Foundry Database schema creation
- foundry-services.yml: YAML template for Foundry services
- config.properties: Contains inputs that you must configure for the installation
- generate-kube-artifacts.sh: A user script that is used to generate required artifacts
As a result of executing the
generate-kube-artifacts.shscript, theartifactsfolder is created containing YAML configuration files. The YAML configuration files are generated based on theconfig.propertiesfile, and they must be applied later to deploy Volt MX Foundry on the OpenShift cluster. -
Update the
config.propertiesfile with relevant information.
For more information about the properties, refer to the following section.
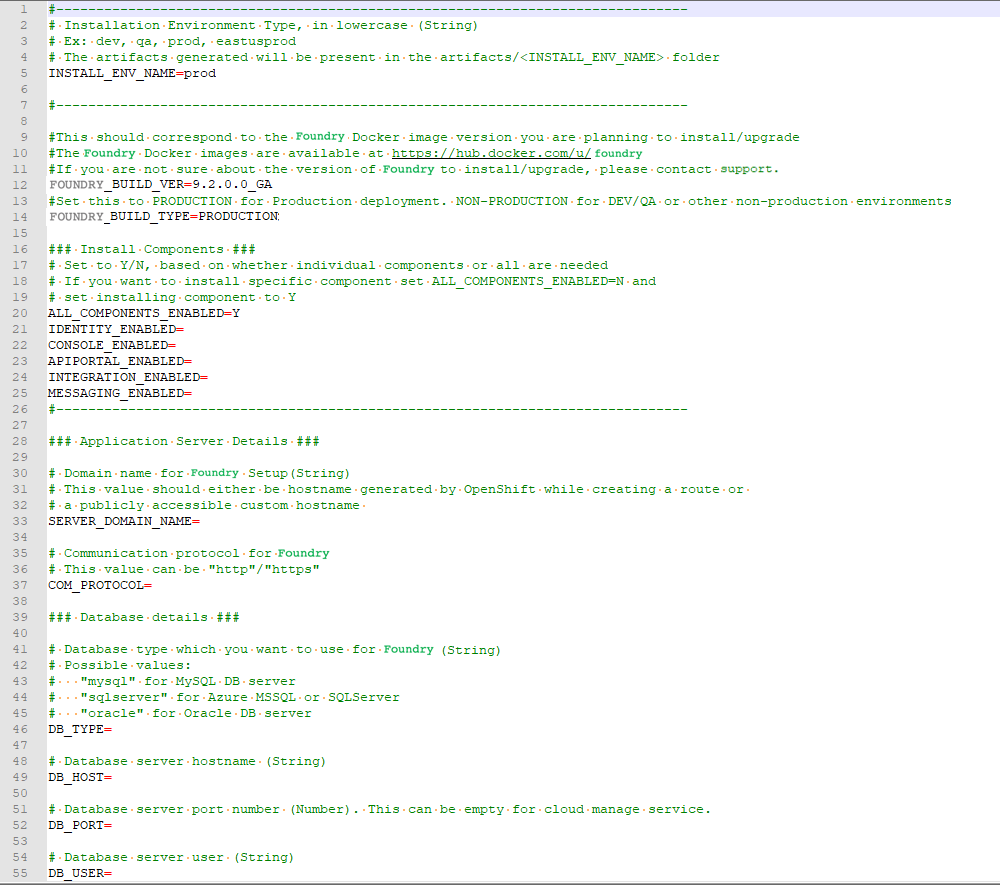
config.properties
-
INSTALL_ENV_NAME: The install environment name must be a in string value in lowercase. For example:
dev,qa,prod, oreastusprod.-
HCL_IMAGE_REGISTRY_SECRET:
Please provide the secret which is configured with hcl harbor username and secret.
-
      To create the secret from Username and Password, please run the following command then the secret will be created as foundry-image-pull
      Command: kubectl create secret docker-registry foundry-image-pull --docker-server=hclcr.io --docker-username=< your-name > --docker-password=< your-pword > --docker-email=< your-email >
      username: your-email
      password: your-authentication-token
      your-authentication-token - This is the CLI secret found under your User Profile in HCL .
- VOLTMX_FOUNDRY_BUILD_VER: The build version of Foundry that you want to install. While upgrading, this specifies the build version to which you want to upgrade.
-
VOLTMX_FOUNDRY_BUILD_TYPE: The type of Foundry environment that must be created. For production environments, the value must be
PRODUCTION. For dev, QA, or other non-production environments, the value must beNON-PRODUCTION. -
Install Components: The following properties must be set to either Y (yes) or N (no). Make sure that at least one of the following input properties must be set to Y. If ALL_COMPONENTS_ENABLED is set to Y, the rest of the inputs can be left empty.
- ALL_COMPONENTS_ENABLED
- INTEGRATION_ENABLED
- IDENTITY_ENABLED
- MESSAGING_ENABLED
- CONSOLE_ENABLED
- APIPORTAL_ENABLED
- Application Server Details
- SERVER_DOMAIN_NAME: The Domain Name for Volt MX Foundry. This value should be the hostname of the LoadBalancer. For example: abc.companyname (DNS name).
- COM_PROTOCOL: The communication protocol for Volt MX Foundry. This value can be either http or https.
- PASSTHROUGH_ENABLED: Enables HTTPS passthrough mode while creating routes from the OpenShift Console.
- KEYSTORE_FILE: The path to an existing keystore file, which must be a valid jks file. This parameter can be left empty for HTTP and HTTPS without passthrough.
- KEYSTORE_FILE_PASS: The password for the jks file that is specified in the KEYSTORE_FILE parameter.
- KEYSTORE_FILE_PASS_SECRET_KEY: The secret key for the Keystore password. This parameter is required if you are using an encrypted Keystore password.
- Database Details
- DB_TYPE - The Database type that is used to host Volt MX Foundry. The possible values are:
- For MySQL DB server:
mysql - For Azure MSSQL or SQL Server:
sqlserver - For Oracle DB server:
oracle
- For MySQL DB server:
- DB_HOST - The Database Server hostname that is used to connect to the Database Server.
- DB_PORT– The Port Number that is used to connect to the Database Server. This can be empty for cloud manage service.
- DB_USER - The Database Username that is used to connect to the Database Server.
- DB_PASS - The Database Password that is used to connect to the Database Server. Make sure that the value is enclosed in single quotes, for example,
'password'. - DB_PASS_SECRET_KEY - This is the decryption key for the database password, which is required only if you are using an encrypted password.
- DB_PREFIX – This is the Database server prefix for Volt MX Foundry Schemas/Databases.
- DB_SUFFIX – This is the Database server suffix for Volt MX Foundry Schemas/Databases.
Note: * Database Prefix and Suffix are optional inputs. * In case of upgrade, ensure that the values of the Database Prefix and Suffix that you provide are the same as you had provided during the initial installation.
- If DB_TYPE is set as oracle, the following String values must be provided:
- DB_DATA_TS: Database Data tablespace name.
- DB_INDEX_TS: Database Index tablespace name.
- DB_LOB_TS: Database LOB tablespace name.
- DB_SERVICE: Database service name.
-
USE_EXISTING_DB: If you want to use an existing database from a previous Volt MX Foundry instance, set this property to Y. Otherwise, set the property to N.
If you want to use an existing database, you must provide the location of the previously installed artifacts (the location must contain the
upgrade.propertiesfile).For example: PREVIOUS_INSTALL_LOCATION =
/C/voltmx-foundry-containers-onprem/kubernetes.
-
Time Zone: The time zone must be set to maintain consistency between the application server and the database. This section contains the following property:
- TIME_ZONE: The country code of the time zone from the tz database. For more information, refer to List of tz database time zones. The default value is UTC.
- Readiness and Liveness Probes Details: The readiness and liveness probes are used to check the status of a container. The probes can check whether a container is ready to receive traffic, or if a container can be stopped and restarted. The following properties specify the initial delay (in seconds) of the probes for the Foundry components:
- IDENTITY_READINESS_INIT_DELAY
- IDENTITY_LIVENESS_INIT_DELAY
- CONSOLE_READINESS_INIT_DELAY
- CONSOLE_LIVENESS_INIT_DELAY
- INTEGRATION_READINESS_INIT_DELAY
- INTEGRATION_LIVENESS_INIT_DELAY
- ENGAGEMENT_READINESS_INIT_DELAY
- ENGAGEMENT_LIVENESS_INIT_DELAY
- Minimum and Maximum RAM percentage Details: These properties specify the minimum and maximum RAM (in percentage) that a Foundry component can use on the server. For example:
CONSOLE_MAX_RAM_PERCENTAGE="80". This section contains the following properties:- CONSOLE_MIN_RAM_PERCENTAGE
- CONSOLE_MAX_RAM_PERCENTAGE
- ENGAGEMENT_MIN_RAM_PERCENTAGE
- ENGAGEMENT_MAX_RAM_PERCENTAGE
- IDENTITY_MIN_RAM_PERCENTAGE
- IDENTITY_MAX_RAM_PERCENTAGE
- INTEGRATION_MIN_RAM_PERCENTAGE
- INTEGRATION_MAX_RAM_PERCENTAGE
- APIPORTAL_MIN_RAM_PERCENTAGE
- APIPORTAL_MAX_RAM_PERCENTAGE
- Container resource limits for memory and CPU: The resource limits are used to restrict resource usage for the Foundry components. The values must be provided in gigabytes (G) or megabytes (m). For example:
CONSOLE_RESOURCE_REQUESTS_CPU="300m". This section contains the following properties:- IDENTITY_RESOURCE_MEMORY_LIMIT
- IDENTITY_RESOURCE_REQUESTS_MEMORY
- IDENTITY_RESOURCE_REQUESTS_CPU
- CONSOLE_RESOURCE_MEMORY_LIMIT
- CONSOLE_RESOURCE_REQUESTS_MEMORY
- CONSOLE_RESOURCE_REQUESTS_CPU
- APIPORTAL_RESOURCE_MEMORY_LIMIT
- APIPORTAL_RESOURCE_REQUESTS_MEMORY
- APIPORTAL_RESOURCE_REQUESTS_CPU
- INTEGRATION_RESOURCE_MEMORY_LIMIT
- INTEGRATION_RESOURCE_REQUESTS_MEMORY
- INTEGRATION_RESOURCE_REQUESTS_CPU
- ENGAGEMENT_RESOURCE_MEMORY_LIMIT
- ENGAGEMENT_RESOURCE_REQUESTS_MEMORY
- ENGAGEMENT_RESOURCE_REQUESTS_CPU
- Custom JAVA_OPTS Details: The custom JAVA_OPTS properties specify Java options that must be configured for the Foundry components on the application server. The following properties can be used to configure additional Java options for the Foundry components:
- CONSOLE_CUSTOM_JAVA_OPTS
- ENGAGEMENT_CUSTOM_JAVA_OPTS
- IDENTITY_CUSTOM_JAVA_OPTS
- INTEGRATION_CUSTOM_JAVA_OPTS
- APIPORTAL_CUSTOM_JAVA_OPTS
- Number of instances to be deployed for each component: These properties specify the number of instances that must be deployed for every component. This section contains the following properties:
- IDENTITY_REPLICAS
- CONSOLE_REPLICAS
- APIPORTAL_REPLICAS
- INTEGRATION_REPLICAS
- ENGAGEMENT_REPLICAS
Deploy Foundry on OpenShift
After you update the config.properties file, follow these steps to deploy Volt MX Foundry on OpenShift:
-
Create a project from the oc command line or from the OpenShift console. For example:
oc new-project foundrytest -
Generate the Foundry services by running the following command:
./generate-kube-artifacts.sh config.properties svcsTo generate the services configuration, you only need to fill the
INSTALL_ENV_NAMEproperty and the ## Install Components ### section in theconfig.propertiesfile.
-
Create the services by running the following command:
The <INSTALL_ENV_NAME> is the install environment name input as provided in theoc apply -f ./artifacts/<INSTALL_ENV_NAME>/foundry-services.ymlconfig.propertiesfile. -
Follow either of the following steps to expose Foundry publicly.
- For development or proof of concept, using HTTP (non-SSL) routes and OpenShift generated hostnames is a quick way to get started. Create the routes from the OpenShift console or by running the following command:
Foroc expose service/<foundry-service> --path=<context_path> --name=<route_name><foundry-service>and<context-path>, refer to Context paths for Foundry components. The<foundry-service>is one of the Foundry services that were created earlier.
Executing theoc expose servicecommand assigns a unique OpenShift generated host name to the route that is created. The assigned host name can be identified by executing the following command:oc describe route <foundry-route>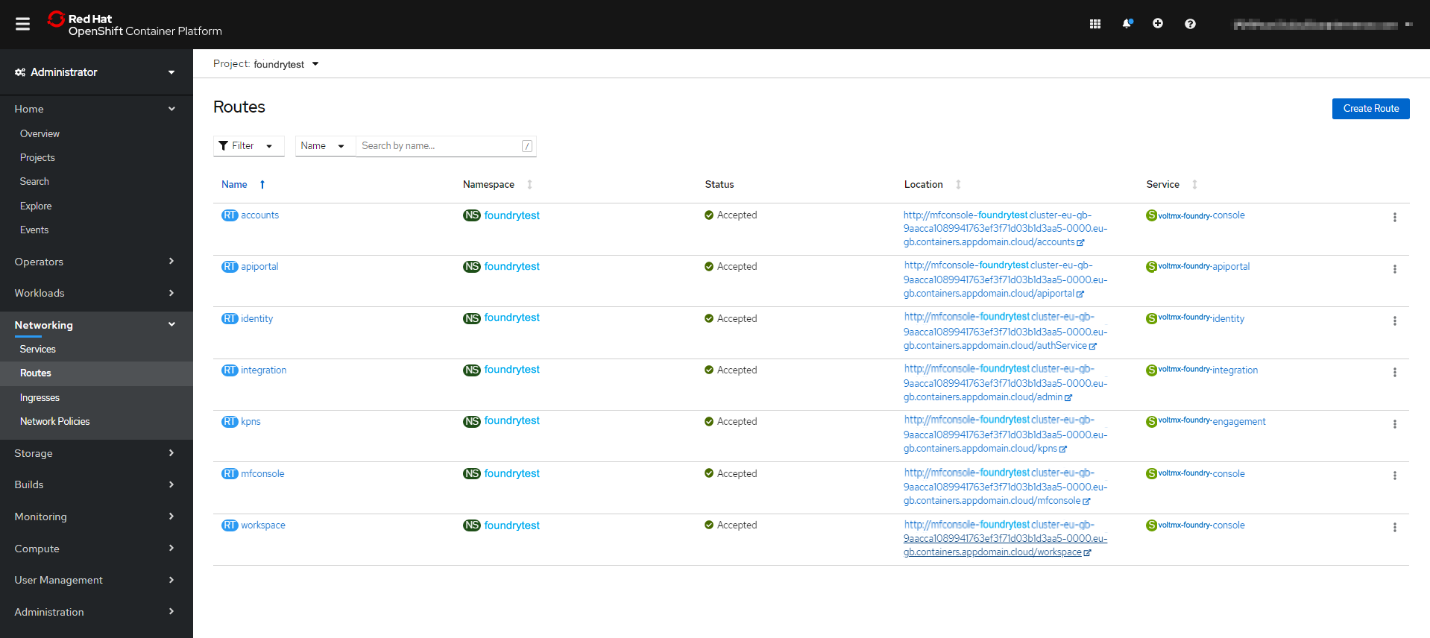
-
For production, Volt MX recommends that you use a custom domain name and terminate your SSL connection at the public load balancer. You need to obtain a custom domain name from a DNS provider, and SSL certificate and keys from a certificate authority. For more information, refer to Exposing apps with routes in OpenShift 4.
Note: The route types Reencrypt and Passthrough are not supported.
For a sample configuration, refer to the following screenshot.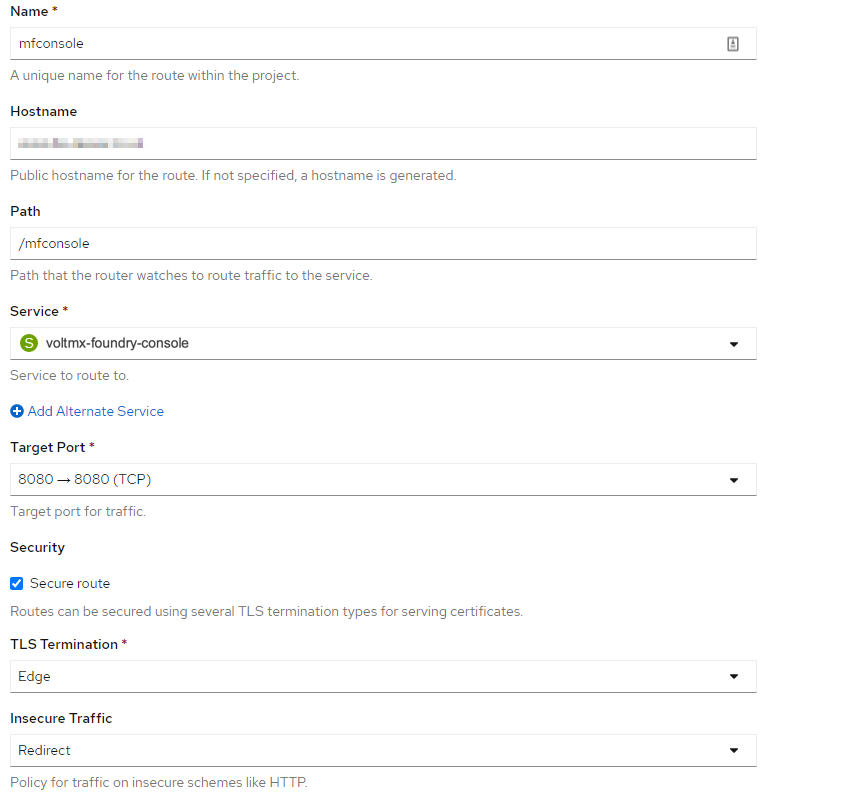
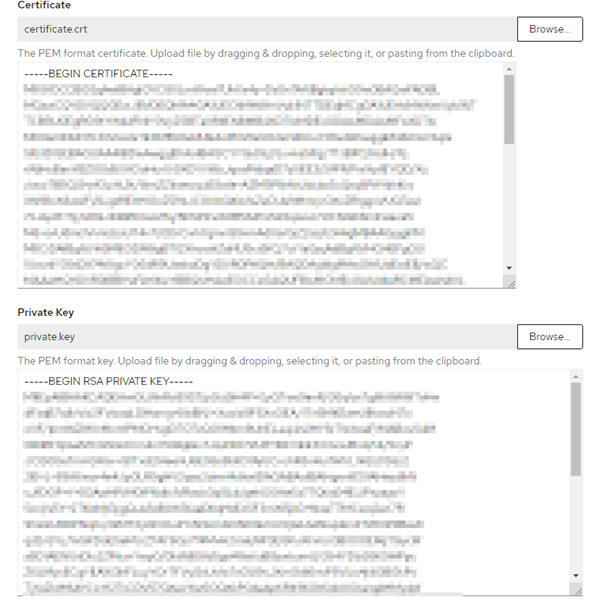
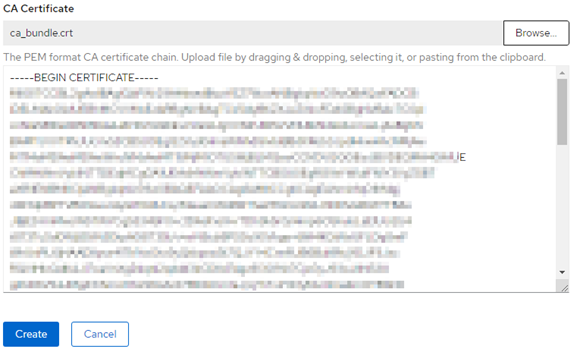
- For development or proof of concept, using HTTP (non-SSL) routes and OpenShift generated hostnames is a quick way to get started. Create the routes from the OpenShift console or by running the following command:
Configure Passthrough Routes
To configure the passthrough, you need to create a secure route for the Foundry component. To do so, follow these steps:
-
On the Create Route page, configure details for the Foundry component.
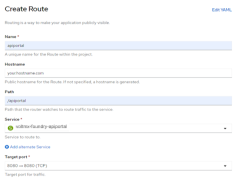
Note: The details in the screenshot are specific to the API Portal component and use a specific domain. Make sure that you change the details for other routes. For more information, refer to Context paths and Service Names for Fabric components.
-
Under Security, select the Secure Route check box.
-
From the TLS termination list, select Passthrough.
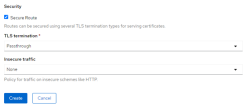
-
Provide the required values in the Application Server Details section of the config.properties file.
Context paths and Service Names for Foundry components
Note:
- Make sure that you use the same host name for all the Foundry routes that you plan to create.
- The Foundry components for accounts, mfconsole, and workspace share the same deployment and service. Therefore, while creating the ingress objects for accounts, mfconsole, and workspace, the paths are mapped to the same service: voltmx-foundry-console.
Make sure that the format of the route location is as follows:
<scheme>://<common_domain_name>/<foundry_context_path>For example, https://voltmx-foundry.domain/mfconsole
Reference table for the mapping of paths and service names:
| Foundry Component | Foundry Service Name | Context Path |
|---|---|---|
| mfconsole | voltmx-foundry-console | /mfconsole |
| workspace | voltmx-foundry-console | /workspace |
| accounts | voltmx-foundry-console | /accounts |
| Identity | voltmx-foundry-identity | /authService |
| Integration | voltmx-foundry-integration | /admin |
| Services | voltmx-foundry-integration | /services |
| apps | voltmx-foundry-integration | /apps |
| Engagement | voltmx-foundry-engagement | /kpns |
| ApiPortal | voltmx-foundry-apiportal | /apiportal |
Additional Resources
You can also use automatic certificate management for your cluster. To automate with OpenShift routes, you can use the open-source project openshift-acme. To automate with Kubernetes Ingress, you can use cert-manager.
Alternatively, if you are using a managed OpenShift service, the public cloud vendor might offer a key manager service, such as Certificate Manager on IBM Cloud.
Deploy Kubernetes artifacts
After deploying the Foundry and creating routes for the components, follow these steps to deploy the remaining Foundry Kubernetes artifacts:
-
In the
config.propertiesfile, in theSERVER_DOMAIN_NAMEfield, add the custom host name or the host name that was generated while creating the routes. -
In the
config.propertiesfile, update the Database Details section with appropriate information. -
Generate the Foundry application and database configuration files by executing the following command.
./generate-kube-artifacts.sh config.properties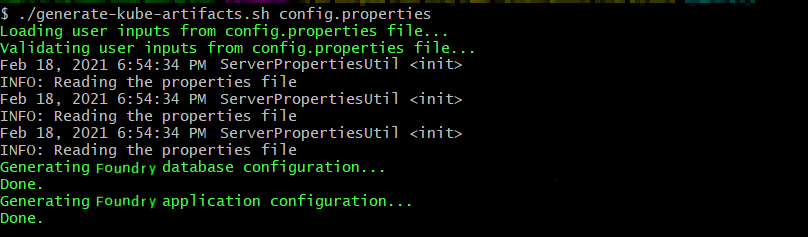
-
Edit the privileged security context by running the following command, and then add the service account that corresponds to your project.
oc edit scc privileged
For example: In the following screenshot, foundrytest is the project and default is the service account that is being used.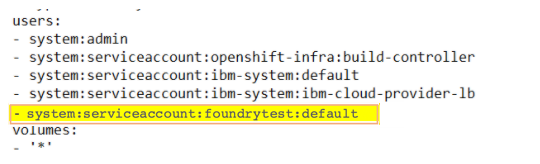
Note: Adding the service account to the privileged security context is only needed to create the database schema in the following step. After the execution of the Foundry database job is completed, you can remove the service account from the privileged security context.
-
Create the database schema by executing the following command.
The <INSTALL_ENV_NAME> is the name of the install environment that you provided in theoc apply -f ./artifacts/<INSTALL_ENV_NAME>/foundry-db.ymlconfig.propertiesfile. -
After the database schema creation is completed, verify the completion by executing the following command.
oc get jobs
-
Create the Foundry deployments by executing the following command.
oc apply -f ./artifacts/<INSTALL_ENV_NAME>/foundry-app.yml
Based on thedefault replica countthat is provided in theconfig.propertiesfile, one deployment of every Foundry component is created. Based on your requirements, the Foundry deployments can be scaled up from the OpenShift Console, or from the command line.
Deploy Fabric using Helm Charts
To deploy Fabric by using Helm charts, make sure that you have installed Helm, and then follow these steps:
-
Open a terminal console and navigate to the extracted folder.
-
Generate the Fabric services by running the following command:
./generate-kube-artifacts.sh config.properties svcsTo generate the services configuration, you only need to fill the
INSTALL_ENV_NAMEproperty and the ## Install Components ### section in theconfig.propertiesfile. -
Navigate to the
helm_chartsfolder by executing the following command.cd helm_charts -
Create the
fabricdbandfabricappHelm charts by executing the following commands.helm package fabric_db/helm package fabric_app/ -
Install the
fabricdbHelm chart by executing the following command.helm install fabricdb fabric-db-<Version>.tgz -
Install the fabricapp Helm chart by executing the following command.
helm install fabricapp fabric-app-<Version>.tgz
IMPORTANT:
- Make sure that you generate the artifacts (generate-artifacts.sh) before creating the Helm charts.
- Make sure that the fabricdb Helm chart installation is complete before installing the fabricapp Helm chart.
Launch the Foundry Console
-
After all the Foundry services are up and running, launch the Foundry console by using the following URL.
<scheme>://<foundry-hostname>/<mfconsole>The
<scheme>is<http>or<https>based on your domain. The<foundry-hostname>is the host name of your publicly accessible Foundry domain. -
After you launch the Foundry Console, create an administrator account by providing the appropriate details.
After you create an administrator account, you can sign-in to the Foundry Console by using the credentials that you provided.
Logging Considerations
All Foundry application logs will be streamed to the Standard Output (stdout). You can view the logs by using the kubectl logs command. For more details refer to Interacting with running Pods.