Engagement Services JPush QuickStart Guide: Configuring JPush in Volt MX Foundry Engagement Services Console
Configuring JPush in Volt MX Engagement Services Console
The section explains how to configure JPush in Volt MX Engagement Services Console.
To configure JPush in the Engagement Services console, follow these steps:
- Open an Internet browser.
-
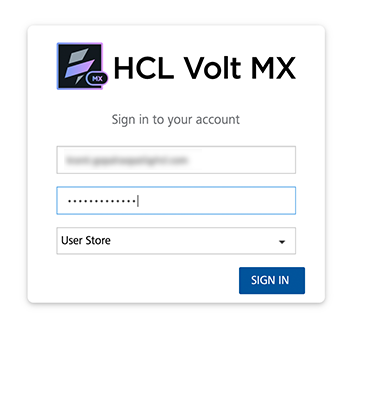
Enter the URL: manage.hclvoltmx.com in the address field and press the Enter key.
The Sign in to your HCL Account page appears.
-
Enter your email address and password as log in credentials.
-
Click Sign in to continue.
The system displays the VoltMX Foundry homepage.
-
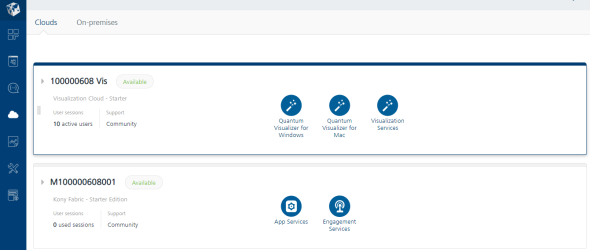
On the Volt MX Foundry home page, click Environments in the left panel.
The Clouds page appears.
-
Click the Engagement Services tab next to the Sync Services tab.
The Engagement Services home page (Dashboard) appears.
Apps
-
Engagement services: In the left panel,under Overview, click Apps to view the application(s) configured in the Engagement services console.
-
Click the required app. For example, VMSDempApp, to set the JPush credentials.
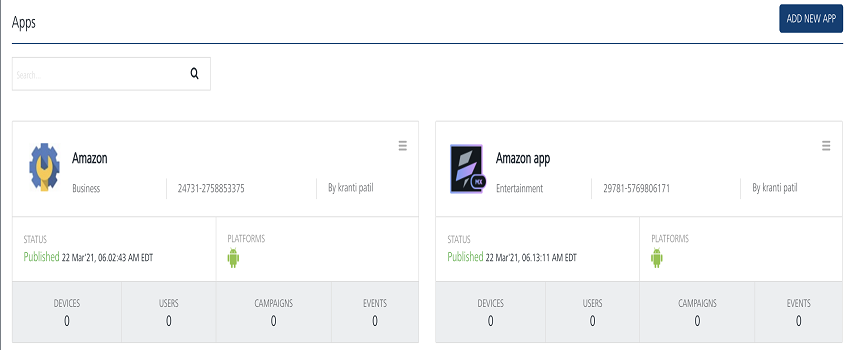
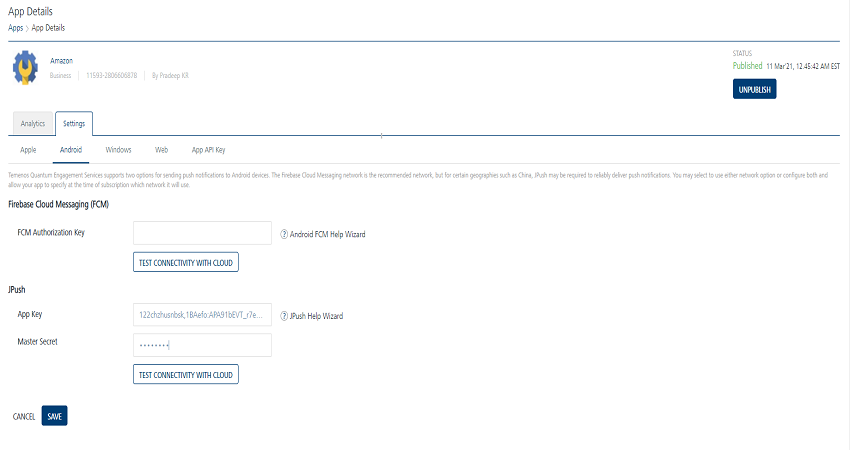
The App Details page appears. There are two tabs: Analytics and Settings. By default, the Analytics tab is set to active.
-
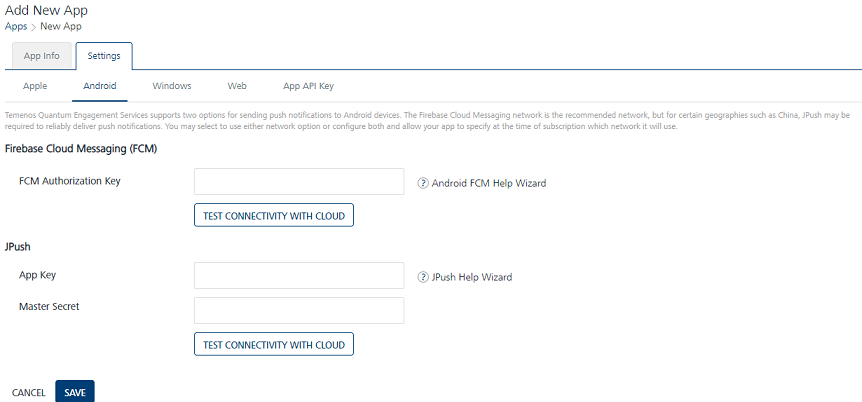
Click the Settings tab.
The system displays four tabs: Apple, Android, BlackBerry, and Windows. By default, the Apple platform tab is set to active. -
Click the Android tab to view the JPush section.
-
In the JPush section, enter the App key and the Master Secret that you received when the account was registered with JPushconsole.
-
Click the Test Connectivity with Cloud button to test the credentials. If the credentials are correct, the system displays the confirmation message dialog box: JPush server connection is successful.
- Click Ok to continue.
-
Click Save.
The updated VMSDemoApp appears in the Apps list view.Adhoc
-
Adhoc: In the left panel, from the Engagement section, click Adhoc.
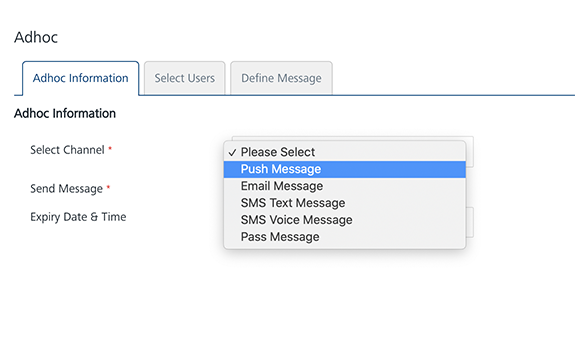
The Adhoc page appears with three tabs: Adhoc Information, Select Users, and Define Message. By default, the Adhoc Information tab is set to active.
-
Select Channel: Select the Push Message channel from the drop-down list.
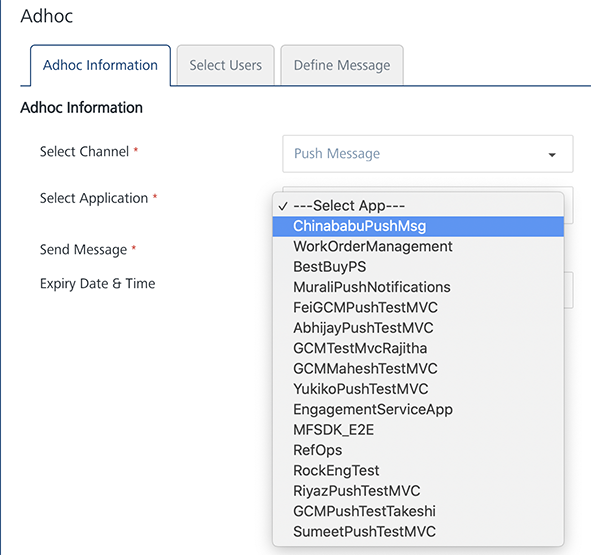
The Select Application drop-down list appears.
-
Select Application: Select VMSDemoApp from the drop-down list.
-
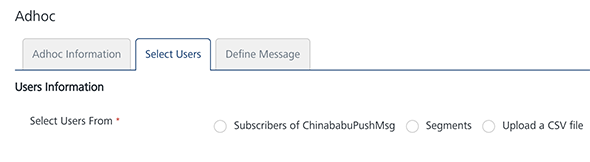
Click the Next -Select Users button to continue. The Select Users tab becomes active.
-
Select the option as Subscribers of VMSDemoApp.
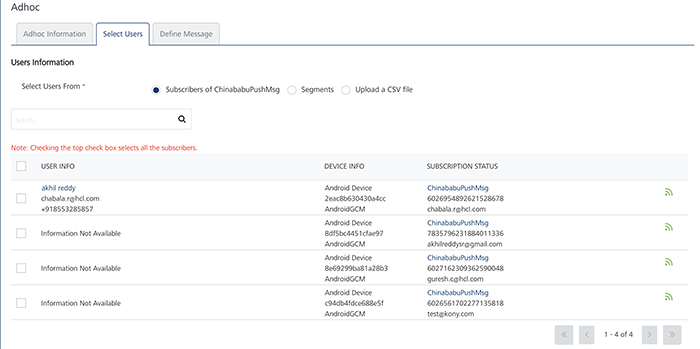
The user list view displays the users associated with VMSDemoApp.
-
Select the users from the list view to send the push message.
-
Click Next - Define Message to continue.
The Define Message tab becomes active. The screen displays the Push Message fields.
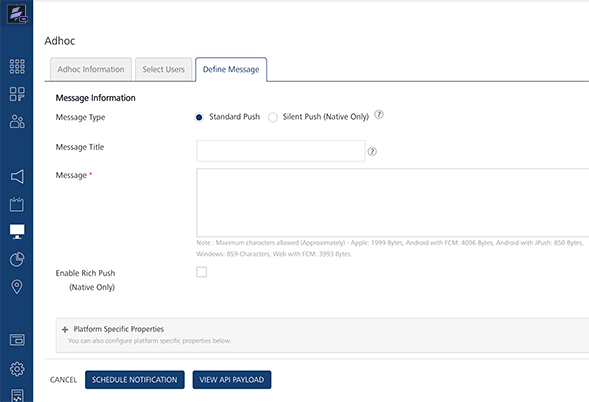
The Define Message page includes the Message Information section to add a new push message. The Message Type field includes the following two options to add a new push message:
- Silent Push
- Standard Push
By default, the message type option is set to Standard Push.
-
Standard Push: In the Push Message Section, enter the Message Title and the push message in the Message Box. If required, select the personalization attributes.
- Enable Rich Push: Select the check box to associate the rich push. To customize your text, you can use the Rich Text Editor tool available at the top of Rich Content box.
-
Silent Push: Check the check box, if you wish to enable the silent push option.
When you check the Silent Push option, the system displays platform-specific properties fields only. This is because the Message Title and the Message Text fields are not applicable for silent push.
-
Choose the Now option to send the notification immediately. Click Send to deliver the push message.
- Click the API Payload button to get details of the API call that can be used by a third party system to send notifications.
- If you want to schedule the message delivery at a later day and time, choose the Later option on the Adhoc Information screen.
- Select the Start Date and Time and the Expiry Date and Time.
-
Click Schedule Notification to schedule the message delivery later.
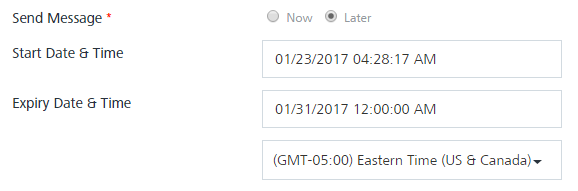
Note: When the expiry date is provided, the Engagement server ensures that the push message is not sent to the user after the set time.