Installation of the Engagement Demo App
Sending Push, Email, and SMS Notifications
This section walk you through the steps needed to submit the push, Email and SMS notifications to the application installed on your device in the previous section.
Sending Push Notifications
We have installed the application, created a subscription, and updated the configuration to receive the push, SMS and email notifications. Now we are ready to trigger the first push notification to the device.
-
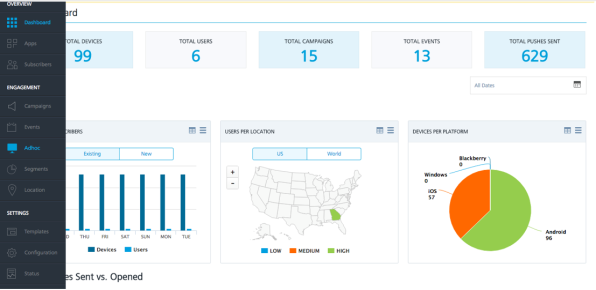
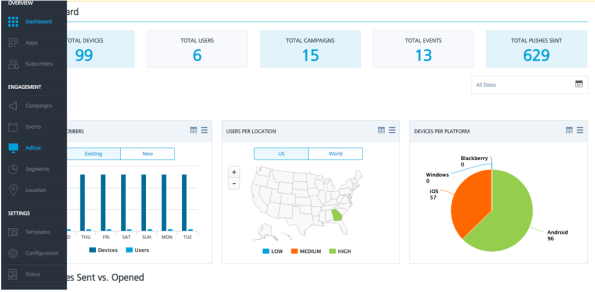
Login to Volt MX Engagement Services console of the Volt MX Foundry. Once the log in is successful, you will see the screen as below. Click Adhoc under Engagement from the left pane.
-
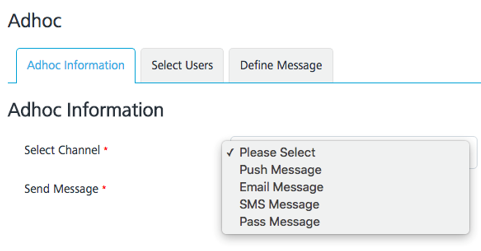
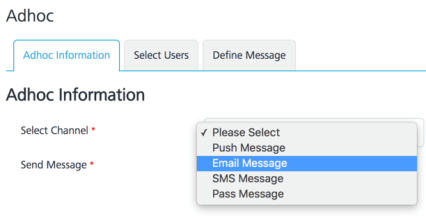
In the Adhoc section, select the Push Message channel.
-
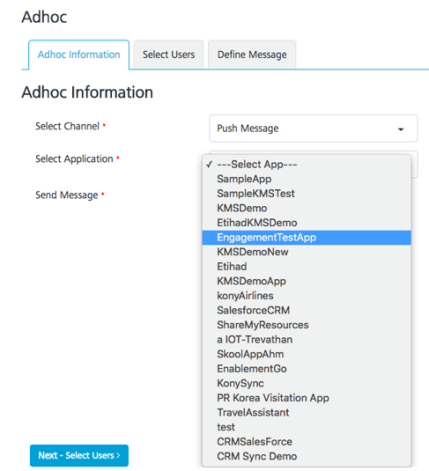
This will cause another drop-down to be displayed, which will allow you to select the application you have created earlier in this track. Select the EngagementTestApp or any other application that you have created.
-
Click Next > Select Users to navigate to the next screen and select the users.
-
In the Select Users section, choose the Subscribers of EngagementTestApp option and the user to send the message. Click Next –Define Message to navigate to the screen to enter the message to be sent.

-
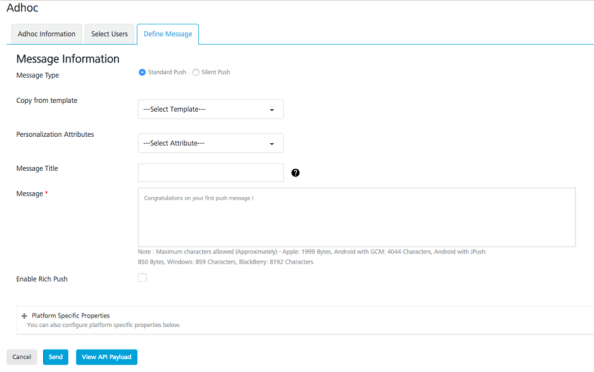
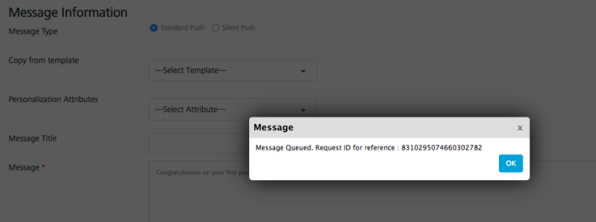
In the Message screen, the Standard Push message type is chosen as default. Enter the message you would like to deliver as a push message to your device. Click Send to send the push message to the device.
-
Once the push message has been successfully submitted for delivery, you will see the notification message. Click Ok to continue.
-
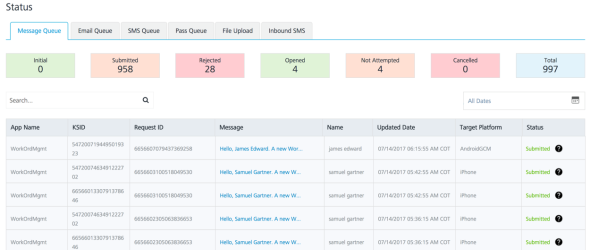
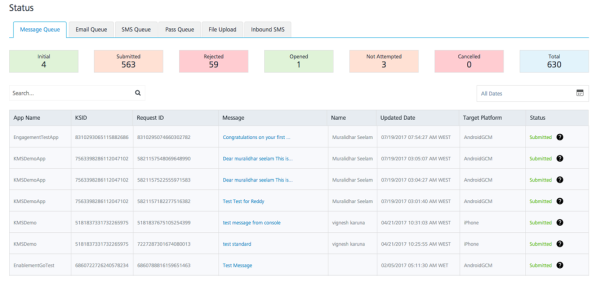
You can also check the status of the message submitted in your Engagement Server by clicking Status under Settings.
-
Click the Message Queue tab to view the status of the push messages sent. As you can see from the screen below, the first message in the list is what was submitted earlier. The status of this message indicates that it was successfully submitted.
-
Next, you will also see on your device screen that the message is successfully delivered.
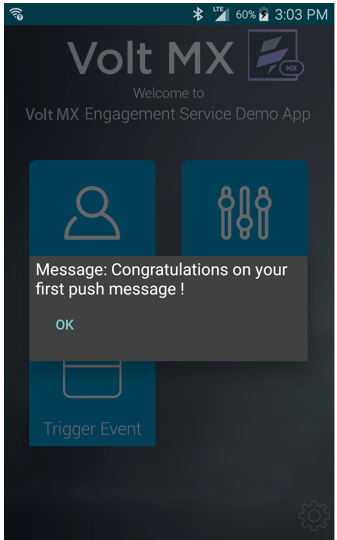
That’s it! Congratulations on your successful install of the Engagement application and receiving your first push message.
Sending SMS Notifications
Now you have successfully installed the application and received the first push message. Next, we will send our first SMS message from the Engagement Services console to the application.
As you may recall, from the earlier section of this track, you will need to sign up with a SMS aggregator and create a trail or a paid account to configure the SMS settings in your Engagement Server. It is assumed that the configuration of the SMS aggregator is completed before the next steps are executed.
-
Login to Volt MX Engagement Services console of the Volt MX Foundry. Once the log in is successful, you will see the screen as below. Click Adhoc under the Engagement section from the left pane.

-
In the Adhoc section, select the SMS Message channel. Click Next –Select Users to navigate to the next screen.

-
Select the user to whom the SMS message needs to be sent. Click Next – Define Message to navigate to the next screen.

-
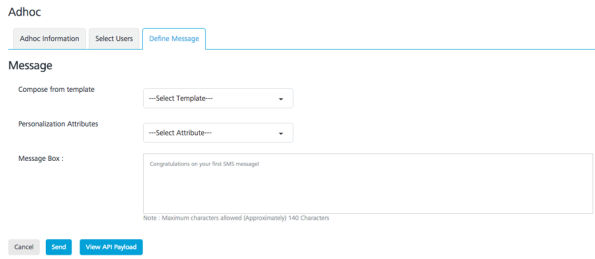
Enter the SMS message in the Message Box and click Send. This will successfully send the SMS message to the user.
-
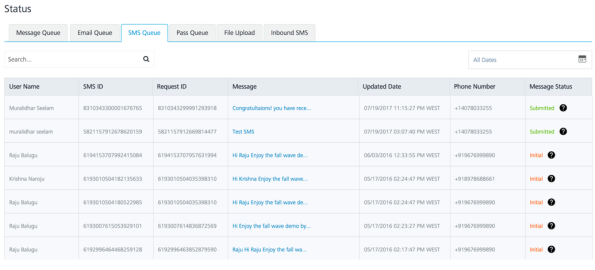
As mentioned in the previous section, you can also check the status of the SMS message from the Status option under the Settings section of the Engagement Services console. Click the SMS Queue tab to view the first status of the first SMS message as successfully submitted.
That’s it! Congratulations on your successful creation of the user and receiving your first SMS message from the Engagement Server.
Sending Email Notifications
Now that you have successfully installed the application and have received the first push message and first SMS message, we will review the steps needed to send email notifications from the Engagement Services console to the user.
As you may recall from the earlier section of this track, you need to configure the Email SMTP Server in your Engagement Server to send the email messages. It is assumed that the configuration of the Email Server is completed before the next steps are executed.
-
Login to the Engagement Services console of Volt MX Foundry. Once the log in is successful, you see the screen as below. Click Adhoc under the Engagement section from the left pane.
-
In the Adhoc section, select the Email Message channel. Click Next –Select Users to navigate to the next screen.
-
Select the user to send the email message. Click Next –Define Message. The CC and the BCC options can be ignored for this tutorial.

-
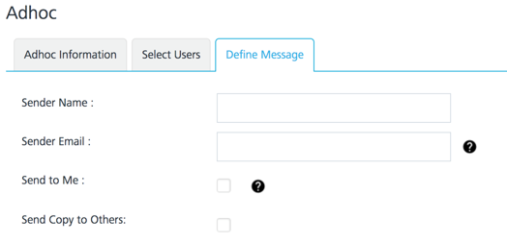
In the Define Message section below, the Sender Name, Sender Email, Send to Me, and Send Copy to others options can be ignored.
-
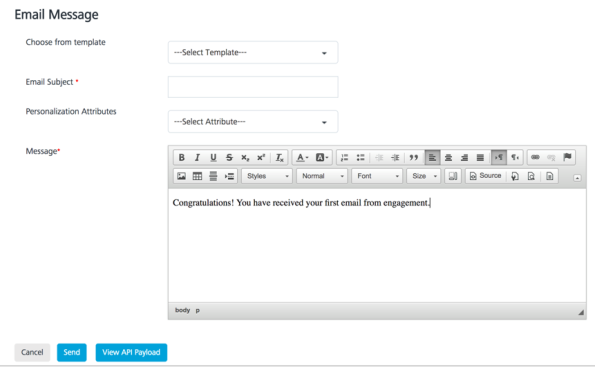
Enter the email message and the subject in the section of the screen below. The other data fields can be ignored. Click Send to send the email to the user.
-
As mentioned in the previous section, you can also check the status of the sent Email message from the Status option under the Settings section of the Engagement Server. Click the Email Queue tab to see the status of the first email message as successfully submitted.

-
The email will be successfully delivered to your email account as shown below.

That’s it! Congratulations on your successful creation of the user and receiving your first email message from the Engagement Server.
Important: For more information refer this video: