Foundry Lab 01 - Hello World Integration Service
Duration 20 Min
What you will learn
You'll learn how to create a simple integration service to return a JSON object including a message element that says "Hello World".
Prerequisites
- This exercise assumes you are familiar with dependency management, as covered in Intro to VoltScript Lab 03a.
Steps
atlas.json
- Click File → Open Folder.
- Create a new folder in your user directory called "foundry-lab".
- Right-click in the empty pane and select New File from the context menu.
- Name the file "atlas.json".
- Type "foundry-atlas" and accept the snippet.
- Set name to "foundry-lab".
- Set description to "Simple Hello World Foundry Lab".
- Set displayName to "foundry-lab".
- Complete publisher and authors.
- Delete repo and library elements.
- Set version to "1.0.0".
- Change array element in mainScripts to "helloWorld.vss"
- Add the usual repositories to the repositories array for VSEs and Library Modules.
- In dependencies array, add VoltScript VoltMX Middleware:
- Set library to "voltscript-voltmx-middleware".
- Set version to "latest".
- Set module to "VoltMXObjects.vss".
- Set repository to "hcl-github".
- Delete unitTestScripts, integrationTestScripts, testDependencies, and vseDependencies elements.
-
Save the atlas.json.
The final atlas.json should look like this:
{
    "name": "foundry-lab",          // REQUIRED: Enter a short name for your VoltScript project, e.g. "Demo1"
    "description": "Simple Hello World Foundry Lab",    // REQUIRED: Enter a longer description, e.g. "My first demo project"
    "displayName": "foundry-lab",  // A longer name to refer to the project, e.g. "Demo 1"
    "license": "Apache 2.0",    // A license to publish the project under.
                                // If you want this to be used by others, Apache 2.0 or MIT are recommended
    "publisher": "HCL America, Inc.",   // Copyright owner
    "authors": [        // REQUIRED: An array of authors, can be names or emails
        "Paul Withers"
    ],
    "version":"1.0.0",  // REQUIRED: Current version for this project, used with dependency management to find the modules
    "sourceDir": "src", // REQUIRED: Directory where mainScripts are located
    "testDir": "test",  // Directory where unitTestScripts and integrationTestScripts are located
    "libsDir": "libs",  // Directory where VoltScript Library Modules and shared scripts are located
    "vsesDir": "vses",  // Directory where VoltScript Extensions are located
    "mainScripts": [    // REQUIRED: Main scripts with Sub Initialize. Used to sync any additional files between
                        // sourceDir and testDir, if libsDir not set
        "helloWorld.vss"
    ],
    "repositories": [       // Repositories in which to search for any dependencies
        {
            "id": "volt-mx-marketplace",
            "type": "marketplace",
            "url": "https://community.demo-hclvoltmx.com/marketplace"
        },
        {
            "id": "hcl-github",     // REQUIRED: Unique ID matching "repository" in a dependency in this file.
                            // Also matches label of a JSON object in atlas-settings, which gives any credentials to use to access this repository
            "type": "github",   // REQUIRED: Currently "github" or "webserver" are supported
            "url": "https://api.github.com/repos/HCL-TECH-SOFTWARE" // REQUIRED: Base URL of the repository
        }
    ],
    "dependencies": [
        {
            "library": "voltscript-voltmx-middleware",  // REQUIRED: Folder to be appended to the base URL when dependency management tries to download modules
            "version": "latest",  // REQUIRED: Version number of modules to download. Currently only supports explicit version or "latest"
            "module": "VoltMXObjects.vss",   // REQUIRED: Filename of a VoltScript Library Module to download
            "repository": "hcl-github"
        }
    ]
}
VoltScript Dependency Manager
- From the Command Palette, run "VoltScript: Install Dependencies".
- Enter the project directory, confirm atlas-settings.json and atlas.json locations.
Success
Your project should now have "src", "test", "libs" and "vses" directories.
- The src directory is empty.
- The test directory is empty.
- The libs directory has been populated with
VoltMXObjects.vssandVoltScriptCollections.vss. VoltScriptCollections is a downstream dependency of VoltMXObjects. - The vses directory has been populated with ddl and so files for ContextVSE and JsonVSE - these are downstream dependencies used by VoltMXObjects, automatically picked up because of its atlas.json.
- A new file,
seti.ini, has been created. This contains mapping for the VoltScript Extensions (VSEs) and will be used for mappingUseVSEstatements. - A new file,
effective-atlas.json, has been added to the root of the directory. This contains the aggregated settings for the project.
helloWorld.vss
- Create a file "helloWorld.vss" in src directory.
- Type "foundry" and accept the Foundry Boilerplate snippet.
-
Between the two comment blocks, enter the following code:
Call VoltMxResult.result.insertValue("message", "Hello World!") -
Save the file.
Success
A message element with the value "Hello World!" is added to the result's JSON object.
Package for Volt Foundry
- From the Command Palette, run "VoltScript: Package for Foundry".
- Enter the project directory, confirm atlas.json locations and continue with nothing entered for additional files to package.
Success
A file is created in the root of the project called "foundry-lab.1.0.0.zip". The zip name comprises the project name and the project version from the atlas.json.
Create Volt Foundry Integration Service
- Log into Volt Foundry.
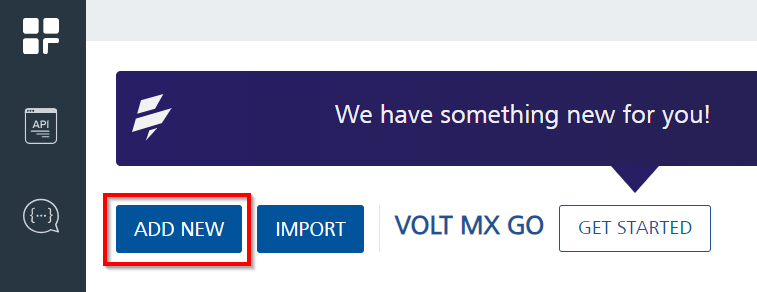
-
On the Apps page, click ADD NEW.
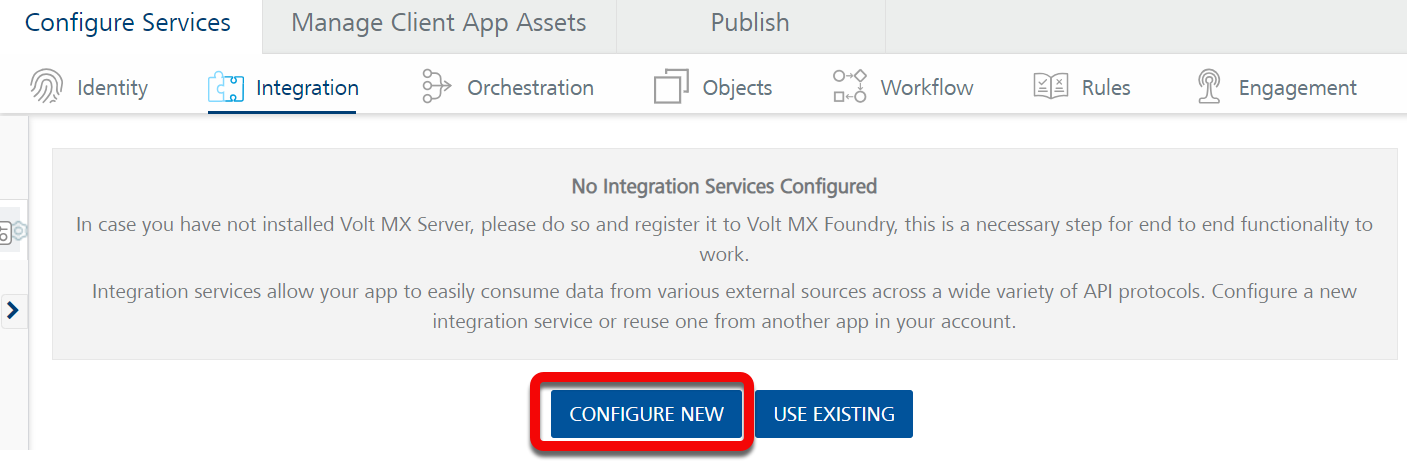
-
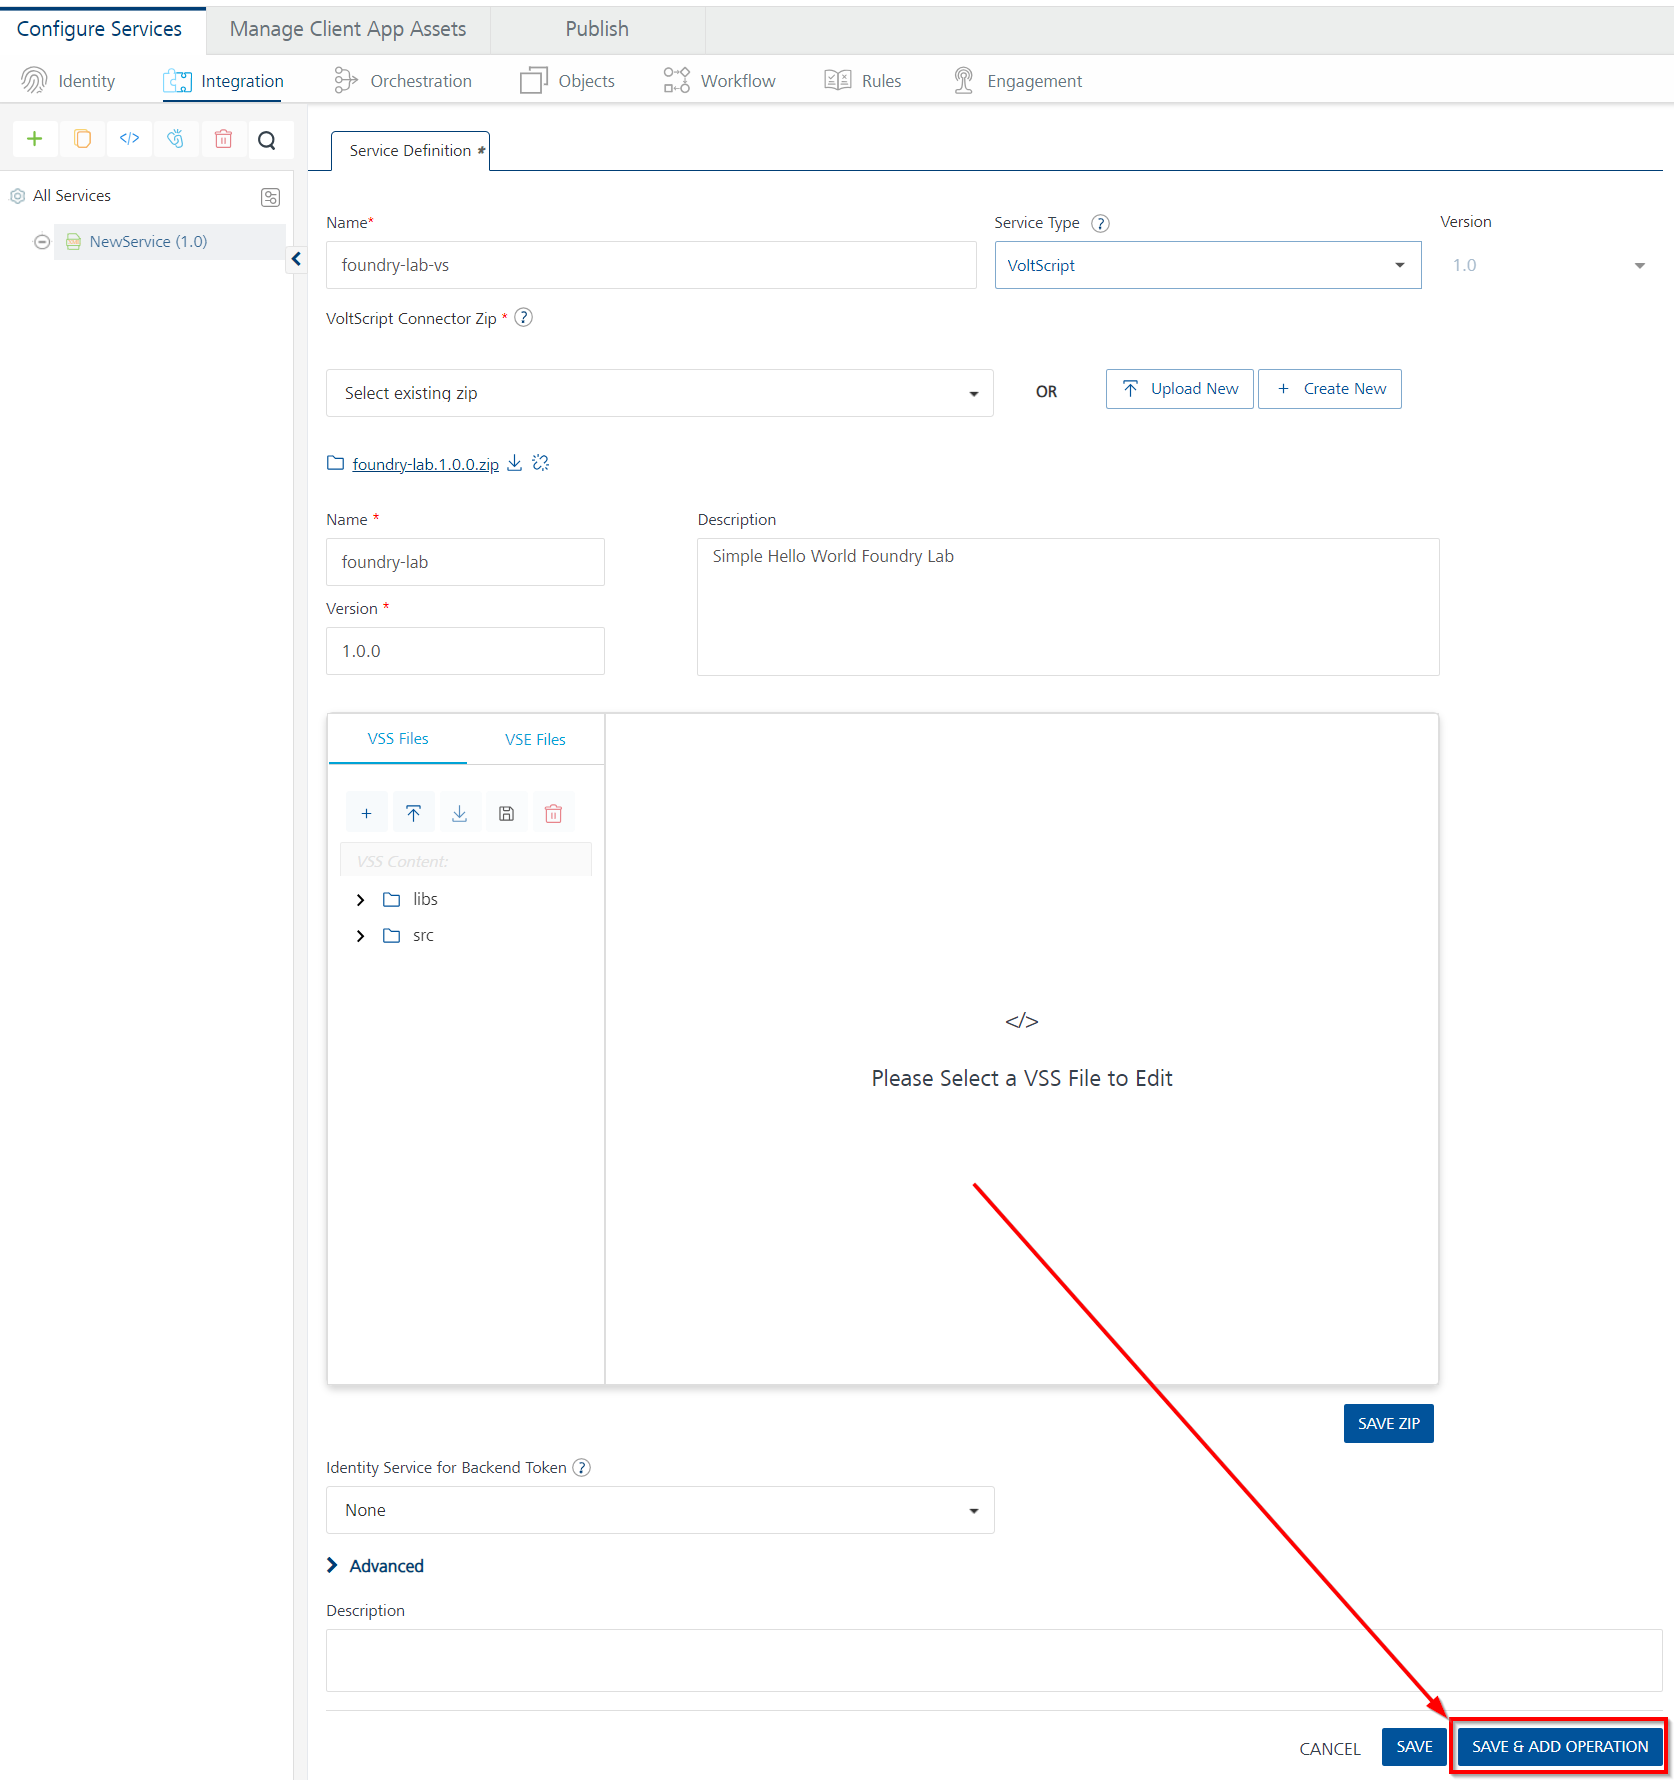
On Configure Services tab, click the Integration tab and then click CONFIGURE NEW.
-
Set the Name to "foundry-lab-vs".
- Select "VoltScript" under Service Type.
-
Click Upload New and select the zip file you just created (
foundry-lab.1.0.0.zip).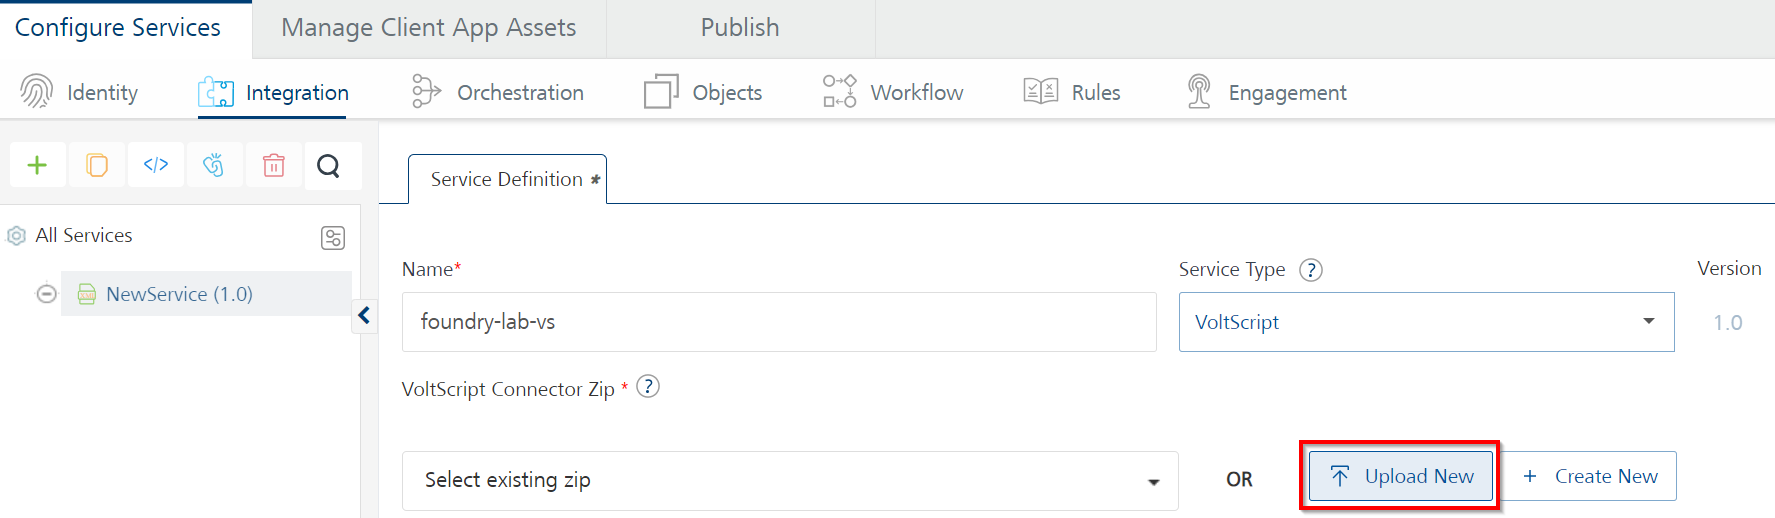
-
Click SAVE & ADD OPERATION at the bottom of the page.
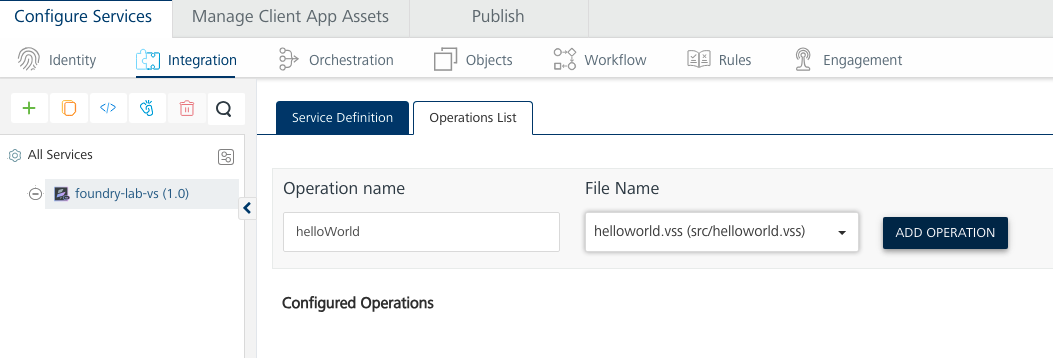
-
Set the name to "helloWorld".
- Select "helloWorld.vss" as the file.
-
Click ADD OPERATION.
-
Scroll down to the bottom of the operation and click SAVE AND FETCH RESPONSE button.
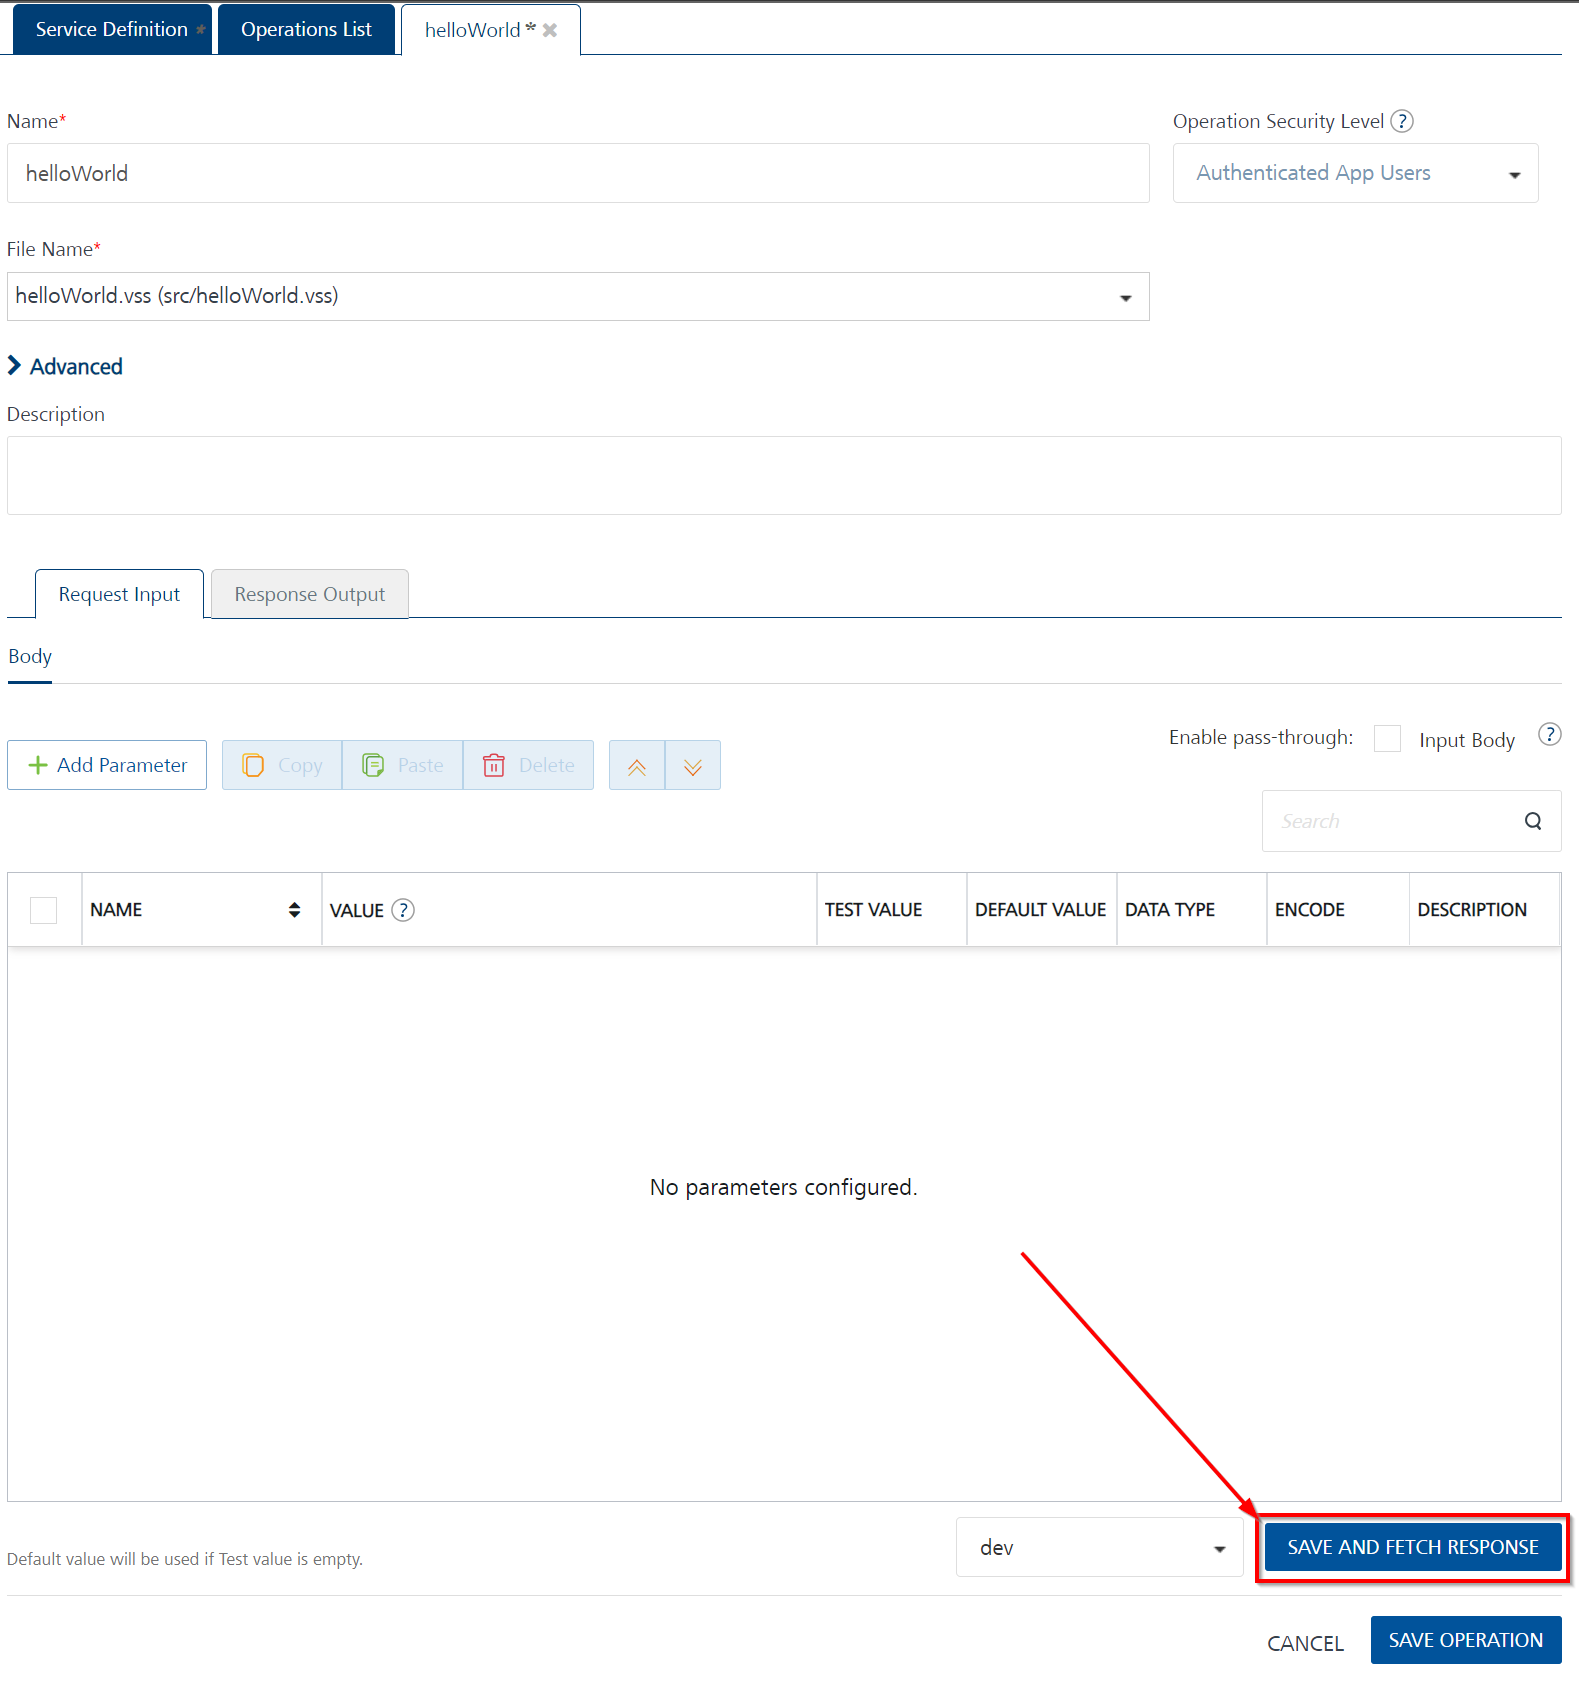
Warning
You need to have an environment set up to test an operation. If you haven't yet configured one, save the operation, follow the steps in Add an Environment, and then come back to the operation to test.
Success
The Output Result returns:
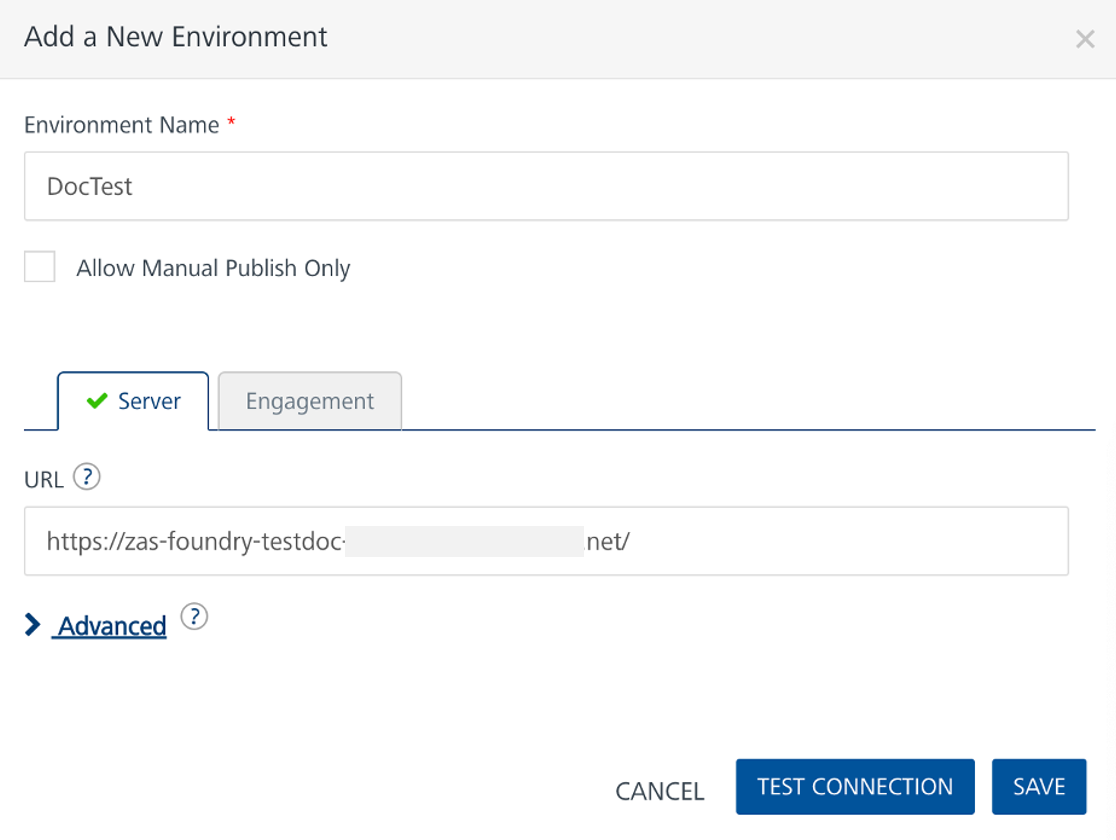
Add an Environment
- On the left pane on the Volt Foundry Console, click Environments.
- On the Environments page, click Add New. The Add a New Environment dialog opens.
-
In the Environment Name text box, enter an environment name.
Note
Your environment name can only contain letters, numbers, and hyphens (-). A hyphen can't appear at the beginning or at the end of a name. A number can't appear at the beginning of a name. A name should be a minimum of three characters and a maximum of 20 characters long.
-
On the Server tab, enter the URL of your Volt Foundry in the URL text box. The URL format is:
<http or https>://<server_host>:<server_port>
For example: http://mbaastest30.hcl.net:53504 - Click Test Connection to verify that the entered URL is correct. If the test is successful, a check mark appears beside the Server tab.
-
Click Save.