VoltScript in Foundry Lab 01 - Hello World Integration Service
Duration 20 Min
What you will learn
You'll learn how to create a simple integration service to return a JSON object including a message element that says "Hello World" - all by writing the VoltScript code within Volt Foundry.
Prerequisites
- Familiarity with creating an Integration Service in Volt Foundry.
- It would be good to have completed the VoltScript Foundry Tutorial Lab 01.
Steps
Create Volt Foundry Integration Service
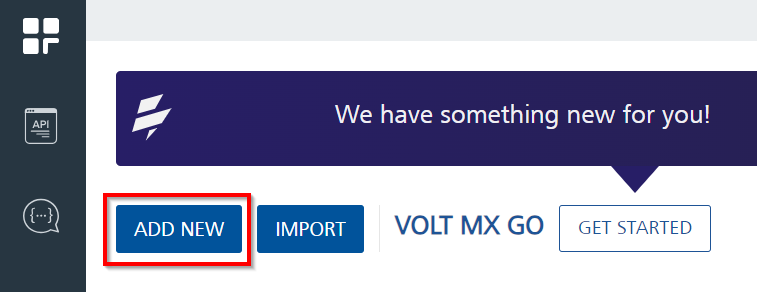
- Log into Volt Foundry.
-
On the Apps page, click ADD NEW.
-
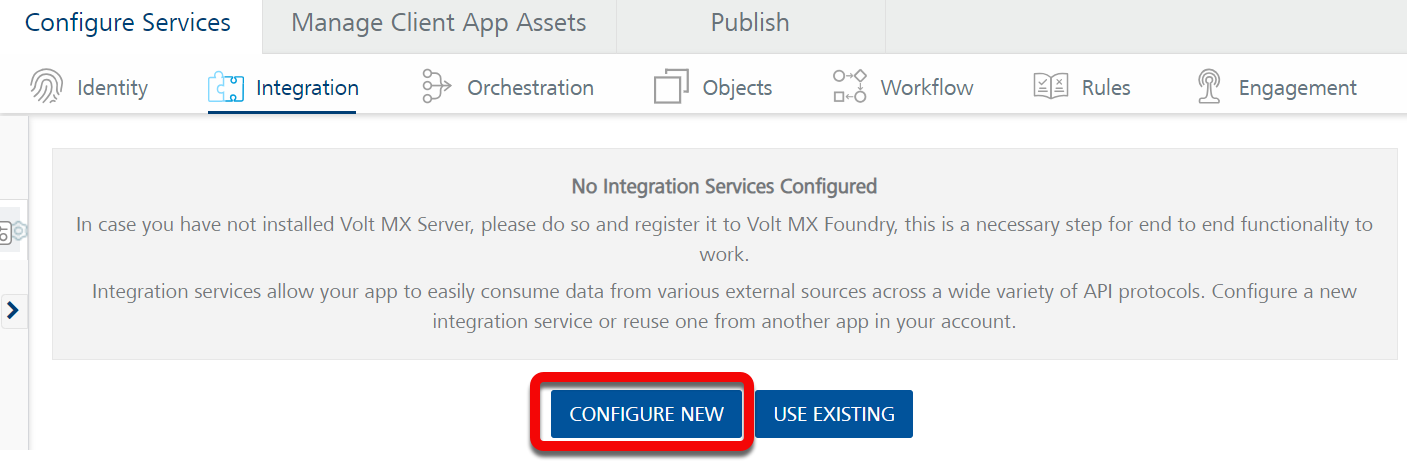
On Configure Services tab, click the Integration tab and then click CONFIGURE NEW.
-
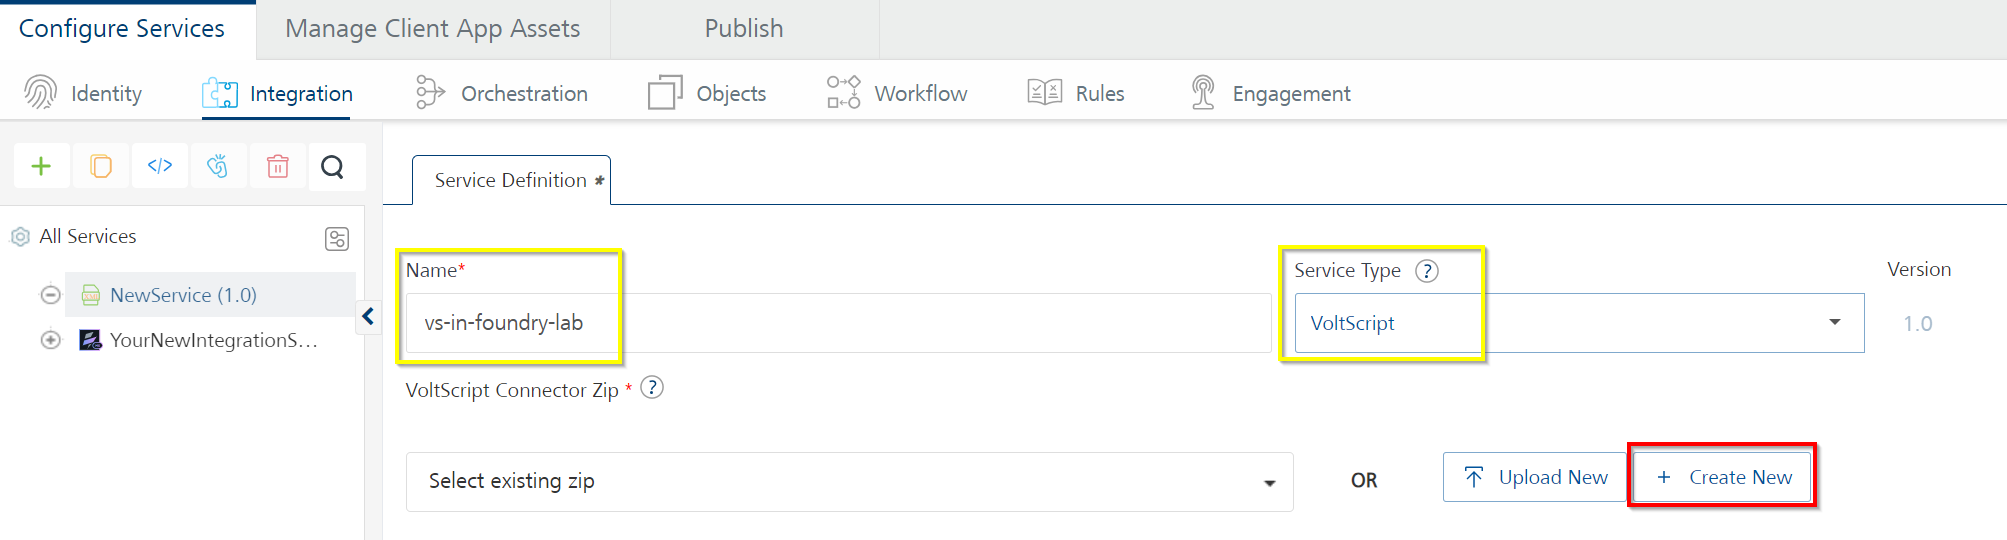
Set the Name to "vs-in-foundry-lab".
- Select "VoltScript" under Service Type.
-
Click Create New.
-
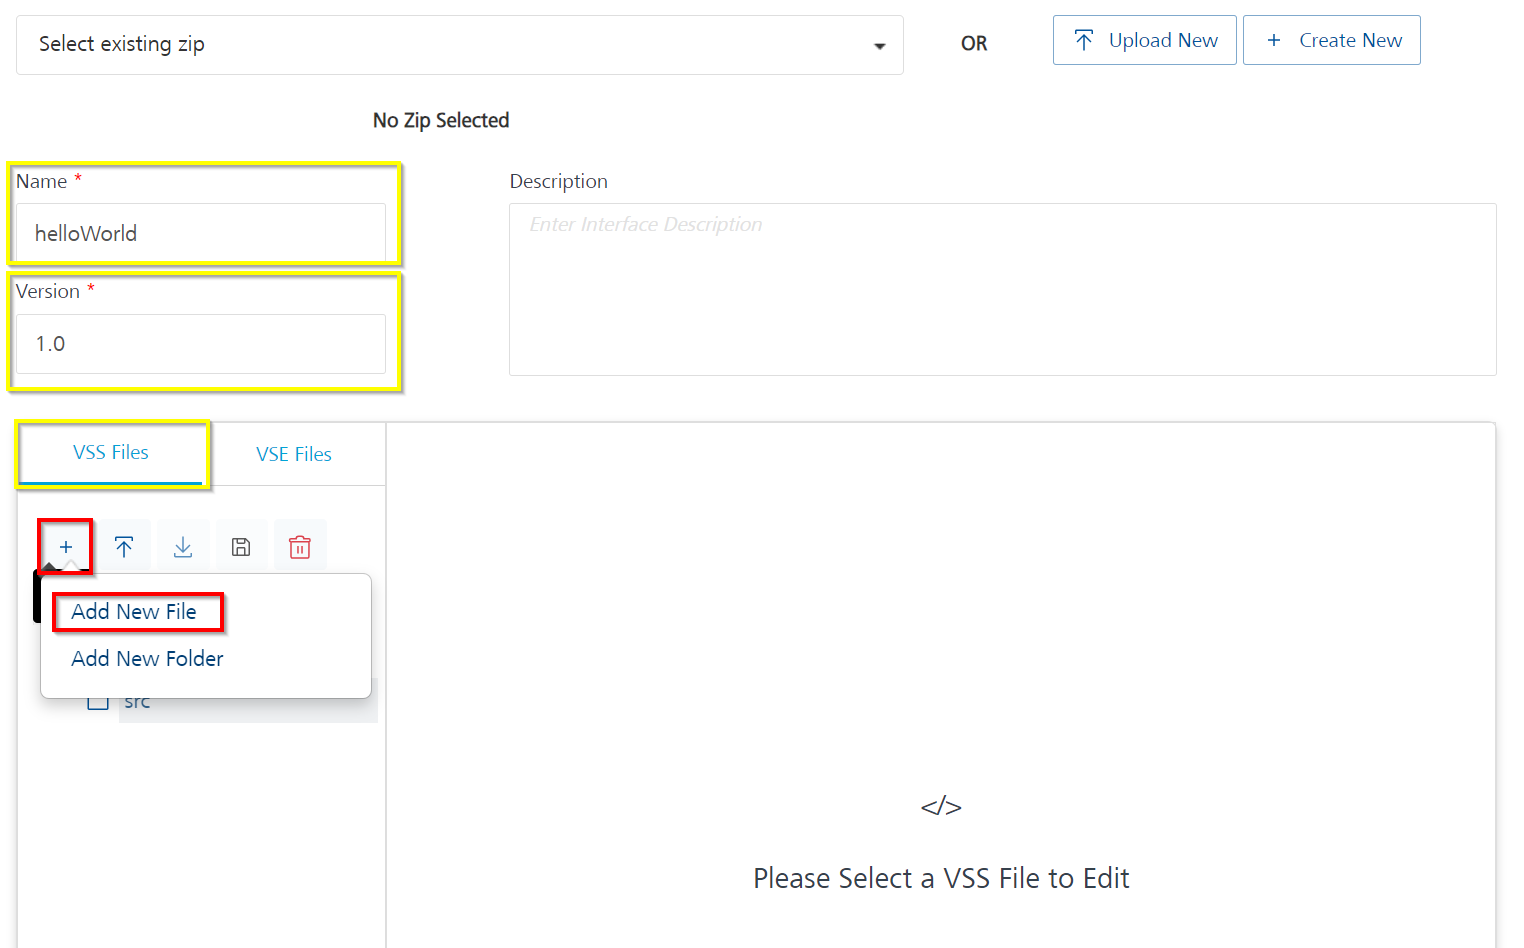
Set the Name to "helloWorld".
- Set the Version to "1.0".
- OPTIONALLY enter a Description if desired.
-
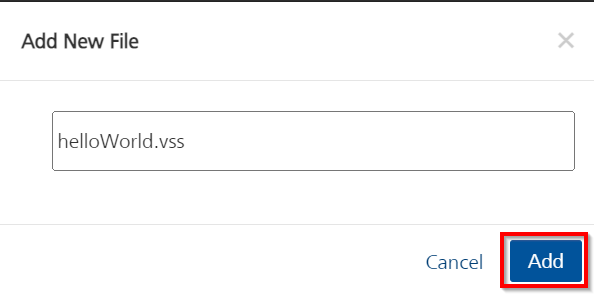
On the VSS Files tab, click Add (+), then select Add New File.
-
In the Add New File dialog, enter "helloWorld.vss", then click Add.
Write the Integration Service Code
Once you've created the helloWorld.vss file in the editor, you'll notice that it's prepopulated with the necessary skeleton code you need for your Integration Service. This includes adding the USE statements for the necessary VoltScript Middleware VSS (VoltMXObject) and VoltScript Context VSE (ContextVSE) libraries, as well as a template for your Initialize subroutine.
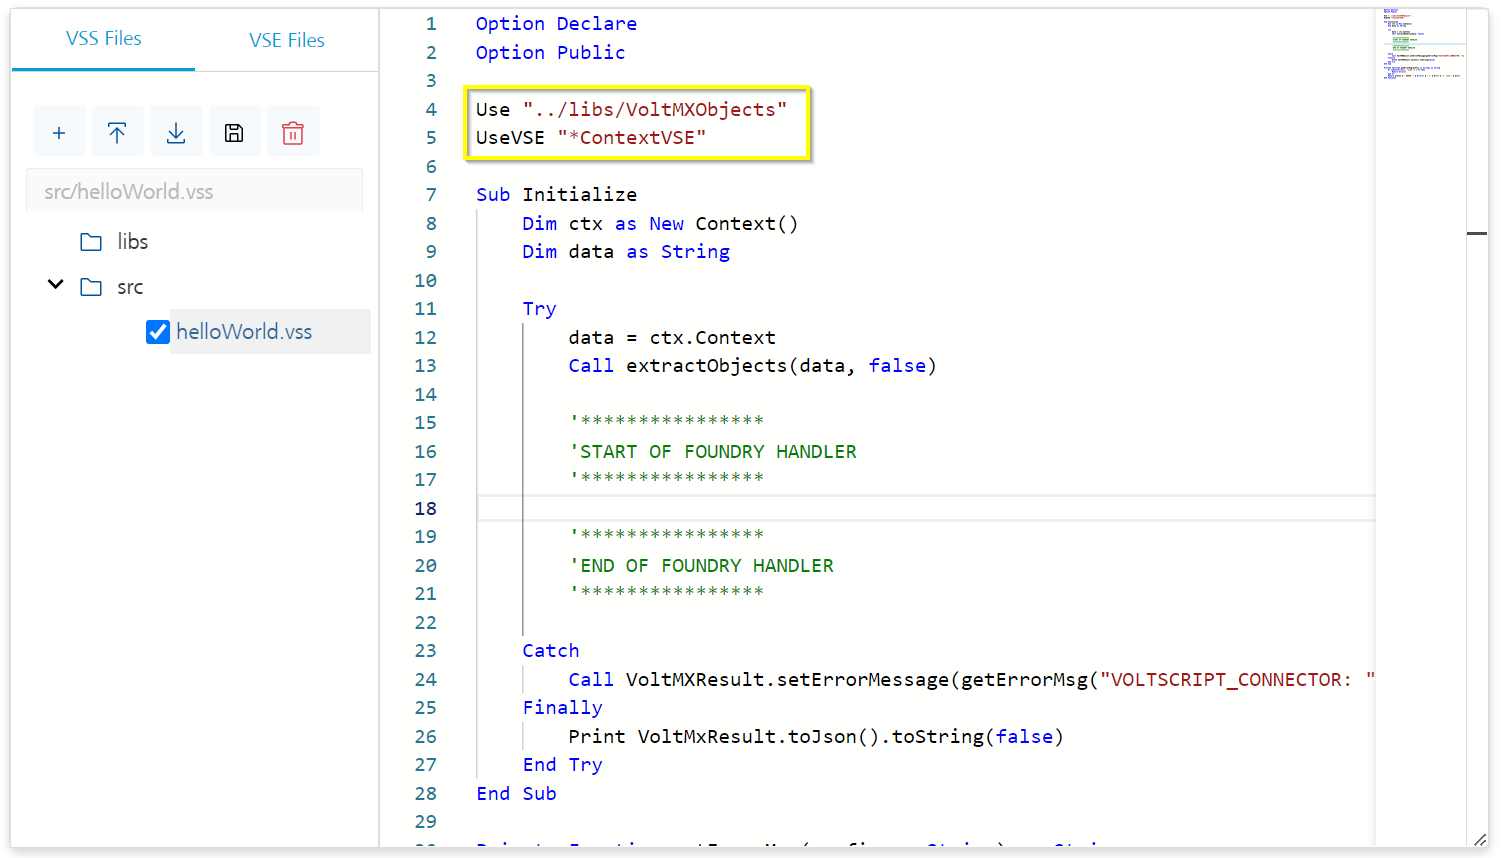
HOWEVER, the VoltMXObjects VSS library and the ContextVSE and JsonVSE VSE extensions are NOT actually loaded yet - so let's add them to our code.
Add Necessary Resources
Note
You will need to have login credentials for the Volt MX Marketplace and for GitHub so that you can access the latest resources.
Let's add the VSEs we'll need first.
Import VSE Extensions
-
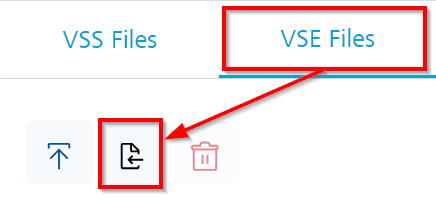
Click on the VSE Files tab in the editor, then click the Import button.
-
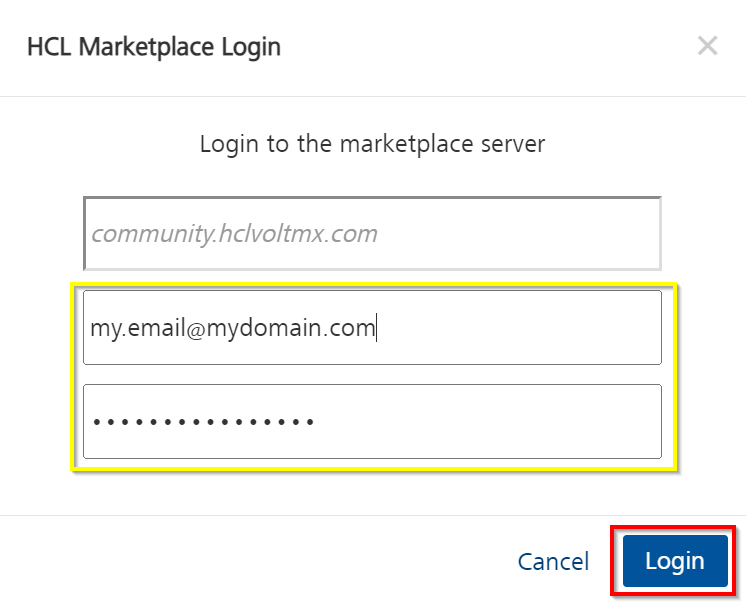
A login prompt will appear. Enter the credentials you created for the Volt MX Marketplace, then click Login.
-
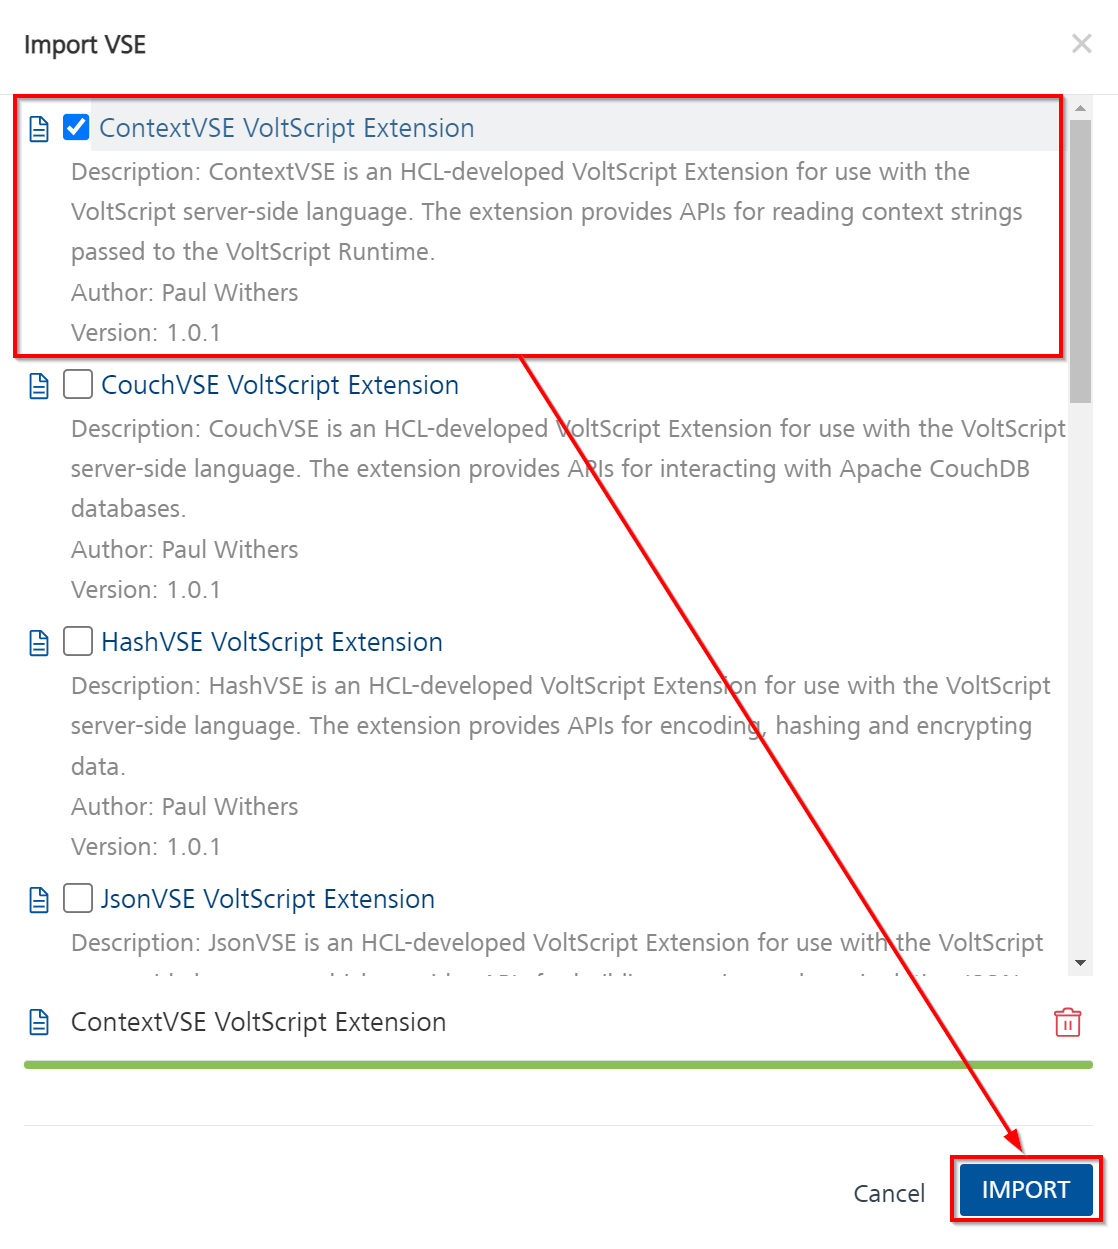
After successfully logging in you're presented with a list of the VSEs available for download. Let's begin by selecting the ContextVSE VoltScript Extension, then click IMPORT.
-
Now we need to add the
JsonVSEextension. Simply click the Import button again, select the JsonVSE VoltScript Extension, then click IMPORT.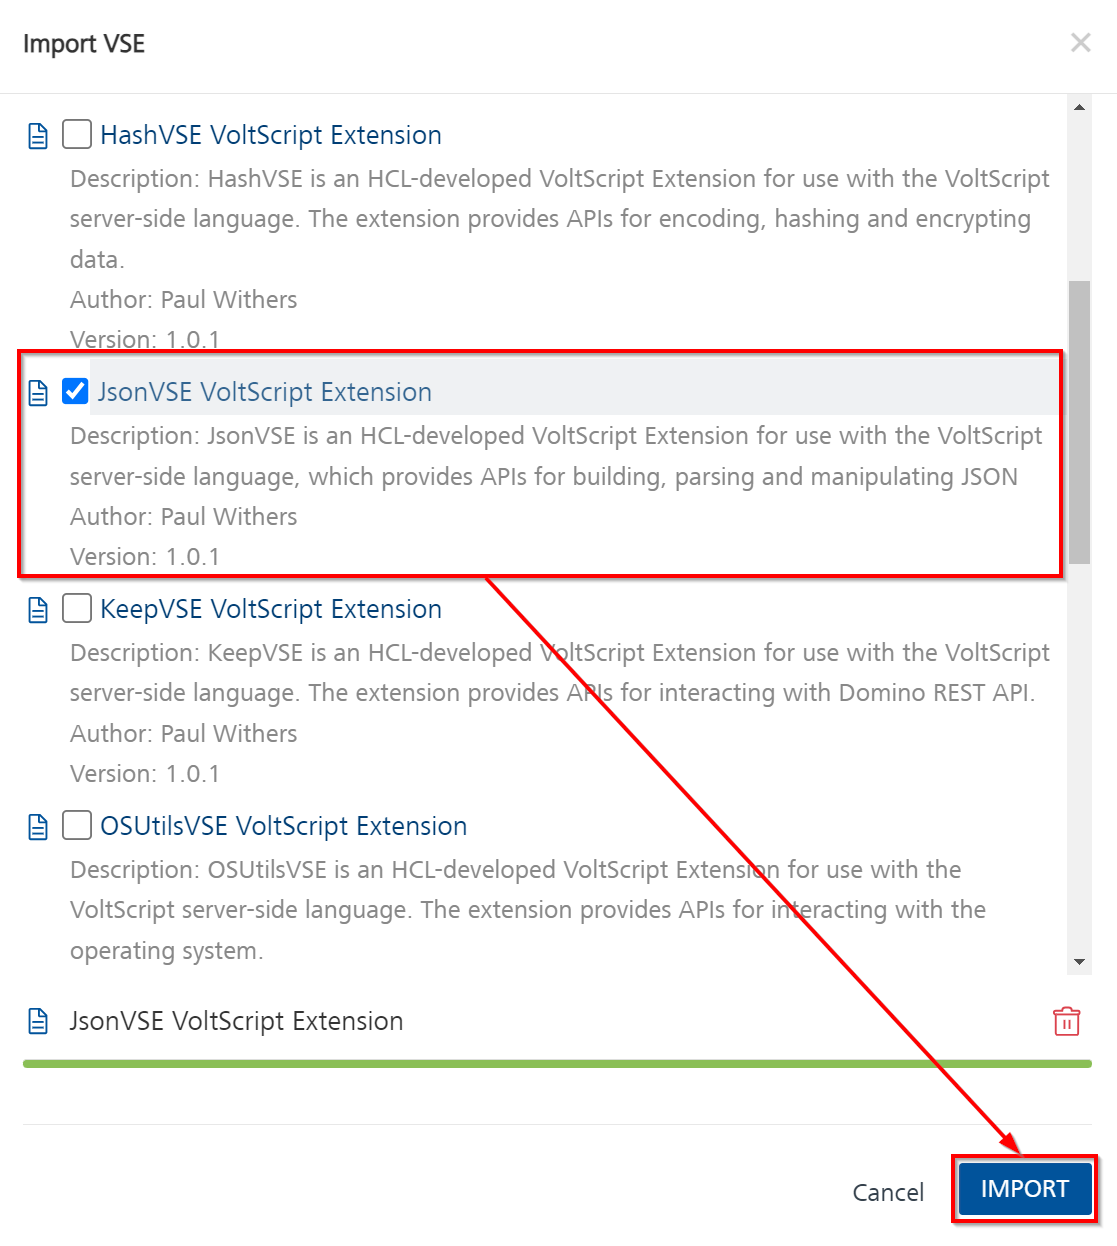
-
Now you should have the
ContextVSEandJsonVSEfiles loaded in the VSE Files tab. Notice that it automatically added both the Windows and Linux versions of the respective VSE extensions - this ensures that you will have access to these files no matter what OS the Volt Foundry server is using. These files are referenced in your code by their programmatic names -ContextVSEandJsonVSE.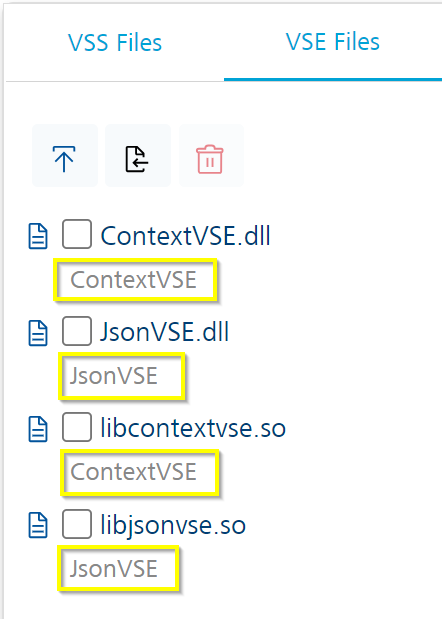
Now that we have the VSE files in our Integration Service, we need to add the necessary VSS as well - VoltMXObjects.vss
Upload VSS Libraries
-
We need to upload the
VoltMXObjects.vsslibrary, so you'll need to log into GitHub and locate the Volt MX Middleware repository. -
Once there, locate the
Releasesarea, and click on the Latest release.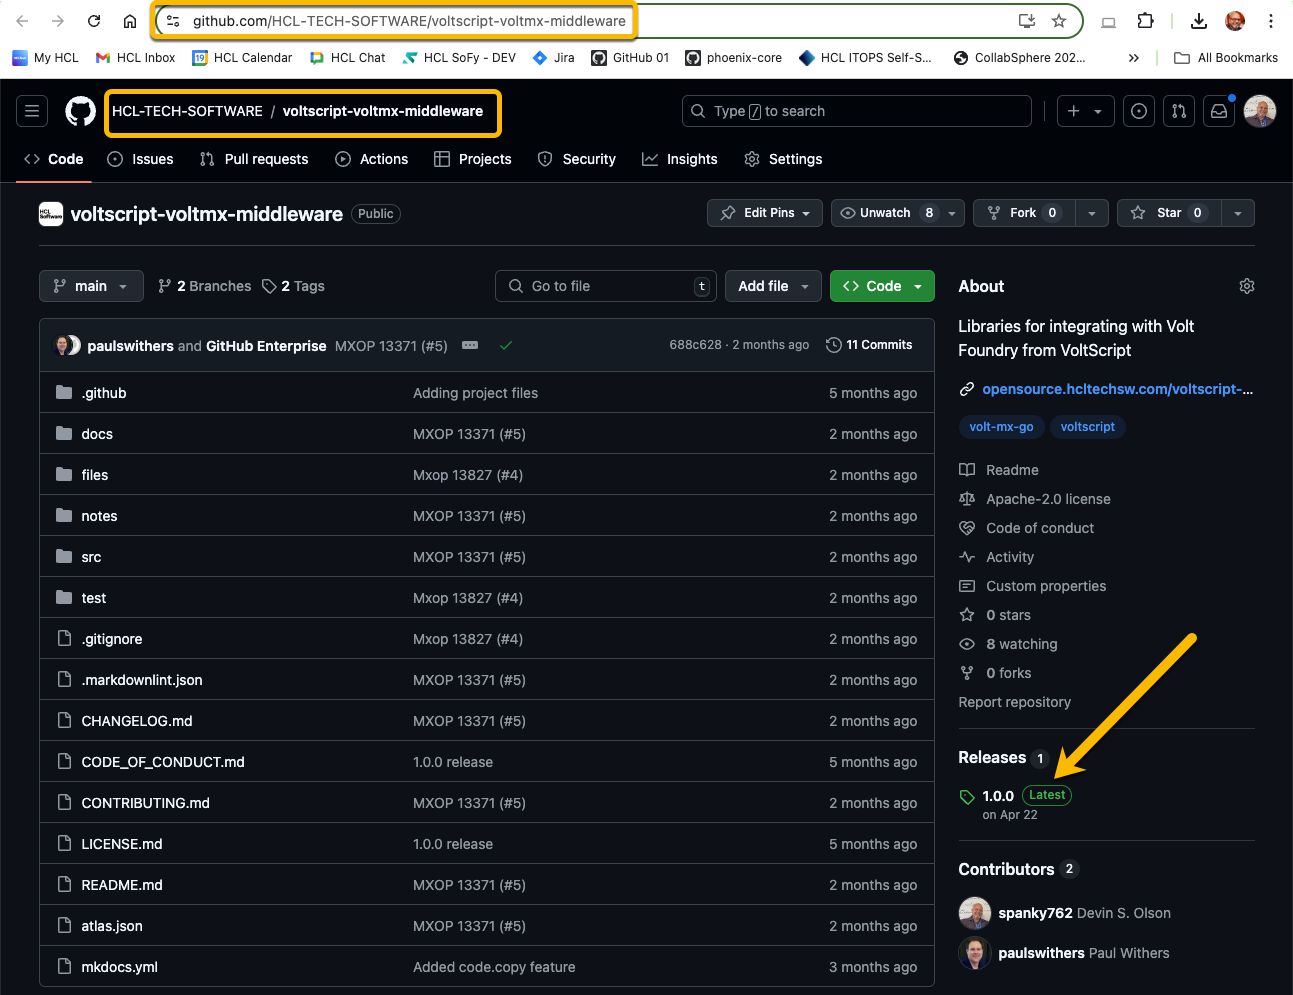
-
We only need the
VoltMXObjects.vssfile. Click on the filename to download the file.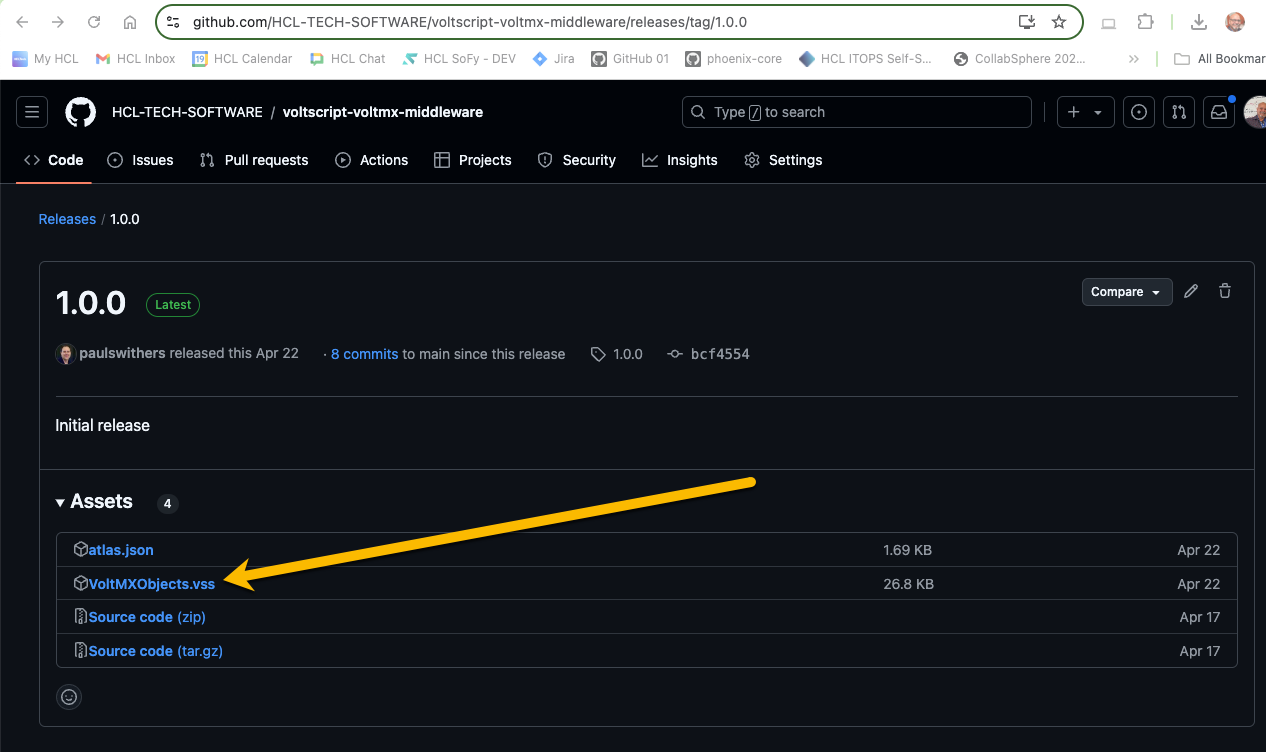
-
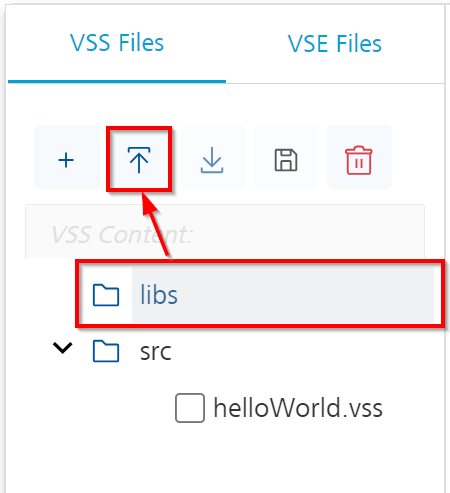
In the Integration Service editor, click on the VSS Files tab. Now select the libs directory, then click the Upload button.
-
Select the
VoltMXObjects.vssfile you downloaded earlier, and click Open to upload it into your Integration Service. Once it's uploaded, you should see the file in the libs directory in your editor.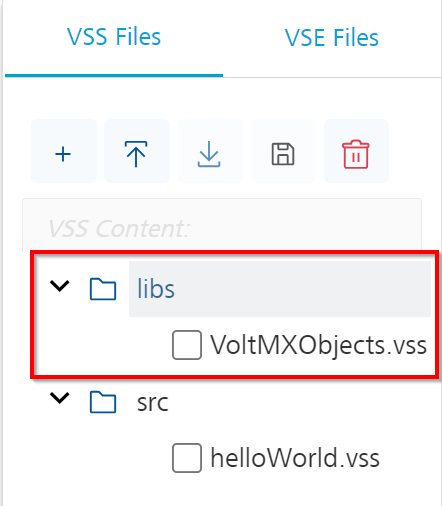
-
We need one more VSS library for our Integration Service - VoltScript Collections. Follow the same steps you used to download
VoltMXObjects.vssand downloadVoltScriptCollections.vss, and upload it to the libs directory. Once you've done so you should see these files in your editor.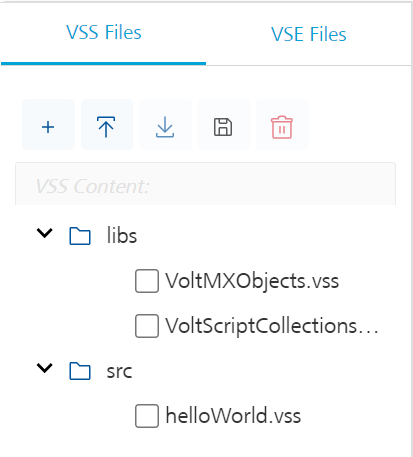
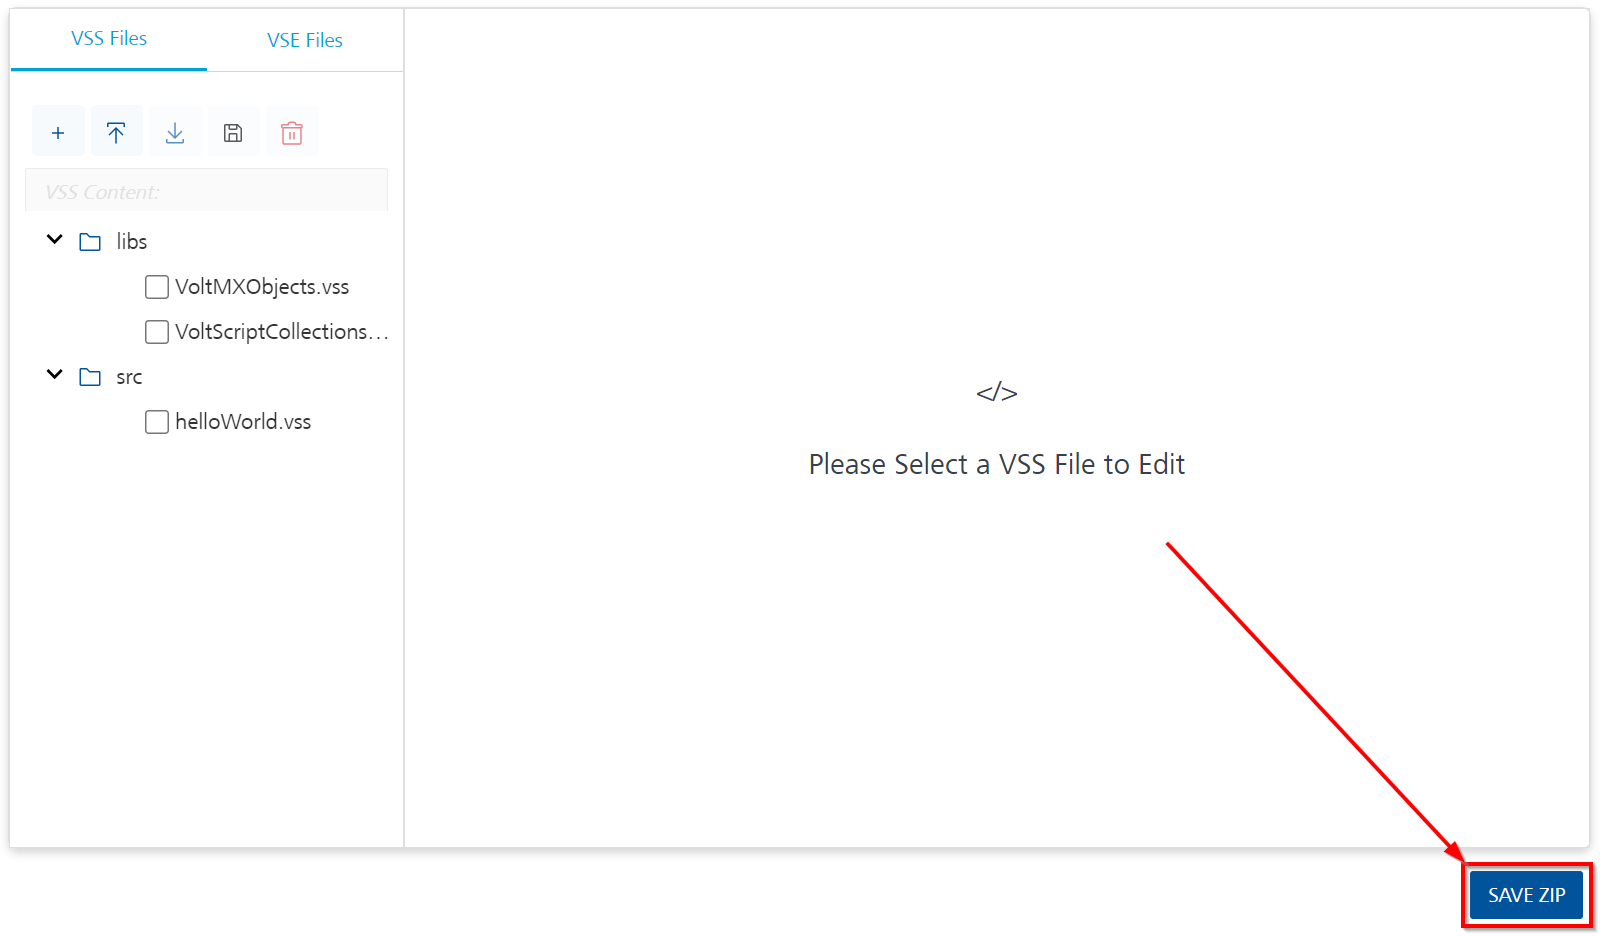
Now that we've successfully uploaded all of the needed resources, let's add some code to test; but before we continue, let's go ahead and save our Integration Service by click the SAVE ZIP button. You should then see a Successfully updated. status at the bottom of the page.
Write Your First Integration Service Code
-
Click on the helloWorld.vss file in your Integration Service editor. You should see the boilerplate code added earlier.
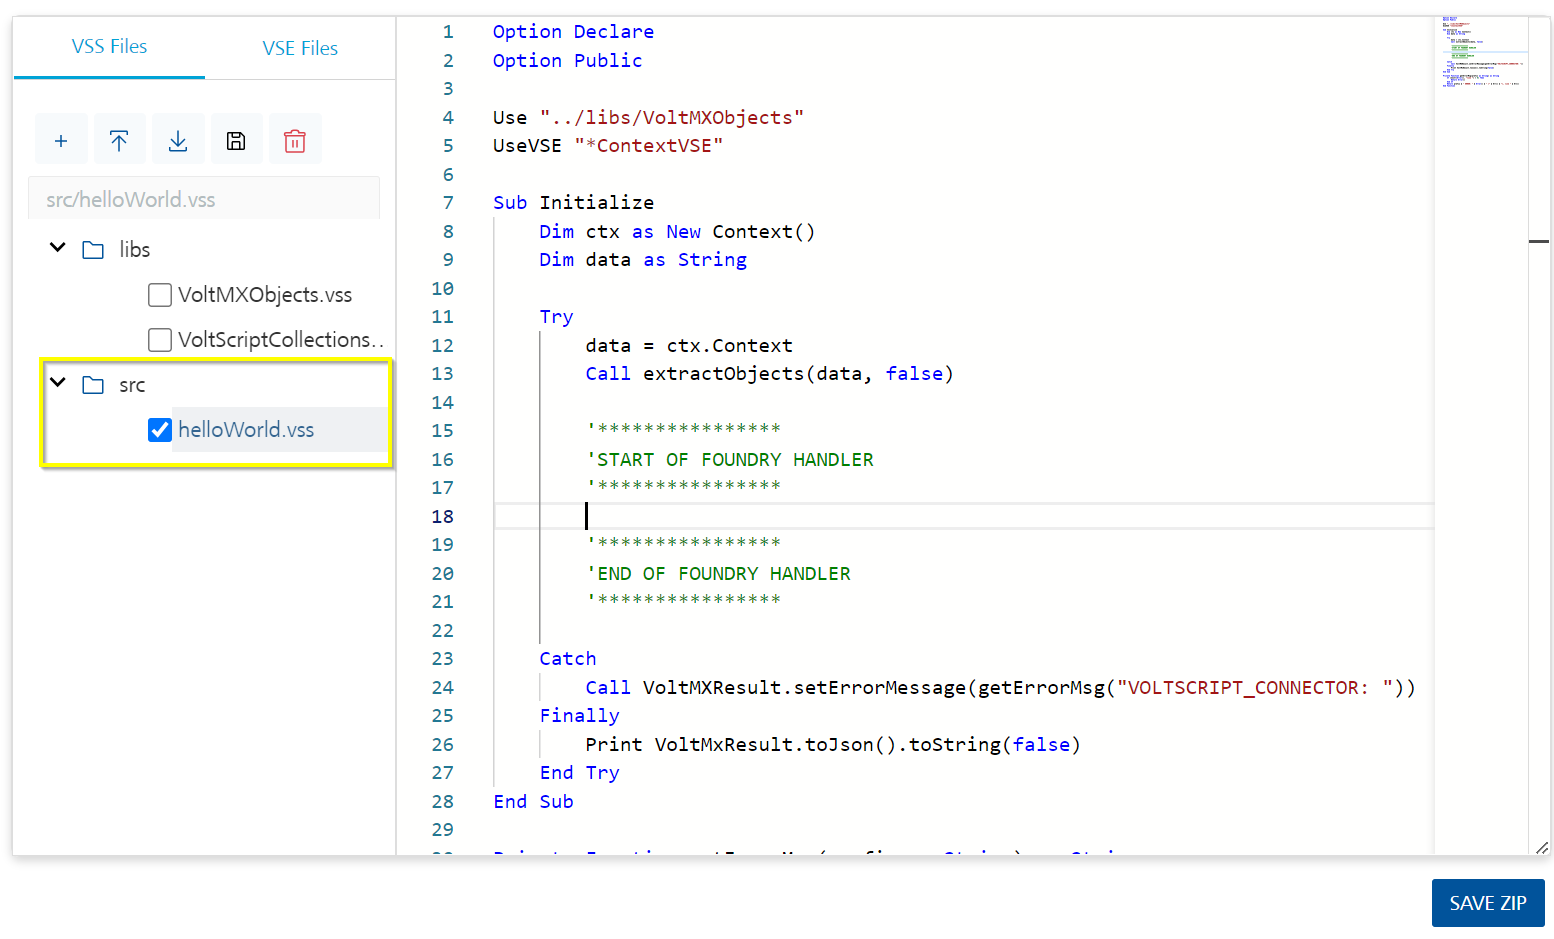
-
Between the two comment blocks, enter the following code:
Call VoltMxResult.result.insertValue("message", "Hello World!")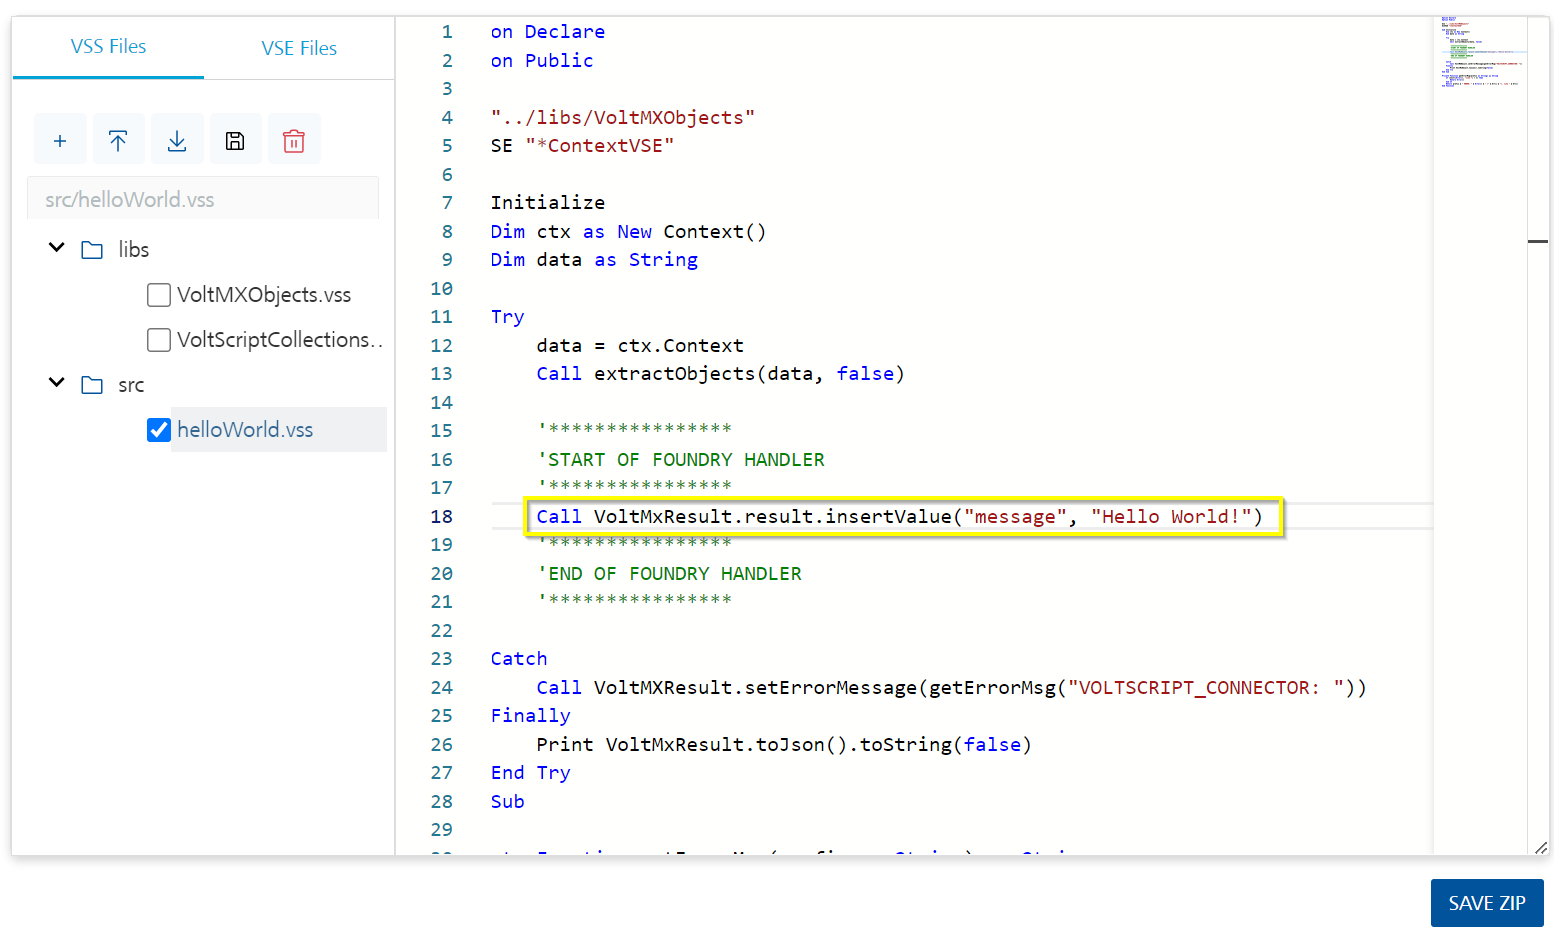
-
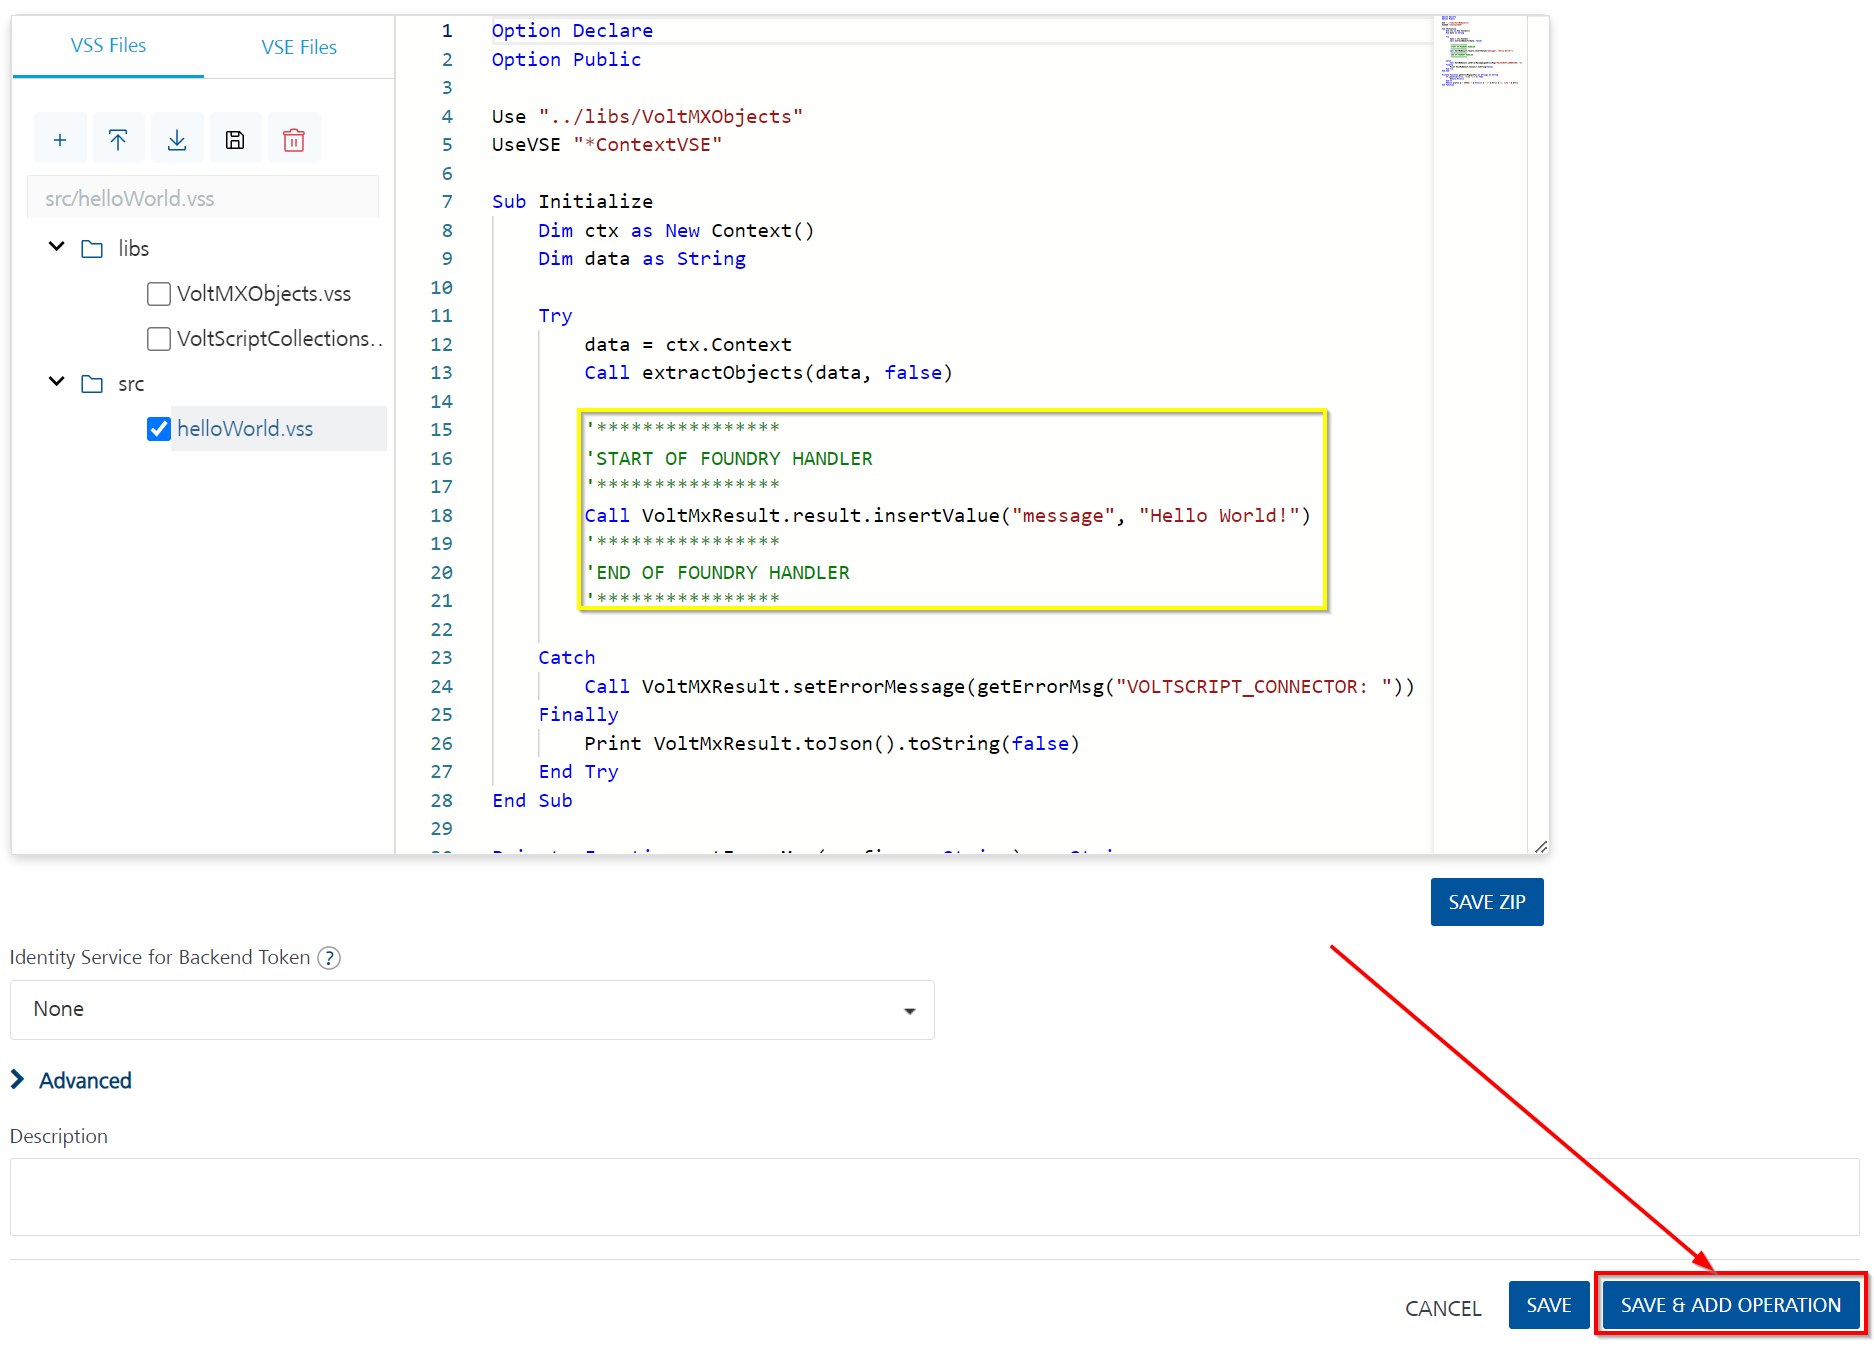
Now that we have some code to test, click SAVE & ADD OPERATION at the bottom of the page.
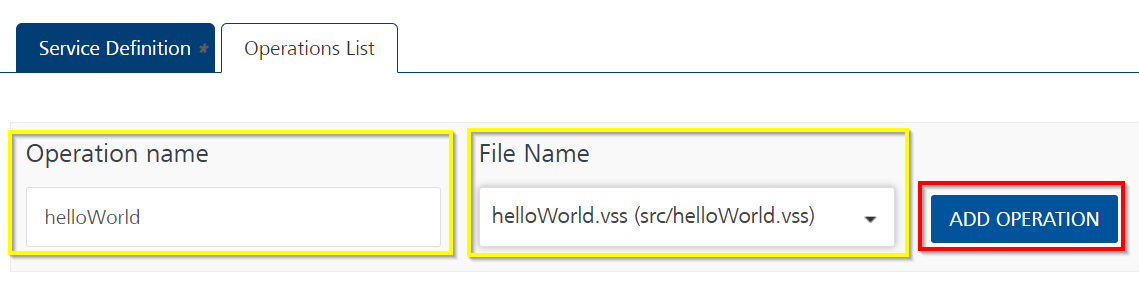
Add An Integration Service Operation
When you click SAVE & ADD OPERATION, it takes you to the Operations List tab where you can add an Operation to test your code.
- Set the name to "helloWorld".
- Select "helloWorld.vss" as the file.
-
Click ADD OPERATION.
-
Scroll down to the bottom of the operation and click SAVE AND FETCH RESPONSE button.
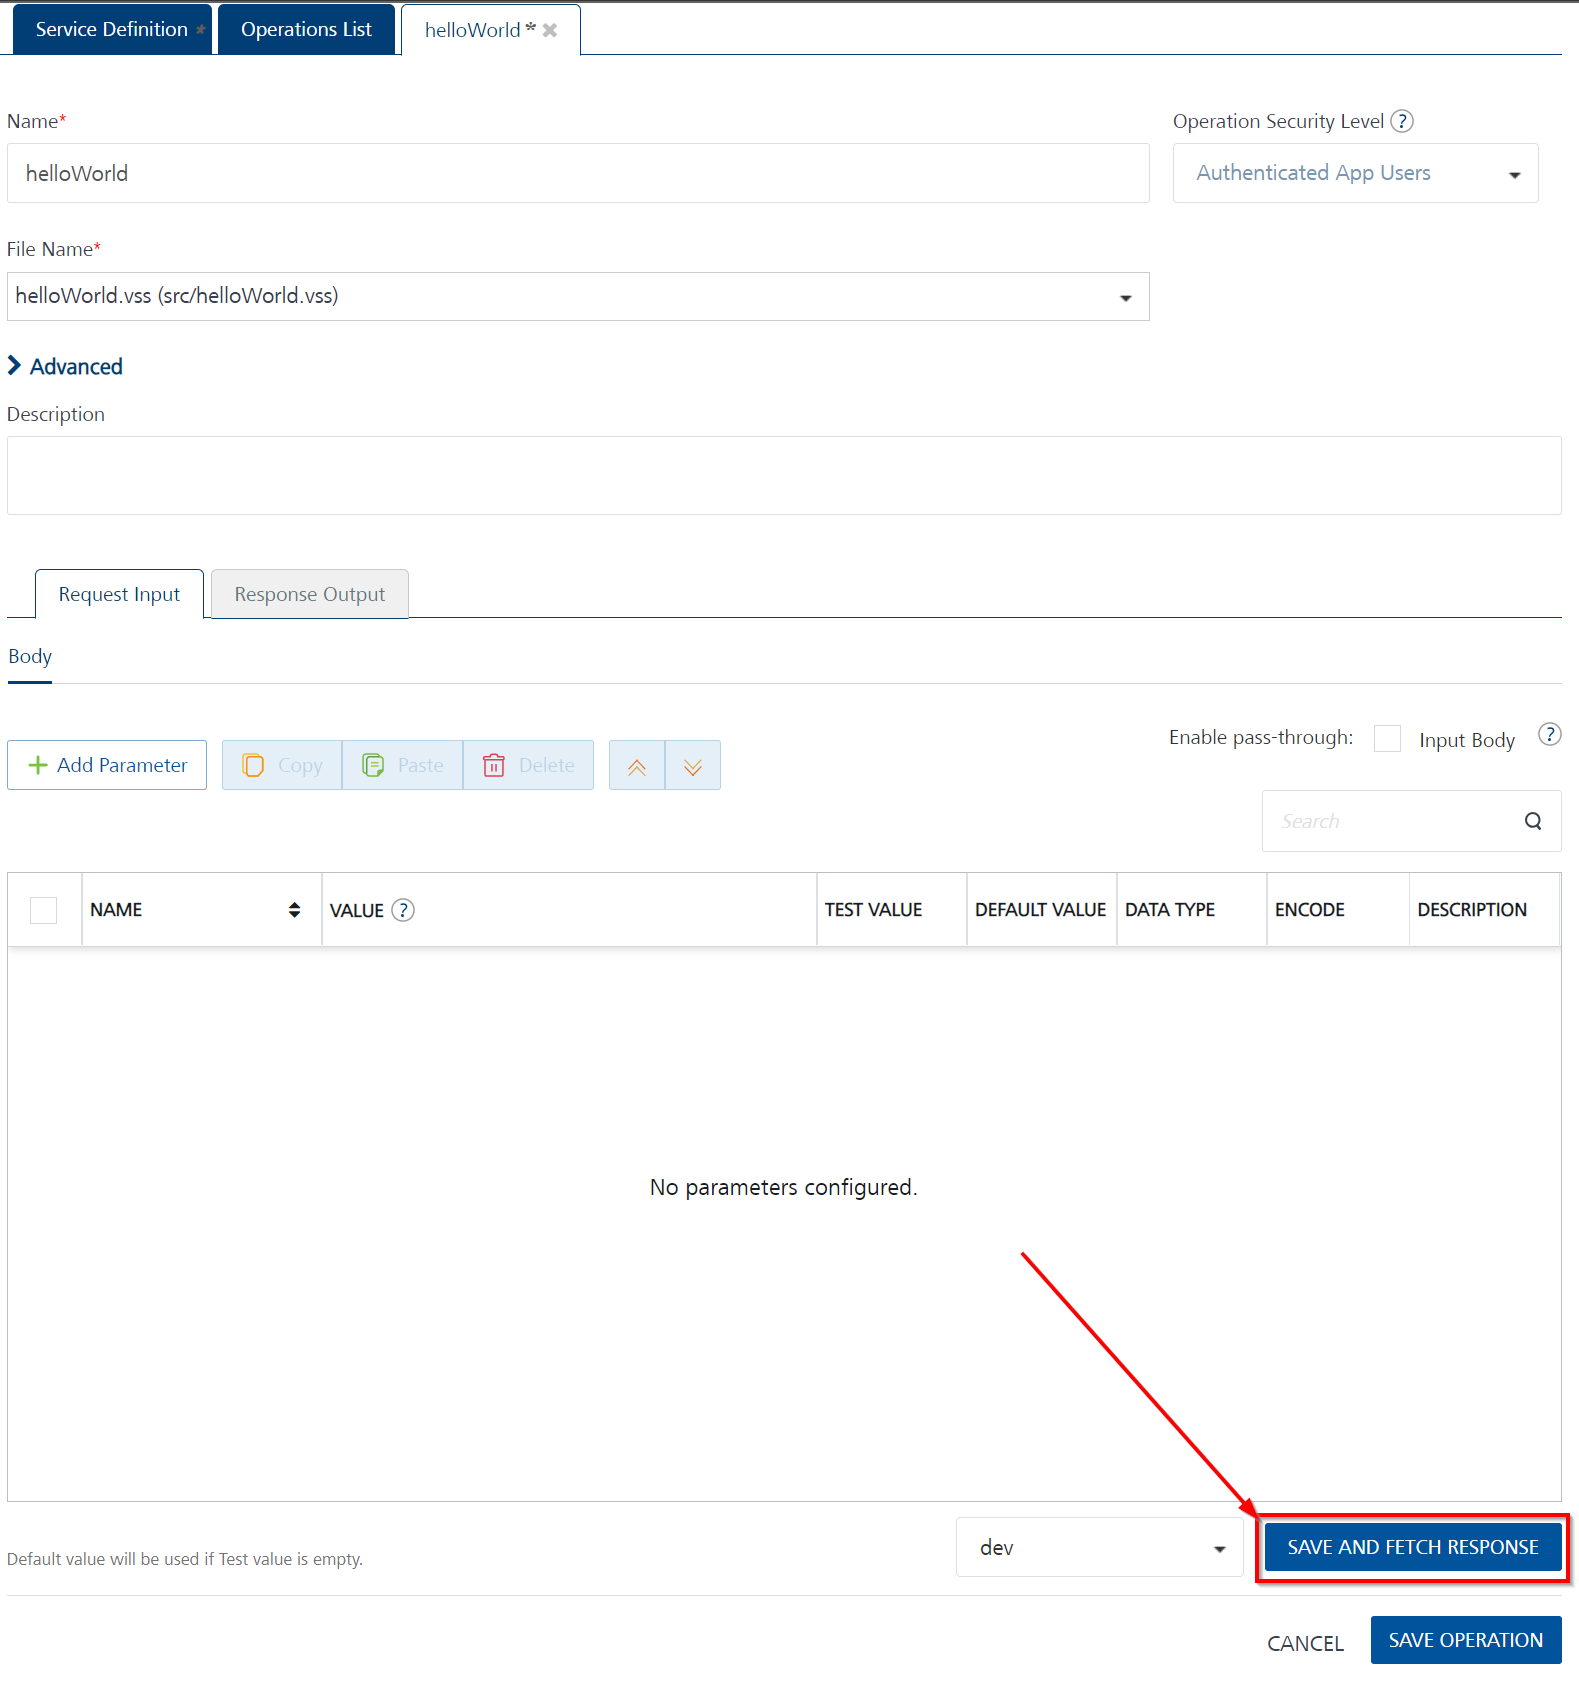
Warning
You need to have an environment set up to test an operation. If you haven't yet configured one, save the operation, follow the steps in Add an Environment, and then come back to the operation to test.
Success
The Output Result returns:
Congratulations! You've created your first VoltScript Integration Service.
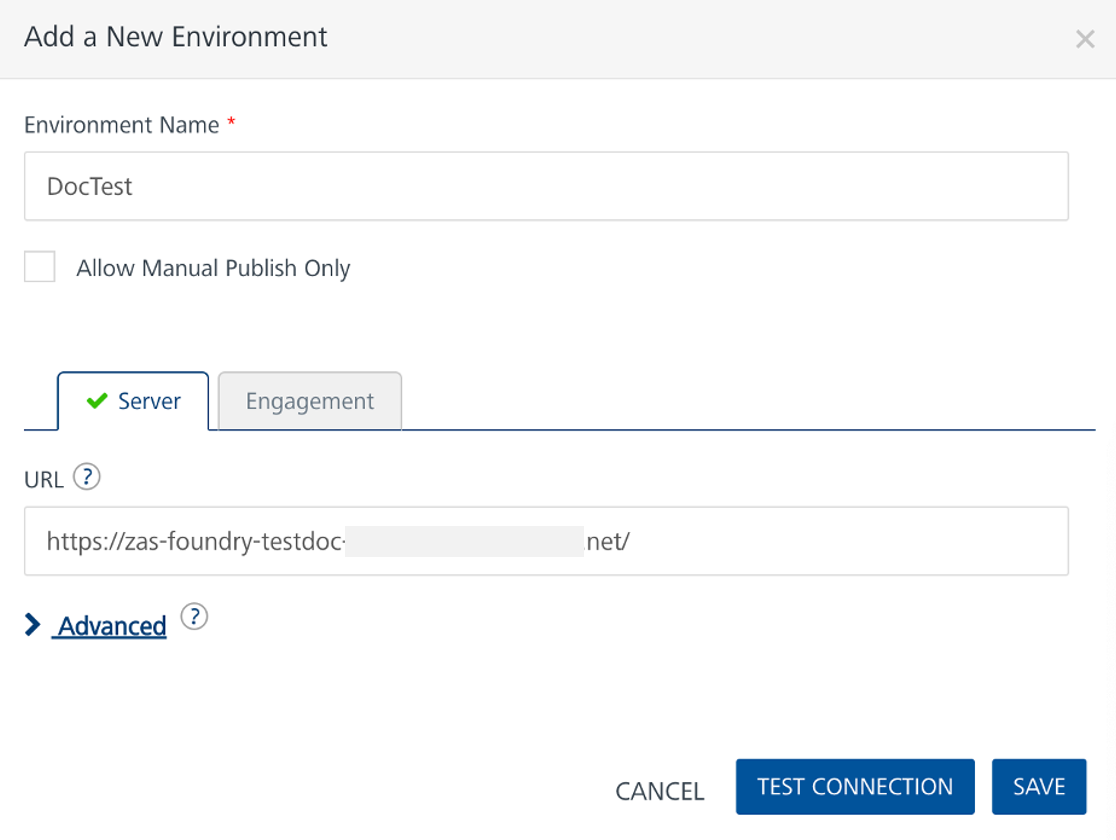
Add an Environment
- On the left pane on the Volt Foundry Console, click Environments.
- On the Environments page, click Add New. The Add a New Environment dialog opens.
-
In the Environment Name text box, enter an environment name.
Note
Your environment name can only contain letters, numbers, and hyphens (-). A hyphen can't appear at the beginning or at the end of a name. A number can't appear at the beginning of a name. A name should be a minimum of three characters and a maximum of 20 characters long.
-
On the Server tab, enter the URL of your Volt Foundry in the URL text box. The URL format is:
<http or https>://<server_host>:<server_port>
For example: http://mbaastest30.hcl.net:53504 - Click Test Connection to verify that the entered URL is correct. If the test is successful, a check mark appears beside the Server tab.
-
Click Save.
The code for the lab is available on GitHub.