Foundry Lab 03 - Domino REST API Integration Service
Duration 40 Min
What you will learn
You'll learn how to perform actions on data from Domino.
The first endpoint will be to populate a Domino database with demo data, which could subsequently be used as a REST service to bulk create documents based on a similar format - a process that might historically have been done by emailing a CSV file to the Domino developer who would run an import agent.
The next endpoint will change the company name on a Company document and update the name on related Contact documents. In Notes Client, this would be performed in a PostSave event. In a traditional Domino web interface, this would be completed in a WebQuerySave agent. In an XPages application, the PostSave event could be used, but more experienced developers would follow a similar approach to what we build here - write code to update the Company and update the related Contact documents. A completely coded approach could also be taken in Notes Client, but would use NotesUIWorkspace's Prompt or DialogBox to retrieve the new company name. But as we've explained, interaction with the end user is not possible from Volt Foundry.
Note
The key difference with code running on a Domino server is the approach for updating related documents: in LotusScript / SSJS / Java the developer will retrieve a view, get all documents based on a key and iterate the collection. Obviously that is a sub-optimal approach when the code is running anywhere other than the Domino server - separate HTTP requests are required for retrieving the collection and updating each document. DQL allows updates on multiple documents and this is the process used by Domino REST API's bulk update endpoints. This is the best-practice approach because the query for related documents and update is performed on the Domino server.
Prerequisites
-
This exercise assumes that:
- You're familiar with creating VoltScript integration services, as covered in Foundry Labs 01 and 02.
- You have a Domino server configured with Domino REST API running and OAuth enabled.
- You're familiar with creating a scope, schema and application in Domino REST API.
Steps
Schema / Scope
Note
The following steps assume you're familiar with creating schemas and scopes using Domino REST API. For more information, see the Domino REST API tutorials.
If you have have already completed Intro to VoltScript > Lab 04 - Connecting to a DRAPI Scope, go ahead and skip to the next section: Application and Oauth.
- Download the Demo Companies and Contacts Template and save it locally.
- Create a New Database instance from the template on the HCL Domino server upon which your HCL Domino REST API is installed, and set the ACL appropriately for your DRAPI instance.
- Create a Scope called
companiesandcontacts, and associate it with thedemo_companies_and_contactsSchema in your newly created database.
Application
- Log into Volt Foundry.
-
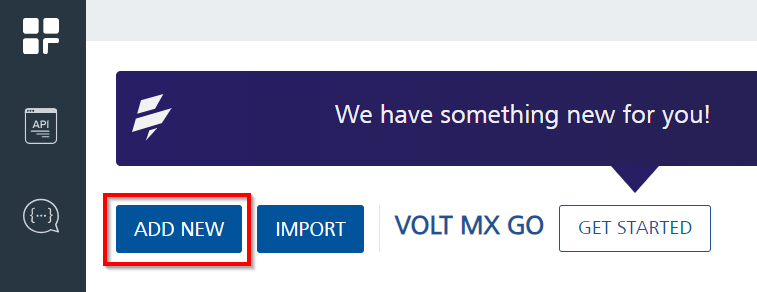
In the Apps page, click ADD NEW.
Integration Service
-
Create a new VS Code VoltScript Workspace folder called foundry-domino.
- Open Visual Studio Code.
-
From the Explorer view, click Open Folder.

-
Create a new folder in your user directory, with the name stated above.
- Select the newly created folder to open in VS Code.
atlas.json
- Right-click in the empty pane and select New File from the context menu.
- Name the file "atlas.json".
- Type "foundry-atlas" and accept the snippet.
- Set name to "foundry-lab-domino".
- Set description to "DRAPI in Foundry Lab".
- Set displayName to "foundry-lab-domino".
- Complete publisher and authors.
- Delete repo and library elements.
- Set version to "1.0.0".
- Add array elements in mainScripts for "populate.vss" and "update.vss".
- Add the usual repositories to the repositories array for VSEs and Library Modules.
- In the dependencies array, add VoltScript JSON Converter and VoltScript VoltMX Middleware:
- Set library to "voltscript-voltmx-middleware".
- Set version to "latest".
- Set module to "VoltMXObjects.vss".
- Set repository to "hcl-github".
- Set library to "voltscript-json-converter".
- Set version to "latest".
- Set module to "VoltScriptJsonConverter.vss".
- Set repository to "hcl-github".
- Add an entry to the vseDependencies object.
- Create a JSON element with the label DrapiVSE.
- Refer to the DrapiVSE Dependency Documentation for the current
library,version,module, andrepositoryvalues.
- Delete unitTestScripts, integrationTestScripts, and testDependencies elements.
-
Save the atlas.json.
The final atlas.json should look like this:
{
    "name": "foundry-lab-domino",           // REQUIRED: Enter a short name for your VoltScript project, e.g. "Demo1"
    "description": "DRAPI in Foundry Lab",  // REQUIRED: Enter a longer description, e.g. "My first demo project"
    "displayName": "foundry-lab-domino",  // A longer name to refer to the project, e.g. "Demo 1"
    "license": "Apache 2.0",    // A license to publish the project under.
                                // If you want this to be used by others, Apache 2.0 or MIT are recommended
    "publisher": "HCL America, Inc.",   // Copyright owner
    "authors": [        // REQUIRED: An array of authors, can be names or emails
        "YOUR NAME HERE"
    ],
    "version":"1.0.0",  // REQUIRED: Current version for this project, used with dependency management to find the modules
    "sourceDir": "src", // REQUIRED: Directory where mainScripts are located
    "testDir": "test",  // Directory where unitTestScripts and integrationTestScripts are located
    "libsDir": "libs",  // Directory where VoltScript Library Modules and shared scripts are located
    "vsesDir": "vses",  // Directory where VoltScript Extensions are located
    "mainScripts": [    // REQUIRED: Main scripts with Sub Initialize. Used to sync any additional files between
                        // sourceDir and testDir, if libsDir not set
        "populate.vss",
        "update.vss"
    ],
    "repositories": [       // Repositories in which to search for any dependencies
        {
            "id": "hcl-github",     // REQUIRED: Unique ID matching "repository" in a dependency in this file.
                            // Also matches label of a JSON object in atlas-settings, which gives any credentials to use to access this repository
            "type": "github",   // REQUIRED: Currently "github" or "webserver" are supported
            "url": "https://api.github.com/repos/HCL-TECH-SOFTWARE" // REQUIRED: Base URL of the repository
        },
        {
            "id": "volt-mx-marketplace",
            "type": "marketplace",
            "url": "https://community.demo-hclvoltmx.com/marketplace"
        }
    ],
    "dependencies": [
        {
            "library": "voltscript-voltmx-middleware",  // REQUIRED: Folder to be appended to the base URL when dependency management tries to download modules
            "version": "latest",  // REQUIRED: Version number of modules to download. Currently only supports explicit version or "latest"
            "module": "VoltMXObjects.vss",   // REQUIRED: Filename of a VoltScript Library Module to download
            "repository": "hcl-github"
        },
        {
            "library": "voltscript-json-converter",
            "version": "latest",
            "module": "VoltScriptJsonConverter.vss",
            "repository": "hcl-github"
        }
    ],
    "vseDependencies": {    // VoltScript Extension dependencies. NOTE: These also require a label
        "DrapiVSE": {        // REQUIRED: This label will be what you use in "UseVSE" statements
            "library": "DrapiVSE VoltScript Extension",  // REQUIRED: Folder to be appended to the base URL when dependency management tries to download modules
            "version": "1.0.0",  // REQUIRED: Version number of modules to download. Currently only supports explicit version or "latest"
            "module": "drapivse",   // REQUIRED: Filename of a VoltScript Library Module to download
            "repository": "volt-mx-marketplace"
        }
    }
}
VoltScript Dependency Manager
-
From the Command Palette in VS Code, run "VoltScript: Run Dependency Setup".
This will ensure that (among other things) a .vss folder is created within your VoltScript workspace. -
From the Command Palette, run "VoltScript: Install Dependencies".
- Enter the project directory, confirm atlas-settings.json and atlas.json locations.
Success
Your project should now have "src", "test", "libs", and "vses" directories.
- The src directory is empty.
- The test directory is empty.
- The libs directory has been populated with
VoltScriptJsonConverter.vss,VoltMXObjects.vssandVoltScriptCollections.vss. VoltScriptCollections is a downstream dependency of VoltMXObjects. - The vses directory has been populated with ddl and so files for DrapiVSE, ContextVSE, JsonVSE - these are downstream dependencies used by VoltMXObjects, automatically picked up because of its atlas.json.
- A new file,
seti.ini, has been created. This contains mapping for the VoltScript Extensions (VSEs) and will be used for mappingUseVSEstatements. - A new file,
effective-atlas.json, has been added to the root of the directory. This contains the aggregated settings for the project.
demo data
- Create a file in the src directory called
demodata.json. - Paste in the JSON from company-contacts.json.
- Save the file.
Contact class
- Create a file in libs directory called
functions.vss. This will hold reusable code. - Set
Option PublicandOption Declare. - Add
Use "VoltMXObjects"andUse "VoltScriptJsonConverter"directives. - Create a class called
Contact. - Declare four public string variables -
firstName,lastName,emailandcompany.
Company class
- In
functions.vsscreate a class calledCompany. - Declare two public string variables -
companyandaddress. - Declare a public variant variable -
contacts. - Add a sub called
addToJsonArraytaking a single argumentjsonArr as JsonObject. -
Add the following code:
Dim childDoc as JsonObject
Dim mainDoc as New JsonObject()

Call mainDoc.insertValue("Form", "Company")
Call mainDoc.insertValue("Company", Me.company)
Call mainDoc.insertValue("Address", me.address)
Call jsonArr.appendToJsonArray(mainDoc)

ForAll contact in contacts
    Set childDoc = new JsonObject()
    Call childDoc.insertValue("Form", "Contact")
    Call childDoc.insertValue("Company", Me.company)
    Call childDoc.insertValue("FirstName", contact.firstName)
    Call childDoc.insertValue("LastName", contact.lastName)
    Call childDoc.insertValue("Email", contact.email)
    Call jsonArr.appendToJsonArray(childDoc)
End ForAll
convertJson function
- In
functions.vsscreate a function calledconvertJson()that takes no arguments and returns a JsonObject. -
For the body of the function, enter:
Dim jsonObj as JsonObject Dim temp as JsonObject Dim company as Company Dim parser as New JsonParser() Dim docs as New JsonObject(True) Dim helper as New JsonConversionHelper() Dim contactConverter as New JsonBasicObjectArrayConverter("Contact", "../libs/functions") ' Load file Call parser.loadFromFile(PROJECT_DIR & "/src/demodata.json") Set jsonObj = parser.getRootObject() 'Deserialize Customers Call helper.withCustomConverter("contacts", contactConverter) ForAll child in jsonObj.getChildren() Set temp = child Set company = helper.toObject(temp, "Company", "../libs/functions").fromJson(temp) Call company.addToJsonArray(docs) End ForAll Return docs -
Save the file.
The code loads the JSON and seeds a JsonConversionHelper with a BasicObjectArrayConverter to convert the contacts array to Contact objects. This only populates the first name, last name, and email. The code iterates each JSON object and creates a Company object for each, populating company, address and the contacts.
populate.vss
- Create a file called
populate.vssin src directory. - Type "foundry" and accept the Foundry Boilerplate snippet.
- Add a directive to use the
DrapiVSEVoltScript Extension - Add a directive to use functions library you just saved.
-
Add the following declarations at the top of the
Sub Initialize:Dim docs as JsonObject Dim request as DrapiRequest Dim responseObj as JsonObject Dim payload as New JsonObject() Dim server as New DrapiServer() Dim parser as new JsonParser() Dim response as DrapiResponse Dim username as String Dim password as String -
Add the following code between the
START OF FOUNDRY HANDLERandEND OF FOUNDRY HANDLER:server.serverURL = VoltMXRequest.getInputParam("serverURL") username = VoltMXRequest.getInputParam("username") password = VoltMXRequest.getInputParam("password") Call server.login(username, password) Set request = server.createRequest("companiesandcontacts") Set docs = convertJson() Call payload.insertValue("documents", docs) Set response = request.bulkCreateDocuments(payload.toString(false)) Call parser.loadFromJson(response.ContentBody) Set responseObj = parser.getRootObject() VoltMxResult.httpStatusCode = 200 Call VoltMXResult.result.insertValue("result", responseObj.childCount & " docs created") -
Save the file.
Info
In this exercise we will be logging into Foundry with named credentials. This simulates authenticating with a service account. These credentials could be provided in multiple ways:
- passed into each request (not recommended).
- session variables set during a basic authentication call to Foundry.
- request variables retrieved during a preprocessor from environment variables or other stored location.
- session variables lazy-loaded during a preprocessor.
- hard-coded credentials in the script, as done here. Admins may wish to add more restricted access to Foundry console to secure the credentials.
If you want to run as the current user, the better approach would be to use an Identity Service, as you would have done if you have configured Domino Adapter for other Volt MX Go tutorials. This will be done in the Identity Service and DRAPI tutorial.
Package for Volt Foundry
- From the Command Palette, run "VoltScript: Package for Foundry".
- Enter the project directory.
- Confirm atlas.json locations.
- Enter
src/demodata.jsonfor additional files to package.
Success
A file will be created in the root of the project called "foundry-lab.1.0.0.zip". The zip name comprises the project name and the project version from the atlas.json.
Create Volt Foundry Integration Service
- Log into Volt Foundry.
- On the Apps page, click ADD NEW.
-
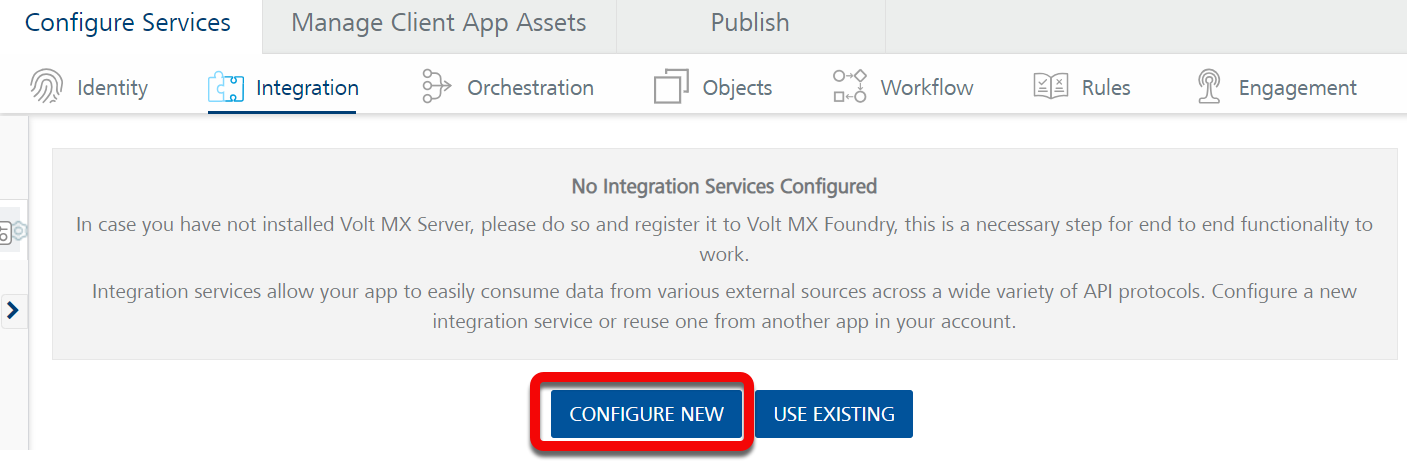
On Configure Services tab, click the Integration tab and then click CONFIGURE NEW.
-
Set the Name to "foundry-drapi-vs".
- Select "VoltScript" for Service Type.
- Click Upload New and select the zip file you just created.
- Click SAVE & ADD OPERATION.
- Set the name to "populate".
- Select "populate.vss" as the file.
- Click ADD OPERATION.
- Scroll down to the Request Input tab and click + Add Parameter.
- Set the NAME to
serverURL. -
Set the TEST VALUE to your domino server's Domino REST API base url, for example
http://localhost:8880/api/v1.Note
The URL needs to end with
/api/v1. -
Add a parameter for
usernameand set the TEST VALUE to your username for your DRAPI Server. - Add a parameter for
passwordand set the TEST VALUE to your password for your DRAPI Server. - Verify that the ENCODE checkbox for all parameters is checked.
- Scroll down to the bottom of the operation and click SAVE AND FETCH RESPONSE.
-
On Identity Backed Response tab, click AUTHORIZE to authenticate to the Domino REST API.
Success
The output result shows the following JSON object:
Tip
Verify by opening the database with Notes Client / Nomad Web. The "companies" view will have Company documents in it. The "contacts" view will have Contact documents which have the company name. This process can be used to seed a test database with demo documents or, by passing a JSON payload, it can be used to replace an import agent with a REST service endpoint.
Advanced
Further enhancements are possible:
- Add proper error handling.
- Unit testing could be added to test the
convertJsonfunction. - You could test the main code to populate the database. You would move it into a function, with the
DrapiServer()object and variables passed. TheDrapiServerwould need to be manually logged in usingDrapiServer.login(*username*,*password*)before being passed to the function. - The REST service can be enhanced further to validate the incoming JSON, in the same way that an import agent would validate each line of a CSV file. VoltScript Testing Framework can be used to perform validation
update.vss
- Create a file called
update.vssin src directory. - Type "foundry" and accept the Foundry Boilerplate snippet.
- Add directives to use the
DrapiVSEVoltScript Extension and the functions library. -
Add the following declarations at the top of the
Sub Initialize:Dim request as DrapiRequest Dim doc as DrapiDocument Dim companyPayload as JsonObject Dim parser as New JsonParser() Dim server as New DrapiServer() Dim replaceItems as New JsonObject() Dim response as DrapiResponse Dim newCompanyName As String Dim oldCompanyName As String Dim query as String Dim unid as String Dim username as String Dim password as String -
Between the two comment blocks, enter the following code:
unid = VoltMXRequest.getInputParam("unid") newCompanyName = VoltMXRequest.getInputParam("CompanyName") server.serverURL = VoltMXRequest.getInputParam("serverURL") username = VoltMXRequest.getInputParam("username") password = VoltMXRequest.getInputParam("password") Call server.login(username, password) Set request = server.createRequest("foundrycontacts") Set doc = request.getDocument(unid) Call parser.loadFromJson(doc.JsonValue) Set companyPayload = parser.getRootObject() oldCompanyName = companyPayload.getChild("Company").scalarValue Call companyPayload.insertValue("Company", newCompanyName) doc.JsonValue = companyPayload.toString(false) Call VoltMxResult.result.insertValue("companyUpdated", doc.put("", "default")) query = "Form = 'Contact' and Company = '" & oldCompanyName & "'" Call replaceItems.insertValue("Company", newCompanyName) Set response = request.bulkPatchDocuments(query, replaceItems.toString(false), "html", "default", 5000, True, True) Call parser.loadFromJson(response.ContentBody) VoltMxResult.httpStatusCode = 200 Call VoltMxResult.result.insertValue("contactsUpdated", parser.getRootObject()) -
Save the file.
Re-Package for Volt Foundry
- From the Command Palette, run "VoltScript: Package for Foundry".
- Enter the project directory.
- Confirm atlas.json locations.
- Enter
src/demodata.jsonfor additional files to package.
Success
A file is created in the root of the project called "foundry-lab.1.0.0.zip". The zip name comprises the project name and the project version from the atlas.json.
Update the Integration Service
- Log into Volt Foundry.
- On the Apps page, select the app you created.
- On Configure Services tab, click the Integration tab.
- Click the Service Definition tab for the "foundry-drapi-vs" integration service.
- Click Upload New and select the zip file you just created. You will receive a warning that this will update the endpoint operations. Click OK.
- Click SAVE & ADD OPERATION.
- Set the name to "update".
- Select "update.vss" as the file.
- Click ADD OPERATION.
- Scroll down to the Request Input tab and click + Add Parameter.
- Add the parameters for
serverURL,username, andpasswordin the same manner as you did for the populate service. - Click + Add Parameter and set the NAME to
unid. - Copy the UNID of a Company document in the Domino database.
- Set the TEST VALUE to the UNID.
- Click + Add Parameter and set the NAME to
CompanyName. - Set the TEST VALUE to a modified company name.
-
Scroll down to the bottom of the operation and click SAVE AND FETCH RESPONSE.
Success
The output result shows a JSON object with:
httpStatusCodeset to 200.companyUpdatedset totrue.contactsUpdatedcontaining a JSON object of results for each contact update - UNID, success message, and status details.