Foundry Lab 04 - VoltScript pre/postprocessors
Duration 15 Min
What you will learn
You'll learn how to create a JSON integration service, manipulate / validate input parameters in a VoltScript preprocessor and manipulate the output in VoltScript postprocessor.
Prerequisites
- Lab 03 completed
Steps
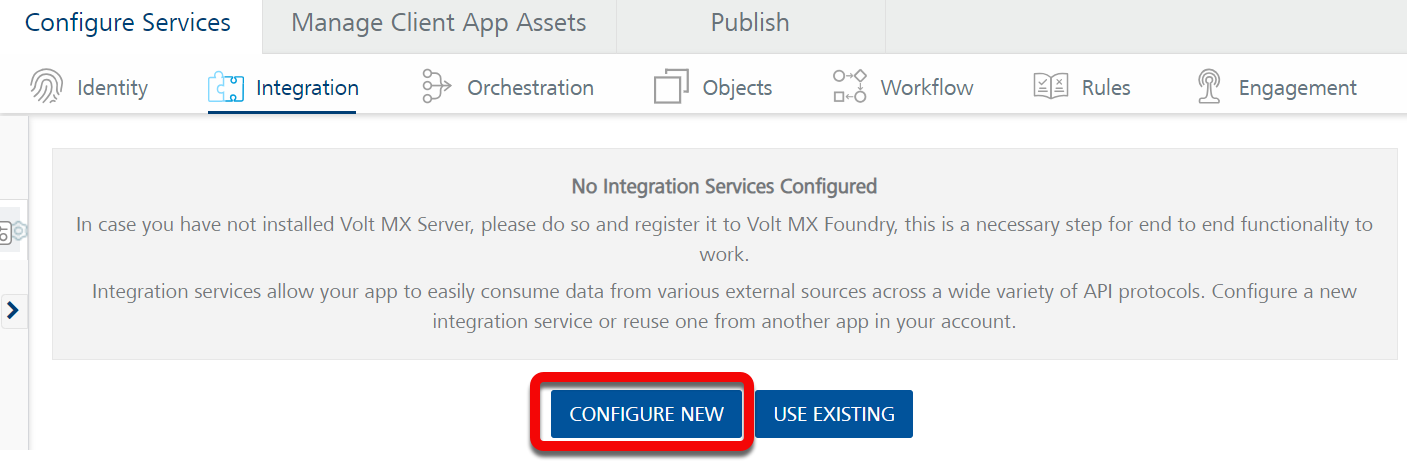
Create Integration Service
- Log into Volt Foundry.
- On the Apps page, click ADD NEW
-
On Configure Services tab, click the Integration tab and then click CONFIGURE NEW.
-
Set the Name to "petstore".
- Select "JSON" under Service Type.
- Set the Base URL to "https://petstore.swagger.io/v2/".
- Click SAVE & ADD OPERATION.
- On the NewOperation tab, set the Name to "getPets".
-
Set the Target URL to "pet/findByStatus?status=$status".
Note
The
$statusmeans it will pick up an input parameter called "status". -
Scroll down to the Request Input tab and click + Add Parameter.
- Set the NAME to "status".
- Set the TEST VALUE to "available".
-
Scroll down to the bottom of the operation and click SAVE AND FETCH RESPONSE.
Success
A JSON payload of available pets is returned.
Create preprocessor
- On the NewOperation tab, expand the Advanced section.
- On the Custom Code Invocation tab, select the VoltScript radio button under Preprocessor.
- Select the Validate Input Parameter code snippet. This shows how to retrieve and check input parameters, using
return falseto abort execution. -
Replace the code with the following VoltScript code:
Dim status as String
status = VoltMxRequest.getInputParam("status")

Select Case status

Case "0":
    Call VoltMxResult.addInputParam("status","available")
Case "1":
    Call VoltMxResult.addInputParam("status","pending")
Case "2":
    Call VoltMxResult.addInputParam("status","sold")
Case Else
    Call VoltMxResult.setErrorMessage("Unexpected status passed - " & status)
    return false
End Select
This manipulates the incoming parameter, switching from a number to a corresponding string.
-
Change the test value to
0. -
Scroll down to the bottom of the operation and click SAVE AND FETCH RESPONSE.
Note
The output result just includes opstatus and httpStatusCode. This is because nothing has been mapped from the backend response (the response from the JSON service) to the output result (the Foundry response).
-
On the Backend Response, click [0] to create a response.
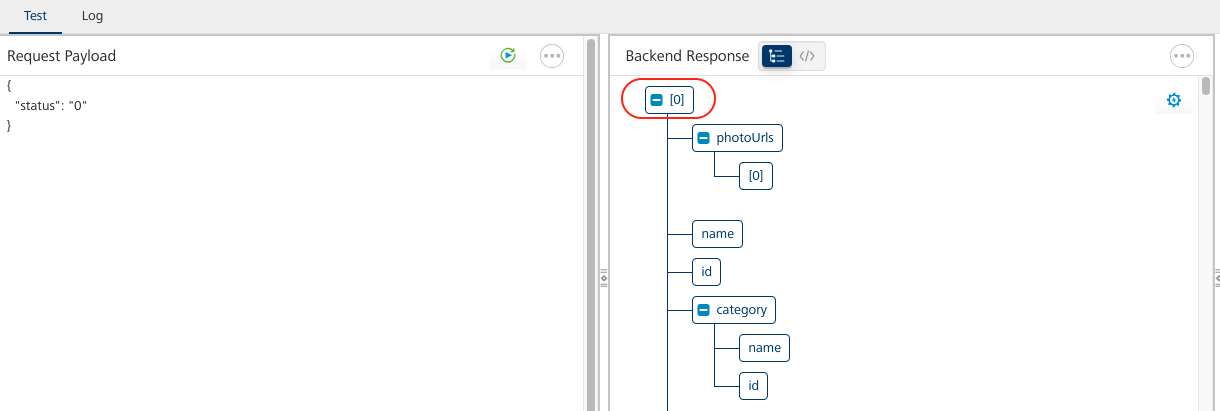
If you scroll down the operation and look at the Response Output tab, you'll see a
responseListcollection has been added to the output, along with all the JSON elements.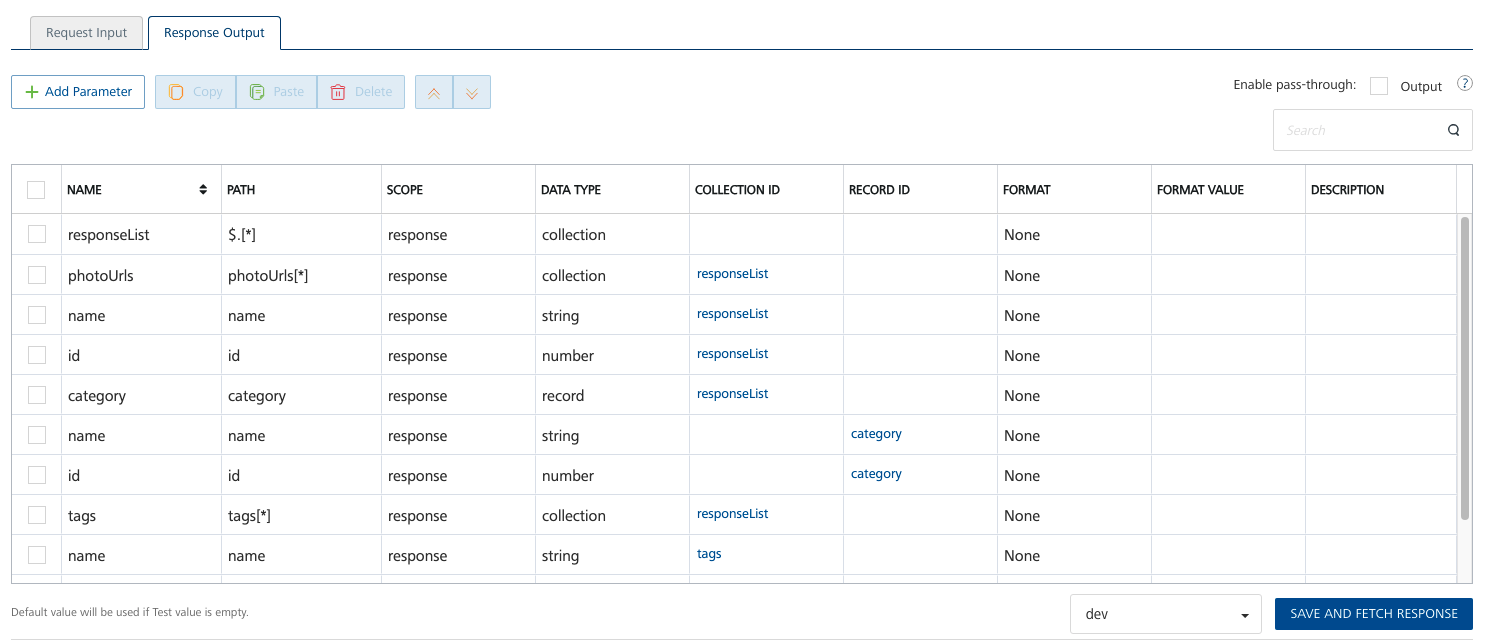
-
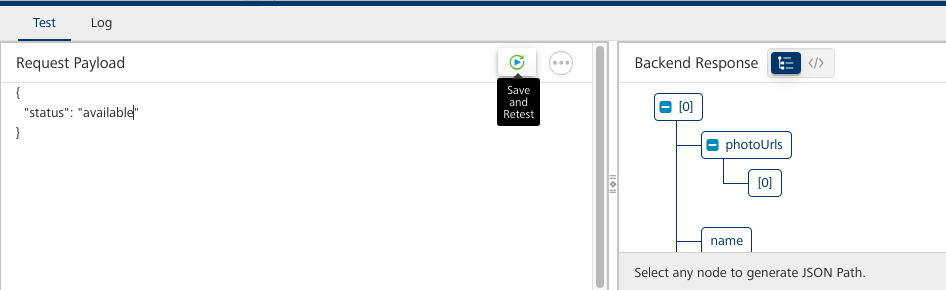
On the Test tab, change the status passed in the JSON object to "available".
-
Click Save and Retest.
Success
You've ran validation and manipulated an input parameter. Although this particular use case is unlikely, two of the most common use cases for a preprocessor will be validating an input parameter and setting an input parameter, which we've done here.
Create postprocessor
- On the NewOperation tab, expand the Advanced section.
- On Custom Code Invocation tab, select the "VoltScript" radio button under Postprocessor.
-
Paste the following VoltScript code:
Dim child as JsonObject
Dim responseList as JsonObject
Dim newResponseList as New JsonObject()
Set responseList = VoltMXResult.result.getChild("responseList")
ForAll jsonObj in responseList.getChildren()
    Set child = jsonObj
    If (child.isChild("name")) Then
        Call child.insertValue("name", StrConv(child.getChild("name").scalarValue, 3))
        Call newResponseList.appendToJsonArray(child)
    End If
End ForAll
Call VoltMxResult.result.insertValue("responseList", newResponseList)
This gets the
responseListelement in theVoltMxResultresult. "responseList" was the name the response was mapped to on the Response Output tab. We then iterate the children and, for those with a "name" element, proper case the name and add to a new JsonObject array. We then replace theresponseListelement with the new JSON array. -
Scroll down to the bottom of the operation and click SAVE AND FETCH RESPONSE.
Success
You've manipulated the response from a third-party integration service. This is one of the most common use cases for a postprocessor.