HCL Notes & Domino Webex Meetings Integration
HCL Notes and Domino integration with Webex Meetings allows you to add an ad hoc meeting to your calendar entry. After setting up your online meeting credentials, at a single click you can:
- create a Webex meeting and add the link to your calendar entry
- update the Webex meeting if key details on the calendar entry have changed
- delete the Webex meeting if the calendar entry is no longer required
1. Pre-Requisites
It is assumed you are already a Notes and Domino customer and familiar with Domino administration. There is no additional subscription required. The functionality only requires a minor modification to your mail template, which will need to be done by your Domino Administrator. The documentation covers all the steps required to do this.
You will need:
- a paid Webex Meetings Account. This only works with paid Webex Meetings Accounts. Free Webex Meeting Accounts unfortunately do not qualify.
- an HCL Notes Client including Domino Administrator and Domino Designer.
- the DOMI Installation database.
2. Installation Process
Full details are covered in the documentation. You will need to:
- Download the DOMI Installation database. Installation will run quickest from a local database.
- Open the database. You will be brought to a landing page which walks you through the steps.
- If you have decided to host your own version of the OAuth application that communicates to Webex Meetings. You will also need to update the
g_DOMI_ROOTURL_TOKENconstant in the same place. This should just be the hostname of the server, in the format “https://demoDOMI.hcltechsw.com”.
3. Signing The Database
Sign the database with your organisation’s signing ID or other appropriate Notes ID for signing databases prior to deployment to production.
4. Installation
Installation process runs quickest using a local replica of DOMI Installation database against a local replica of the mail template.
In the DOMI Installation database’s landing page, click the Install DOMI action button. You will be prompted to select the mail template into which to deploy DOMI. Within seconds the process will complete and the design elements will have been copied into the mail template. The standard Domino design task can be used to propagate the changes to relevant users.
If the ID running the install is different to the signer of the mail template, it is recommended to re-sign the mail template after installing DOMI.
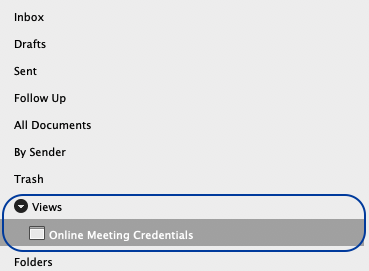
5. Setting Up Online Meeting Credentials
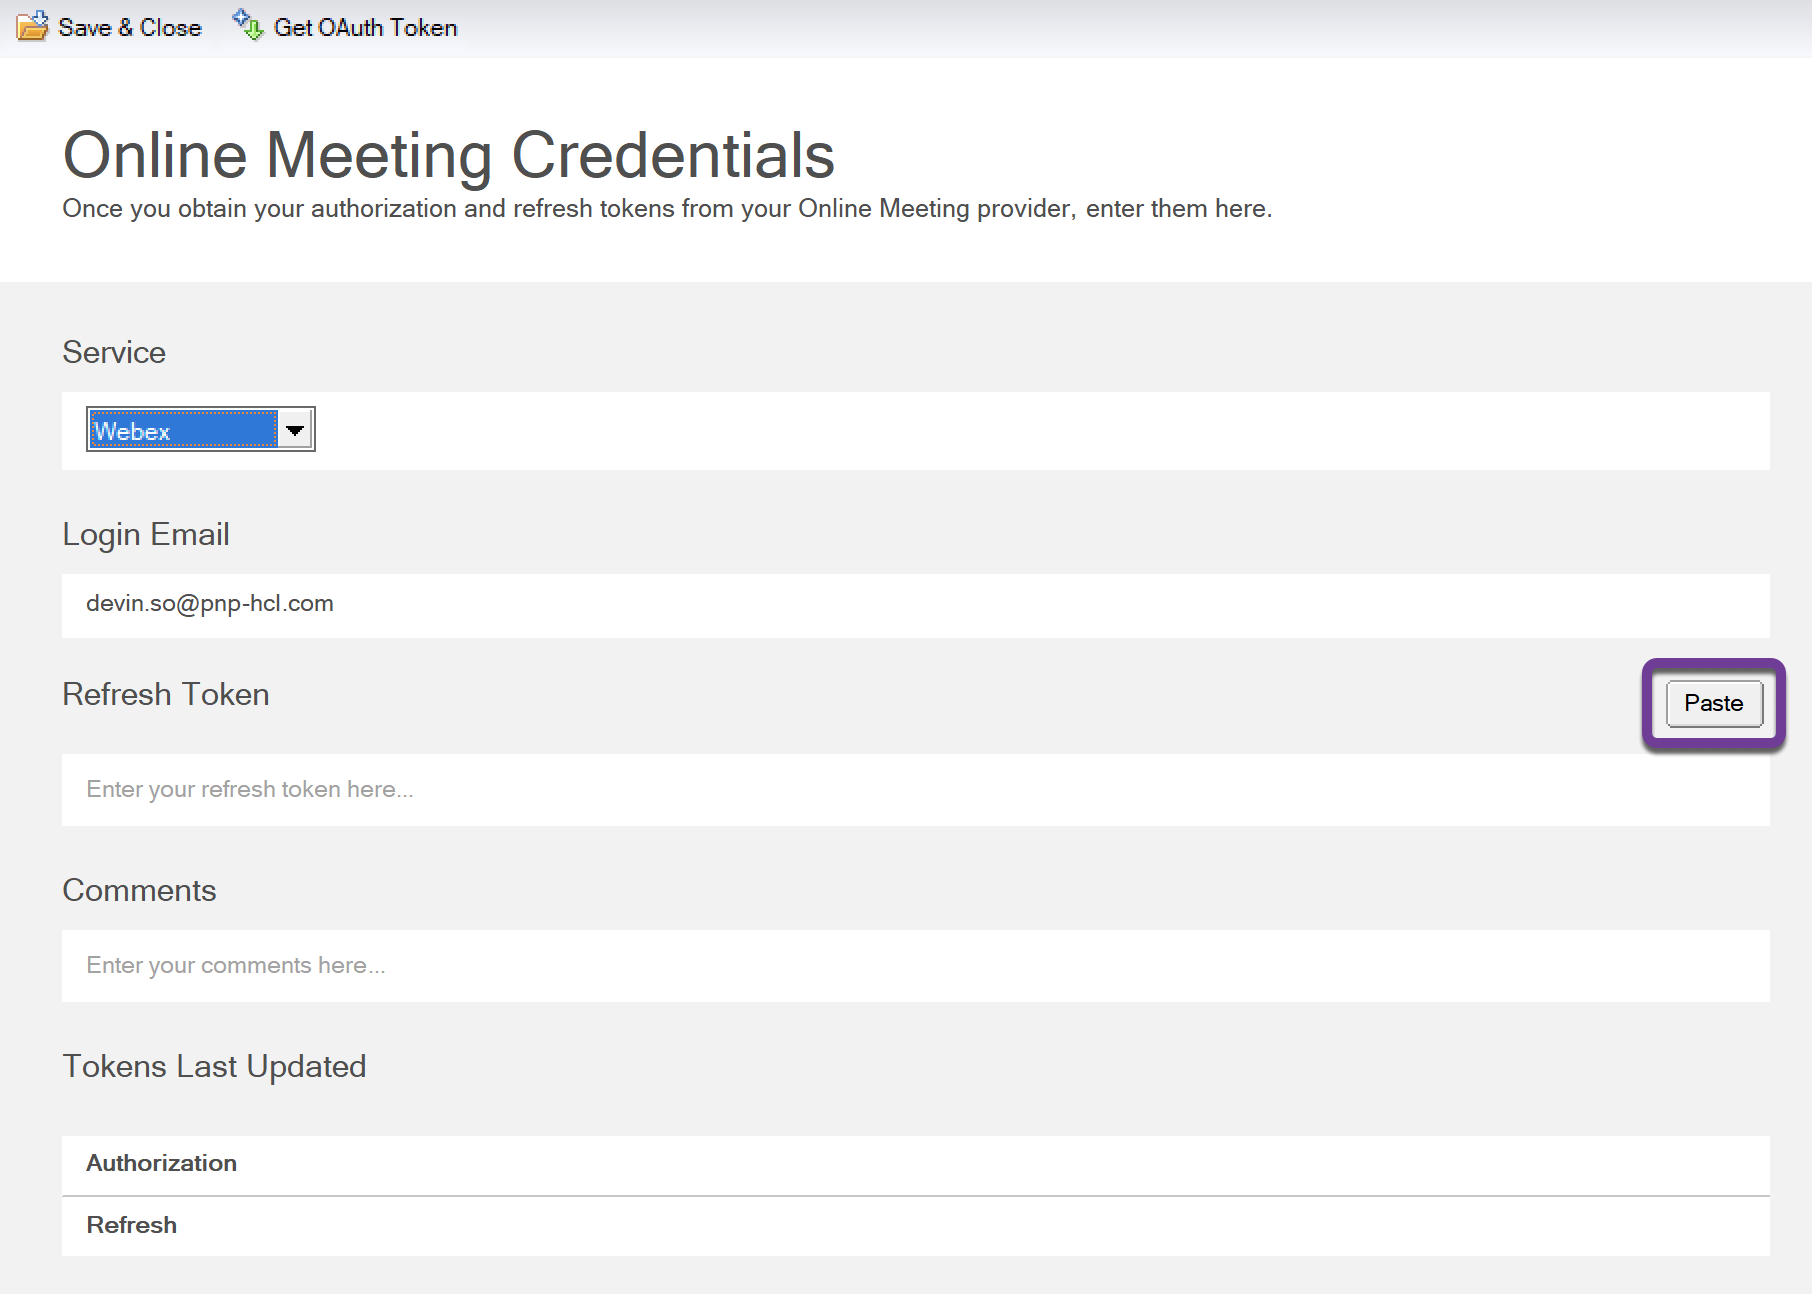
- Go to the Online Meeting Credentials view.
- click the New Meeting Credentials button.
- Click the Get OAuth Token button.
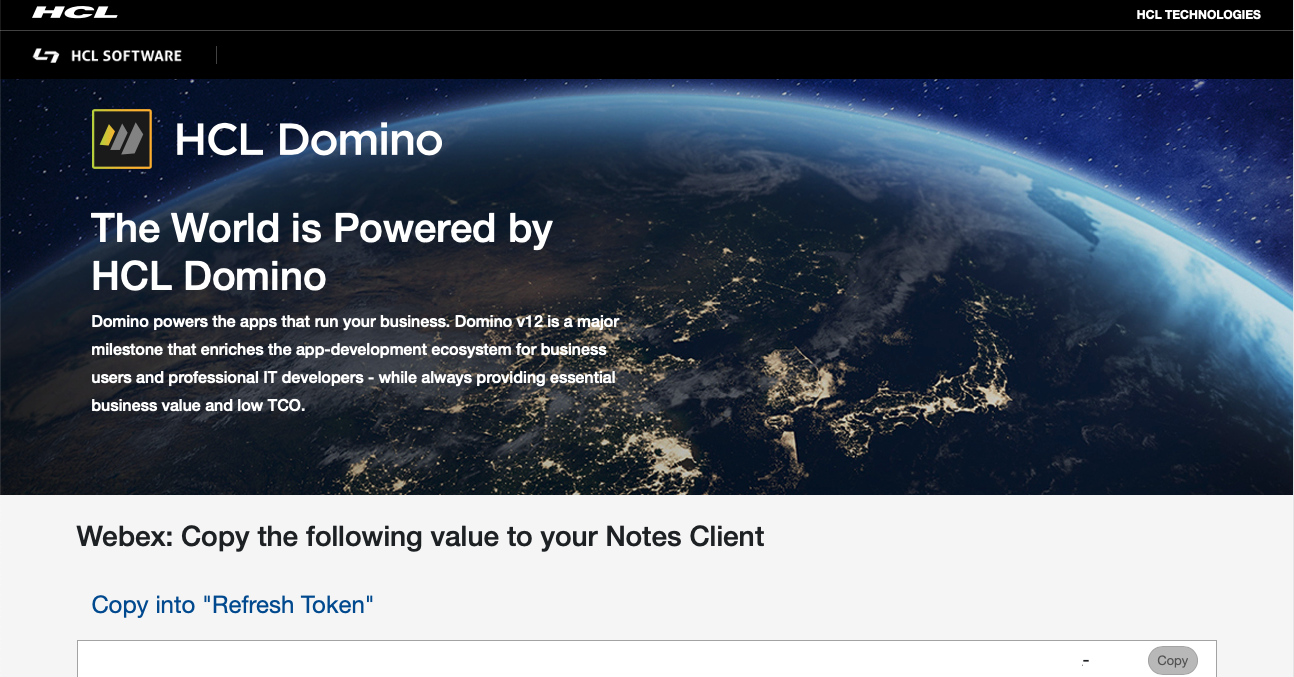
- You will be taken to a browser to authenticate with the relevant meeting service. After authenticating, you will be redirected to a page with a refresh token. The format of the token will vary depending on the meeting provider. Click Copy.
- Return to the Notes Client and click the Paste button. Using the Paste button automatically saves and validates the token. If you use paste into the field manually, you will need to save and close to trigger the token validation.
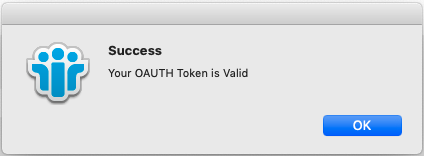
- The system will automatically validate and retrieve an access token. If successful, you will receive the following success message. You are now ready to create ad hoc meetings for this provider and can save and close the Online Meeting Credentials document.
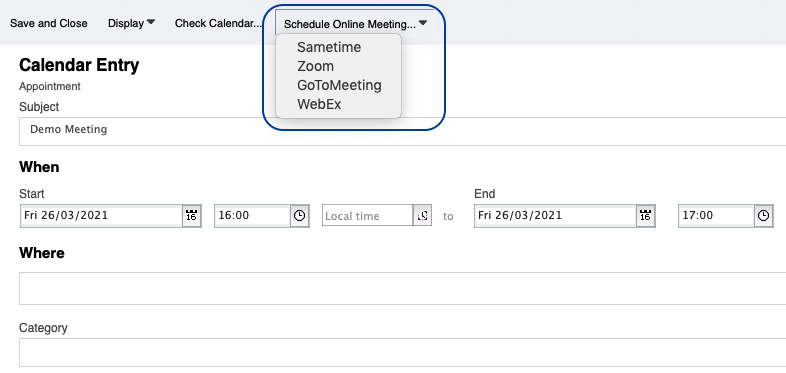
6. Creating Online Meetings from Calendar Entries
The Schedule Online Meeting… action button will only be available if you have configured online meeting credentials for one or more services. The actions underneath will depend on which online meeting credentials were configured when the calendar entry was created.
- Create a Calendar Entry and complete as normal. Where services support that functionality, Subject, dates/times and agenda will be sent to the meeting provider for the ad hoc meeting. So it is recommended that you complete those details before scheduling the online meeting.
- Click Schedule Online Meeting… and select the desired meeting provider.
- If the access and refresh tokens are valid, you will be notified that the meeting has been generated, the details added to the Location field.
- If the refresh token is no longer valid, you will be prompted to request a new token. To complete adding an ad hoc meeting for this provider, click “Yes”.
- You will be taken to the Online Meeting Credentials form. Click the Get OAuth Token button (or Get Sametime Token button for Sametime) and continue through authentication. This is the same process outlined in the Online Meeting Credentials section.
- Once complete, save and close the Online Meeting Credentials.
- Return to the calendar entry and click Schedule Online Meeting… and select the desired meeting provider. The online meeting should now be created successfully.