Iris Enterprise
Volt MX Iris Tutorials
Iris
1. Import A Project Created In Iris
-
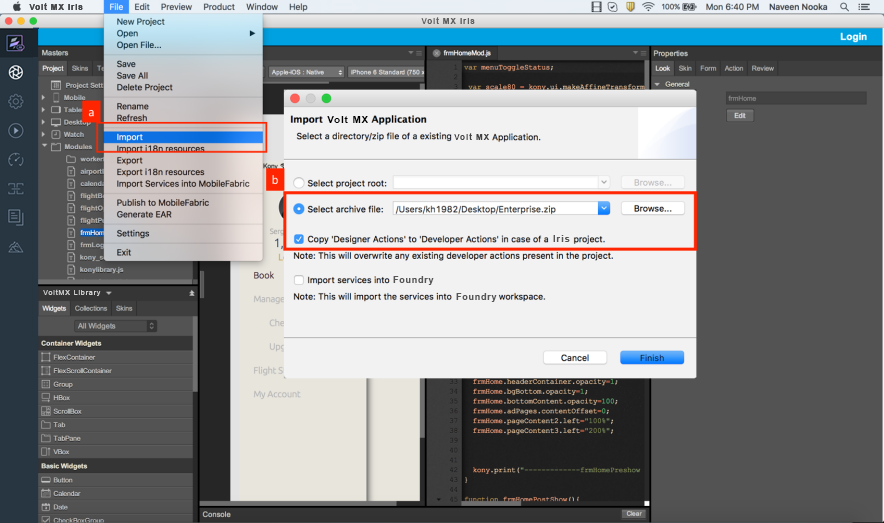
Click on Import.
-
Select the archive file. Check the Copy Designer Actions to Developer Actions option to copy the actions defined.
2. Add Splash
-
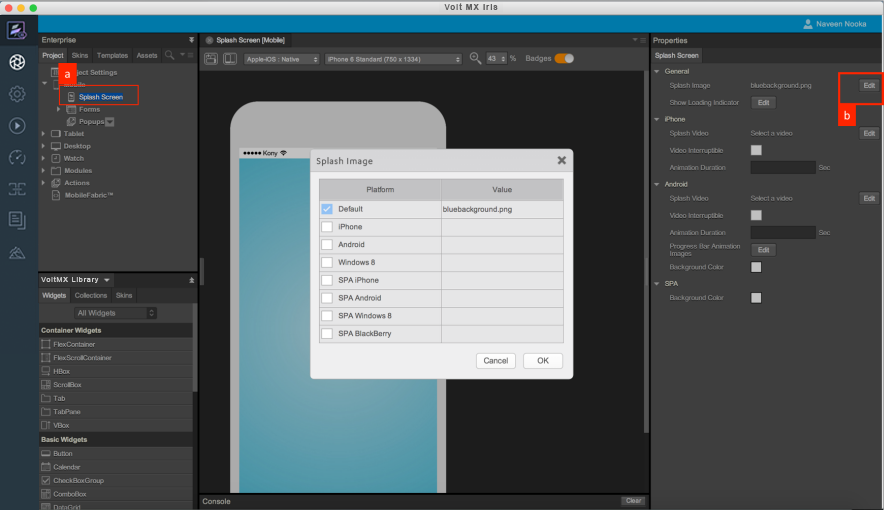
Click on Splash Screen node under Mobile Channel. Splash Screen appears on Iris Canvas.
-
Click on Edit in Splash screen properties and in the pop up that opens, assign the required Splash image.
3. Service Integration
-
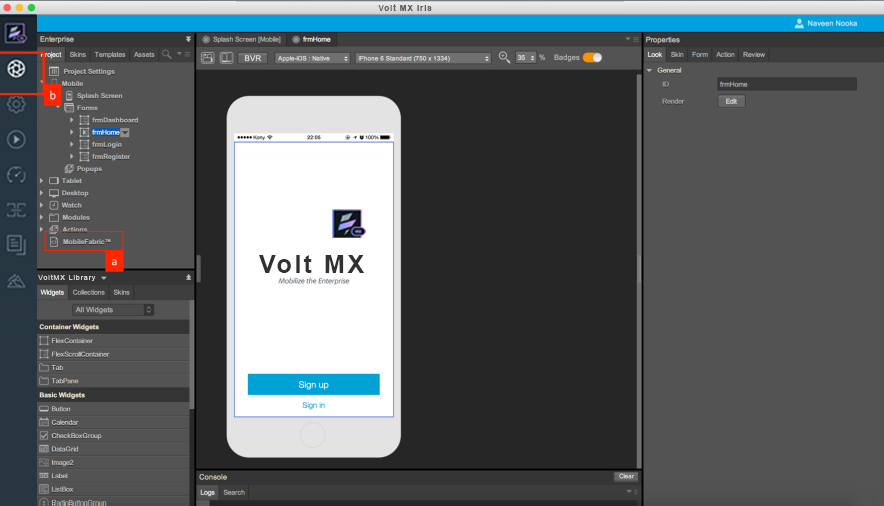
To configure services, click on Foundry™ node displayed under Project explorer. All the service definitions are to be done in the Foundry™ console.
-
To Jump back to Iris Canvas from Foundry™ console click on the workspace icon.
4. App Icon
-
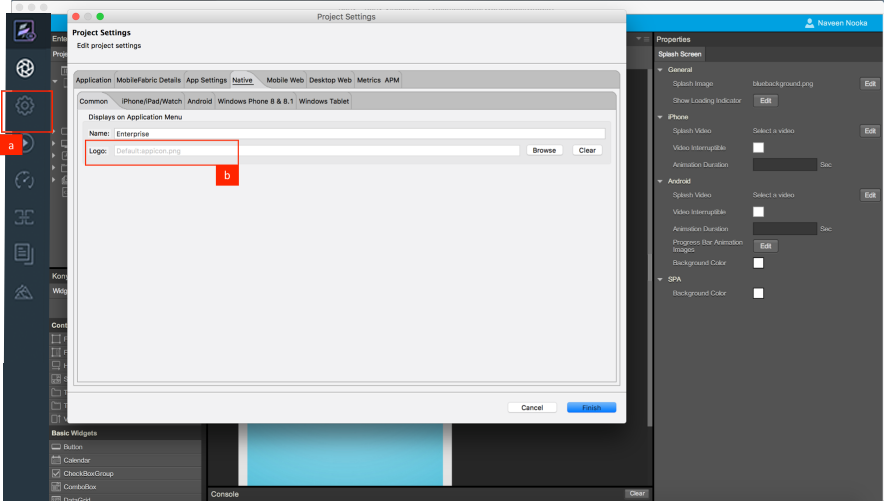
To configure an app icon (logo) click on Project Settings.
-
In the Project Settings explorer, navigate to the Native tab and assign the required Logo.
5. Build App Binary
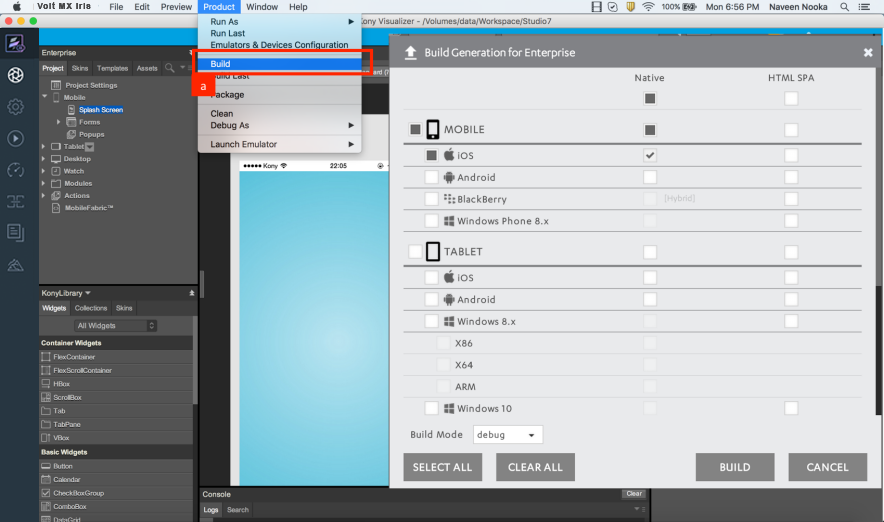
-
To generate the application binary click on Build.
-
All the available channels and platforms are listed on the Build screen. Choose the required channels and platforms and generate the build.
6. Configure Emulators
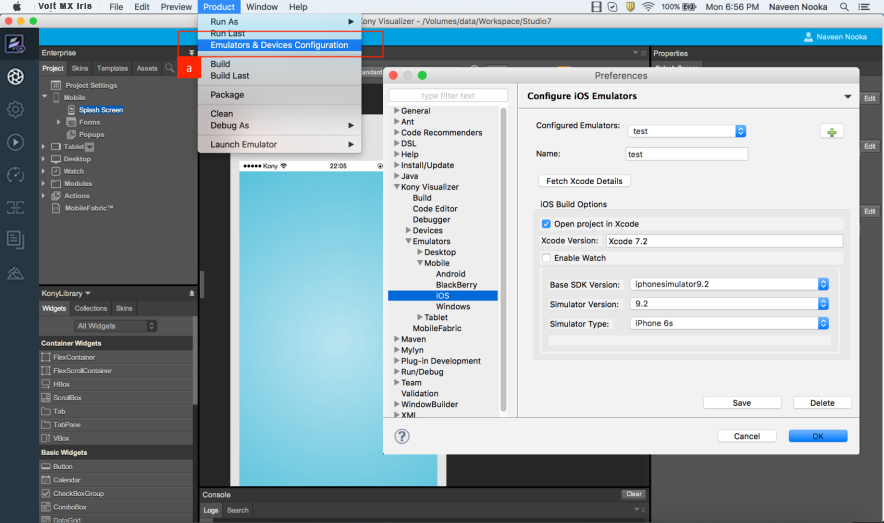
-
Define emulators by navigating to the Emulators and Devices Configuration.
-
Select the required SDK version, Simulator Version and Type.
7. Run Application
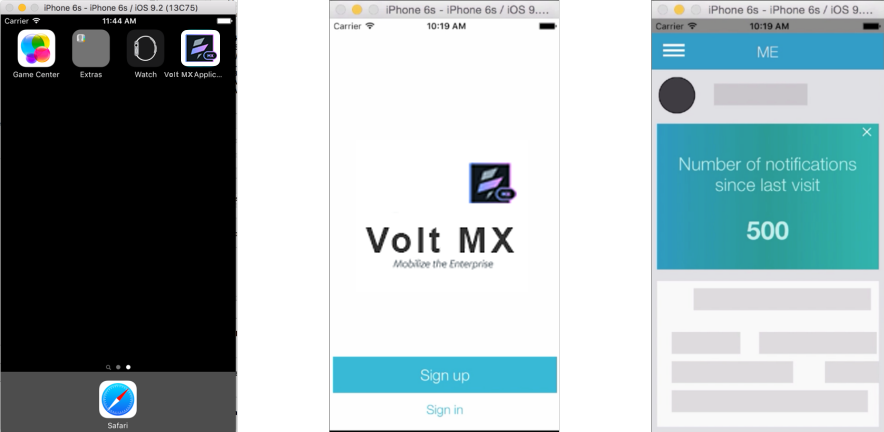
- Run As will list all the emulators configured on the system. Choose the required emulator and run the application.