Volt MX APIs - Touch ID
Volt MX Iris Tutorials
Volt MX APIs - Touch ID API
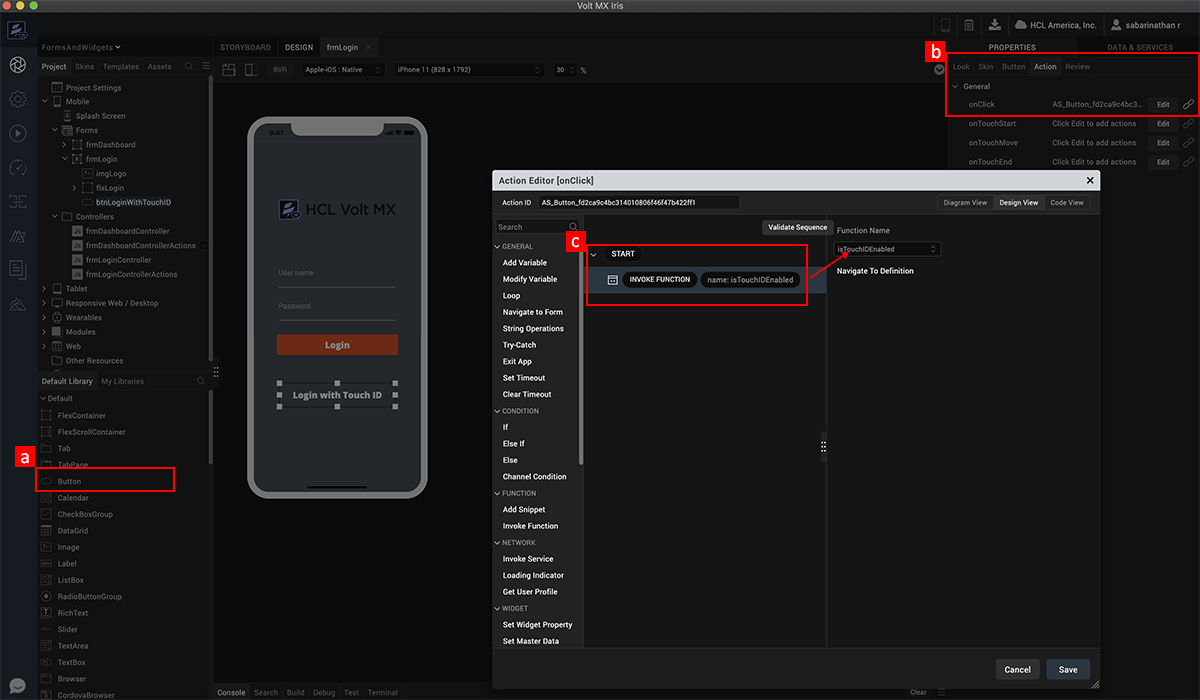
1. Link the Touch ID feature to your form
-
Drag a button widget for invoking for invoking touch ID functionality.
-
Add an onClick action to the button widget.
-
Through action editor, invoke the function that you will add as part of the next step.
2. Implement the JavaScript code using the Touch ID APIs
function isTouchIDEnabled() {
    var status = voltmx.localAuthentication.getStatusForAuthenticationMode(constants.LOCAL_AUTHENTICATION_MODE_TOUCH_ID);
    if (status == 5000) {
        voltmx.localAuthentication.authenticate(constants.LOCAL_AUTHENTICATION_MODE_TOUCH_ID, touchID_return, {
            "promptMessage": "Place your finger on the home button to login"
        });
    } else {
        var msg = "Touch ID is not enabled on your device";
        voltmx.ui.Alert({
            message: msg,
            alertType: constants.ALERT_TYPE_INFO,
            yesLabel: "Close"
        }, {});
    }
}

function touchID_return(status, message) {
    if (status == 5000) {
        frmDashboard.show();
    } else {
        var return_message = status + ":" + message;
        voltmx.ui.Alert({
            message: return_message,
            alertType: constants.ALERT_TYPE_INFO,
            yesLabel: "Close"
        }, {});
    }
}
-
Invoke the API to check if the Touch ID is enabled.
-
If Touch ID is enabled, call the authentication API to invoke the Touch ID prompt.
-
The call back function of the Authenticate API, where you will implement the logic for the authentication success and failure scenarios.
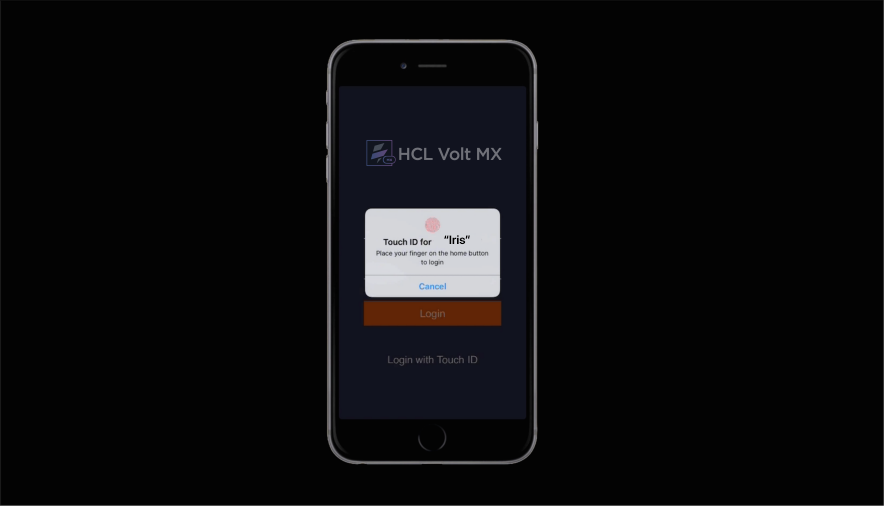
3. Application preview when the authentication API is invoked.
-
Configure the expression for the If condition. If the Widget Property confirmpasswordtxt.text is Not Equal to passwordtxt.text.
-
In the Action Editor that opens up, click on If Condition listed under the Conditions group.
-
An If condition is added to the action sequence.