User Guide: Identity > Configure the Identity Service > OAuth Provider
OAuth Provider Identity Service
OAuth Provider is an identity service uses an existing identity service as a authentication source to create an OAuth Server for authentication and authorization. The OAuth Provider retrieves the service configuration from the source and saves the attributes in the Foundry Identity Sessions. The OAuth Provider also supports OpenID Connect (OIDC) for authentication. For more information about OpenID, refer to OpenID documentation.
From V9 ServicePack 2, the consent screen contains a Remember Consent option. For more information, refer to Remember Consent.
Configuring a Volt MX Foundry OAuth Provider Identity Service
Prerequisites
Make sure that you have an existing identity service that you can use as a user authentication source. For more information about creating an identity service, refer to Configure Identity Service.
Important:
Only Custom, User Repository, and Microsoft AD LDAP identity services are supported as User Authentication Sources.
Creating an OAuth Provider
- While configuring the identity service, from the Type of Identity list, select OAuth Provider.
-
From the User Authentication Source list, select an identity service that you want to use as the authentication source for the OAuth Provider. The Service Configuration details appear.
Important: Only Custom, User Repository, and Microsoft AD LDAP identity services are supported as User Authentication Sources.
-
Configure the parameters (fields) for the service. For more information about the parameters, refer to the following sections.
Service Configuration
<table style="mc-table-style: url('Resources/TableStyles/Basic.css');width: 80%;" class="TableStyle-Basic" cellspacing="0"><colgroup><col class="TableStyle-Basic-Column-Column1" style="width: 25%;"><col class="TableStyle-Basic-Column-Column1" style="width: 75%;"></colgroup><tbody><tr class="TableStyle-Basic-Body-Body1"><th class="TableStyle-Basic-BodyE-Column1-Body1">Parameter</th><th class="TableStyle-Basic-BodyD-Column1-Body1">Description</th></tr><tr class="TableStyle-Basic-Body-Body1"><td class="TableStyle-Basic-BodyE-Column1-Body1" style="font-size: 11pt;">Access Point Token Ttl (sec)</td><td class="TableStyle-Basic-BodyD-Column1-Body1" style="font-size: 11pt;">Specifies the duration of the session of the token.The default value is 1800.</td></tr><tr class="TableStyle-Basic-Body-Body1"><td class="TableStyle-Basic-BodyB-Column1-Body1" style="font-size: 11pt;">Enable Refresh Token</td><td class="TableStyle-Basic-BodyA-Column1-Body1" style="font-size: 11pt;">Specifies whether the service allows the use of refresh tokens.The default value is NO.</td></tr></tbody></table>
Login Configuration
<table style="mc-table-style: url('Resources/TableStyles/Basic.css');width: 80%;" class="TableStyle-Basic" cellspacing="0"><colgroup><col class="TableStyle-Basic-Column-Column1" style="width: 25%;"><col class="TableStyle-Basic-Column-Column1" style="width: 75%;"></colgroup><tbody><tr class="TableStyle-Basic-Body-Body1"><th class="TableStyle-Basic-BodyE-Column1-Body1">Parameter</th><th class="TableStyle-Basic-BodyD-Column1-Body1">Description</th></tr><tr class="TableStyle-Basic-Body-Body1"><td class="TableStyle-Basic-BodyE-Column1-Body1" style="font-size: 11pt;">Supported Grant Type</td><td class="TableStyle-Basic-BodyD-Column1-Body1" style="font-size: 11pt;">Specifies the grant type that you want to use for the OAuth Provider. A grant type specifies the method that is used to acquire the access token.VoltMX Foundry supports the following grant types:<b>Authorization Code</b>A temporary code (that is obtained from the authorization server) is used to obtain the access token.The user can see what information is requested by the client, and then approve or deny the request.The authorization code grant type is used when a third-party client wants to request access to protected resources on behalf of the user.<b>Resource Owner Password</b>The Username and Password of the resource owner (user) are used to obtain the access token<b>Client Credentials</b>The client send requests to access resources that are not in the context of a user<span class="autonumber"><span><b><i><span style="color: #0a9c4a;" class="mcFormatColor">Note: </span></i></b></span></span>If you enable Authorization Code, the console displays additional parameters that you must configure.</td></tr><tr class="TableStyle-Basic-Body-Body1"><td class="TableStyle-Basic-BodyE-Column1-Body1" style="font-size: 11pt;">Logo</td><td class="TableStyle-Basic-BodyD-Column1-Body1" style="font-size: 11pt;">Specifies the image that is displayed on the top of the sign-in screen.This parameter is applicable only if one of the <b>Supported Grant Type</b> is <b>Authorization Code</b>.</td></tr><tr class="TableStyle-Basic-Body-Body1"><td class="TableStyle-Basic-BodyE-Column1-Body1" style="font-size: 11pt;">Header label</td><td class="TableStyle-Basic-BodyD-Column1-Body1" style="font-size: 11pt;">Specifies the text that is displayed below the logo on the sign-in screen.The default value is <b>Sign in to your account</b>.This parameter is applicable only if one of the <b>Supported Grant Type</b> is <b>Authorization Code</b>.</td></tr><tr class="TableStyle-Basic-Body-Body1"><td class="TableStyle-Basic-BodyE-Column1-Body1" style="font-size: 11pt;">Button label</td><td class="TableStyle-Basic-BodyD-Column1-Body1" style="font-size: 11pt;">Specifies the text that is displayed on the button at the bottom of the sign-in screen.The default value is <b>SIGN IN</b>.This parameter is applicable only if one of the <b>Supported Grant Type</b> is <b>Authorization Code</b>.</td></tr><tr class="TableStyle-Basic-Body-Body1"><td class="TableStyle-Basic-BodyE-Column1-Body1" style="font-size: 11pt;">Sign in parameters</td><td class="TableStyle-Basic-BodyD-Column1-Body1" style="font-size: 11pt;">Specifies the parameters that are sent to the authentication source.This parameter is applicable only if one of the <b>Supported Grant Type</b> is <b>Authorization Code</b> and the <a href="#auth_source" class="selected">authentication source</a> is a custom identity service.To add a parameter, follow these steps:<ol style="list-style-type: lower-roman;">From the drop-down list, select <b>Text</b> or <b>Password</b>. This value is for the HTML <i>type</i> attribute of the parameter.In the <b>Service Input Parameter</b> box, type the name of the parameter. This value is for the HTML <i>name</i> attribute of the parameter.In the <b>Display Name</b> box, type the name that you want to display on the sign-in screen. This value is for the HTML <i>placeholder</i> attribute of the parameter.</ol></td></tr><tr class="TableStyle-Basic-Body-Body1"><td class="TableStyle-Basic-BodyB-Column1-Body1" style="font-size: 11pt;"><a name="Redirect"></a>Redirect URL on successful authentication</td><td class="TableStyle-Basic-BodyA-Column1-Body1" style="font-size: 11pt;">Specifies the URL that is loaded when authentication of the user is successful. Contains the following options:<b>Allow Any URL</b>: Allows any URL to be set as the redirect URL<b>Specify URL list</b>: Allows only the specified URLs to be set as the redirect URLIn the <b>URL</b> boxes, type the URLs that you want to allow</td></tr></tbody></table>
Advanced
<table style="mc-table-style: url('Resources/TableStyles/Basic.css');width: 80%;" class="TableStyle-Basic" cellspacing="0"><colgroup><col style="width: 25%;" class="TableStyle-Basic-Column-Column1"><col style="width: 75%;" class="TableStyle-Basic-Column-Column1"></colgroup><tbody><tr class="TableStyle-Basic-Body-Body1"><th style="text-align: center;" class="TableStyle-Basic-BodyE-Column1-Body1">Parameter</th><th style="text-align: center;" class="TableStyle-Basic-BodyD-Column1-Body1">Description</th></tr><tr class="TableStyle-Basic-Body-Body1" data-mc-conditions="Default.V9SP1GA"><td class="TableStyle-Basic-BodyE-Column1-Body1" style="font-size: 11pt;">Disable Consent Screen</td><td class="TableStyle-Basic-BodyD-Column1-Body1" style="font-size: 11pt;">Specifies whether the consent screen must be disabled.<a name="configure_consent"></a>You can also configure the consent screen by clicking <b>Configure</b>.This parameter is applicable only if one of the <b>Supported Grant Type</b> is <b>Authorization Code</b>.For more information about configuring the consent screen, refer to <a href="#Editing" class="selected">Editing the consent screen</a>.</td></tr><tr class="TableStyle-Basic-Body-Body1" data-mc-conditions="Default.V9SP1GA"><td class="TableStyle-Basic-BodyE-Column1-Body1" style="font-size: 11pt;">Provide Headers</td><td class="TableStyle-Basic-BodyD-Column1-Body1" style="font-size: 11pt;">Specifies the parameters that you want to send to the authentication source as Header Parameters.This parameter is applicable only if the <a href="#auth_source" class="selected">authentication source</a> is a custom identity service.To provide a header parameter, type the name of a parameter, and then press enter (or press comma).If you want to paste multiple parameters in the text box, make sure that the names are separated by commas.</td></tr><tr class="TableStyle-Basic-Body-Body1" data-mc-conditions="Default.V9SP1GA"><td class="TableStyle-Basic-BodyE-Column1-Body1" style="font-size: 11pt;">Additional Form Parameters</td><td class="TableStyle-Basic-BodyD-Column1-Body1" style="font-size: 11pt;">Specifies the parameters that you want to send to the authentication source as Form Parameters. These parameters are not displayed on the consent screen.To add a parameter, you must configure the following fields (columns):<b>Name</b>: Specifies the key that is used as an identifier for the parameter.<b>Source</b>: Specifies the source that is used to pick the parameter. Contains the following values:<b>Constant</b>: The parameter is picked from a set of pre-defined values<b>Client Specified</b>: The parameter is sent by the client appYou can send parameters from the client app to the service by using Volt MX SDKs. For more information, refer to <a href="https://support.hcltechsw.com/csm?id=community_question&sys_id=7184dcd11b58e8142518542f0a4bcbd5&view_source=searchResult" target="_blank">this Base Camp query</a><b>Value</b>: Specifies the value of the parameter. You can type a value only if the source is <b>Constant</b>.This parameter is applicable only if the <a href="#auth_source" class="selected">authentication source</a> is a custom identity service.</td></tr><tr class="TableStyle-Basic-Body-Body1"><td class="TableStyle-Basic-BodyE-Column1-Body1" style="font-size: 11pt;">Restrict to Foundry Server to Server Authentication</td><td class="TableStyle-Basic-BodyD-Column1-Body1" style="font-size: 11pt;">Specifies whether access of the identity service must be restricted to Foundry servers. The services for which this option is enabled are used only to authenticate a foundry server to invoke services. A client app cannot use the service to authenticate users.</td></tr><tr class="TableStyle-Basic-Body-Body1"><td class="TableStyle-Basic-BodyB-Column1-Body1" style="font-size: 11pt;">Concurrent User Logins</td><td class="TableStyle-Basic-BodyA-Column1-Body1" style="font-size: 11pt;">Specifies the number of concurrent sessions that can be created for a single user.Contains the following options:<b>Allow concurrent user sessions</b>: A user can have multiple identity sessions using this identity service. On concurrent login, the user remains signed in to all the existing identity sessions.<b>Allow only one active user session per app</b>: A user can have only one identity session for one Foundry App. On concurrent login to a Foundry app, the user is signed out of the existing identity session of that app.<b>Allow only one active user session across all apps</b>: A user can only have one identity session for one Identity service. On concurrent login, the user is signed out of all existing identity sessions of the service.</td></tr></tbody></table>
- After you configure all the required parameters, click SAVE.
- Link the service to a Foundry app, and then publish the app. For more information, refer to How to use an existing Identity Service and Publish.
Note:
After you link the service to a Foundry app, you can use the service in the Data Panel of Volt MX Iris.
How to use a Volt MX Foundry OAuth Provider
You can use the OAuth Provider in multiple flows. For more information, refer to the following sections.
Note:
For more information about integrating the OAuth Provider, User Repository, and OAuth 2.0 Identity services to create a basic login form, refer to the Base Camp article: Exploring Volt MX OAuth Provider.
Authorization Code flow
- From your OAuth provider configuration page, copy the authorization endpoint and the token endpoint.
- From the Publish page of the Foundry app, copy the app key and the app secret.
The app key and the app secret serve as the client ID and the client secret or OAuth 2.0. - Invoke the authorization request API with the appropriate parameters.
- Enter the login credentials, and then click submit.
A consent screen displays the details of resources to which access is granted. - After you authorize access to th resources, an authorization code is generated and the screen is redirected to a new URL with the code as the query parameter.
For example, http://myredirect?code=XYZ - Make a POST call to the token endpoint with the authorization code that you obtained in the previous step. You can use the access token to invoke your Volt MX Foundry integration services.
Important:
From V9 ServicePack 2, Foundry supports PKCE for the Authorization code flow of OAuth 2.0.
If your back-end source does not follow the rfc7636 naming convention for PKCE parameters, you need to configure additional parameters in your OAuth client. For more information, refer to PKCE Support in Foundry.
Profile Flow
- Obtain an access token by using the Authorization Code flow.
- From the OAuth Provider configuration page, copy the Profile Endpoint.
-
Invoke a GET call to the Profile endpoint with the authorization header.
For example,
https://100000012.auth.voltmxcloud.com/oidc/profile
Authorization:Bearer eyAidHl...H3mspKIPnAKzEbyc
Curl example:
Curl -X GET " https://100000012.auth.voltmxcloud.com/oidc/profile " -H "accept: application/json" -H "Authorization Bearer eyAidHl...H3mspKIPnAKzEbyc"
Sign-out flow
The sign-out flow can be used only after a successful sign-in by using the Authorization Code flow.
To sign out of the OAuth Provider, invoke the logout API. Make sure that you copy the Logout Endpoint from the OAuth Provider configuration page.
For example, https://10000000.auth.voltmxcloud.com/oidc/logout/OAuthProvider
Refresh Flow
The refresh token is used to obtain a new access_token and id_token for the user. To use the refresh token, make a POST call to the token endpoint with the respective parameters.
For more information about the Refresh flow, refer to Refresh Token.
OAuth Provider APIs
After you create an OAuth Provider service, you can use the following APIs.
Important:
To use OIDC features, make sure that you add openid to the scope of the client.
Authorization API
The authorization API is used to obtain consent from a user to authorize access to their specified account resources.
Syntax
POST https://<<accountnumber>>.auth.voltmxcloud.com/oidc/authorize/<provider_name>?client_id=<appkey>&scope=<scopes>&response_type=code&redirect_uri=<valid redirect uri>&prompt=<value>
| Parameter | Required | Description |
|---|---|---|
| provider_name | Yes | The name of the OAuth Provider service. |
| client_id | Yes | The App Key string that you obtain from the Publish page. |
| response_type | Yes | If the value of response_type is code, the API launches a Basic flow. You must send a POST request to the token endpoint to acquire the tokens. |
| scope | Yes | Specifies the information that can be accessed by the client. The scope parameters need to be separated by a blank space. For example: openid email profile The scope parameter supports the following values: openid: Indicates that the client uses OpenID Connect to verify the user's identity profile: Indicates that the client can access the user's profile information email: Indicates that the client can read the user's email address access_offline: Indicates that the client needs a refresh token for offline access to the resource |
| redirect_uri | Yes | Specifies the URL (HTTP endpoint) to which the response is sent. If you selected Specify URL list in the Redirect URL on successful authentication parameter, the redirect_uri value must match one of the authorized URLs. Otherwise, a redirect_uri_mismatch error occurs. |
| prompt | Optional | A list of string values that specifies whether the authorization server prompts the user for re-authentication and consent. The values must be separated by a blank space. The prompt parameter supports the following values: consent: The authorization server prompts you for consent before returning information to the client. login: If you have already signed in, and passed login as an input to prompt, the authorization server prompts you to sign in again. > Note: If you invoke the authorization API without passing the parameter prompt, the API takes consent as the value by default. none: The authorization server does not display any authentication or user consent screens. You can use none to check for existing authentication and consent.If the user is not already authenticated, and has not authorized consent for the requested scopes, an error occurs when none is selected. |
Token API
The token API is used to obtain the access token for a user.
Syntax
POST https://<<accountnumber>>.auth.voltmxcloud.com/oidc/token/<provider_name>
Query Parameters
| Parameter | Required | Description |
|---|---|---|
| provider_name | Yes | The name of the OAuth Provider service. |
Request Body Parameters
| Parameter | Required | Description |
|---|---|---|
| code | Yes | The value of the authorization code. |
| grant_type | Yes | The method that is used to obtain the access token. For the authorization flow, the grant type must be code. |
| scope | Yes | The types of information about the resource that can be accessed by the client. |
| redirect_uri | Yes | The URL to which the response is sent. The redirect_uri should be the HTTP endpoint on your server that receives the response from Volt MX OAuth Provider. If you are using Foundry services, make sure that the redirect_uri is the callback URL of the Foundry server. |
| client-id | Yes | The app key of the Foundry app that contains the OAuth Provider service. |
| client-secret | Yes | The app secret of the Foundry app that contains the OAuth Provider service. |
Request Header Parameters
| Parameter | Required | Description |
|---|---|---|
| Content-Type | Yes | The type of content that is sent in the request. Make sure that the value of the Content-Type is application/x-www-form-urlencoded. |
| X-VoltMX-RequestId | Optional | An identifier for the request that is sent to the OAuth Provider service. You can provide any value for this parameter. This parameter is only required when the Authentication Source is Custom. |
| Accept | Yes | The value of the header must be in application/json. The client needs the response in JSON. |
Sample Response
200 OK
{
    "access_token":"eyAi.....",
    "token_type":"Bearer",
    "expires_in":1799,
    "scope":"profile"
}
Profile API
The profile API fetches the profile details of the user whose access token is specified.
Syntax
GET https://<<accountnumber>>.auth.voltmxcloud.com/oidc/profile
Request Header Parameters
| Parameter | Required | Description |
|---|---|---|
| Content-Type | Yes | The type of content that is sent in the request. Make sure that the value of the Content-Type is application/x-www-form-urlencoded. |
| X-VoltMX-RequestId | Optional | An identifier for the request that is sent to the OAuth Provider service. You can provide any value for this parameter. This parameter is only required when the Authentication Source is Custom. |
| Authorization | Yes | Specifies the access token (bearer token) of the user whose profile details you want to fetch. The value of this parameter must be in the following format:Bearer <access token> |
Logout API
The logout API signs the user out of the service and destroys the respective access token.
Syntax
POST https://<<accountnumber>>.auth.voltmxcloud.com/oidc/logout/<provider_name>?target_url=<redirect_url>
| Parameter | Required | Description |
|---|---|---|
| provider_name | Yes | The name of the OAuth Provider service. |
| target_url | Optional | The URL that is loaded after a successful sign-out. If you do not pass the target_url parameter, the API displays a logout success message. Otherwise, it redirects to the specified URL. |
Discover API
The Discover API obtains information about the provider configuration by using the well-known configuration URL.
Syntax
GET https://<<accountnumber>>.auth.voltmxcloud.com/.well-known/openid-configuration?provider=<provider_name>&client_id=<app_key>
Query Paramters
| Parameter | Required | Description |
|---|---|---|
| provider_name | Yes | The name of the OAuth Provider service. |
| client_id | Yes | The app key of the Foundry app that contains the OAuth Provider service. |
Sample Response
{
    "issuer": "https://1000000.auth.voltmxcloud.com",
    "authorization_endpoint": "https://1000000.auth.voltmxcloud.com/oidc/authorize/OAuthProvCustom",
    "token_endpoint": "https://1000000.auth.voltmxcloud.com/oidc/token/OAuthProvCustom",
    "userinfo_endpoint": "https://1000000.auth.voltmxcloud.com/oidc/profile",
    "scopes_supported":
    [
        "address",
        "phone",
        "openid",
        "profile",
        "offline_access",
        "email"
    ],
    "response_types_supported":
    [
        "code"
    ],
    "grant_types_supported":
    [
        "authorization_code",
        "client_credentials",
        "password"
    ],
    "introspection_endpoint": "https://1000000.auth.voltmxcloud.com/oidc/introspect",
    "introspection_endpoint_auth_methods_supported":
    [
        "client_secret_post"
    ],
    "jwks_uri": "https://1000000.auth.voltmxcloud.com/metadata/tHza2-kiYNyjZHet=="
}
Introspection API
The Introspection API checks whether the specified token is valid and active.
Syntax
POST https://<<accountnumber>>.auth.voltmxcloud.com/oidc/introspect/<provider_name>
Query Parameters
| Parameter | Required | Description |
|---|---|---|
| provider_name | Yes | The name of the OAuth Provider service. |
Request Body Parameters
| Parameter | Required | Description |
|---|---|---|
| client_id | Yes | The app key of the Foundry app that contains the OAuth Provider service. |
| client_secret | Yes | The app secret of the Foundry app that contains the OAuth Provider service. |
Request Header Parameters
| Parameter | Required | Description |
|---|---|---|
| Content-Type | Yes | The type of content that is sent in the request. Make sure that the value of the Content-Type is application/x-www-form-urlencoded |
| X-VoltMX-Authorization OR Authorization | Yes | The token that you want to validate. You can validate the following tokens: access_token id_token refresh_token |
Sample Response
{
  "active": true,
  "client_id": "FmUE4Dx11KMnO4TheWHO",
  "username": "johndoe",
  "exp": 1437275311
}
Refresh Token
The refresh token is used to obtain a new access_token and id_token for the user. To use the refresh token, make a POST call to the token endpoint with the respective parameters.
Important:
To use the Refresh Token, make sure that you add access_offline to the scope.
Syntax
POST https://<<accountnumber>>.auth.voltmxcloud.com/oidc/token/<provider_name>
Query Parameters
| Parameter | Required | Description |
|---|---|---|
| provider_name | Yes | The name of the OAuth Provider service. |
Request Body Parameters
| Parameter | Required | Description |
|---|---|---|
| grant_type | Yes | The method that is used to obtain the access token. For the refresh flow, the grant type must be refresh_token. |
| refresh_token | Yes | The value of the refresh token. You can obtain the refresh token from the token endpoint after signing in. |
| scope | Yes | The types of information about the resource that can be accessed by the client. Make sure that you add openid and access_offline to the scope. |
| redirect_uri | Yes | The URL to which the response is sent. The redirect_uri should be the HTTP endpoint on your server that receives the response from Volt MX OAuth Provider. If you are using Foundry services, make sure that the redirect_uri is the callback URL of the Foundry server. |
| client-id | Yes | The app key of the Foundry app that contains the OAuth Provider service. |
| client-secret | Yes | The app secret of the Foundry app that contains the OAuth Provider service. |
Sample Response
{
    "access_token": "alwejkfljvnjfasdlkcpdovherbg",
    "token_type": "Bearer",
    "id_token": "2307bco9weyq79dy667byco7rg3",
    "expires_in": 1799,
    "scope": "openid offline_access"
}
Editing the consent screen
While configuring the OAuth Provider identity service, you can also configure the consent screen. The option to configure the consent screen is available in the Advanced section of the service configuration page.
To edit the consent screen, click EDIT.
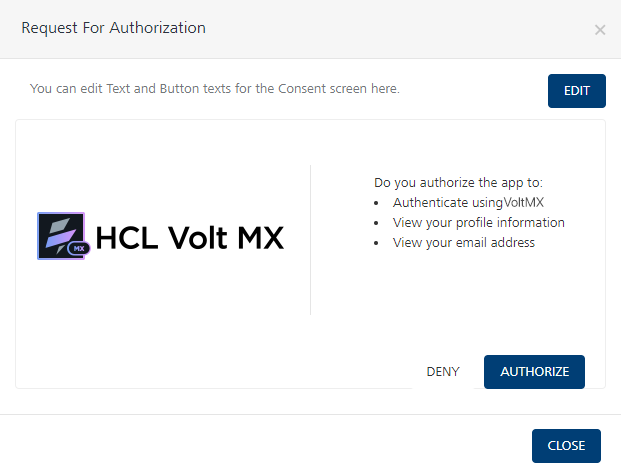
You can edit the following elements of the consent screen:
- Screen title: The title of the window that displays the consent screen.
The default value is Request for Authorization. - Permissions: The set of permissions that require authorization of consent.
You can use the HTML tags that are specified on the edit screen to format the content. - Button Text: The text that is displayed on the DENY and AUTHORIZE buttons
Remember Consent
From V9 ServicePack 2, the consent screen contains a Remember Consent option. If the user enables the option and provides their consent for the app, the OAuth provider does not display the consent screen for subsequent sign-ins. Therefore, the user does not have to provide consent every time they sign-in to the app.
Note: The OAuth Provider uses cookies that specify whether the user has provided consent for the app. Cookies are specific to a browser, therefore, if the user signs-in to the app from a different browser, the consent screen is displayed, and they need to provide consent for the app.