Internationalization
Volt MX Iris Tutorials
Internationalization
1. Enable Internationalization
-
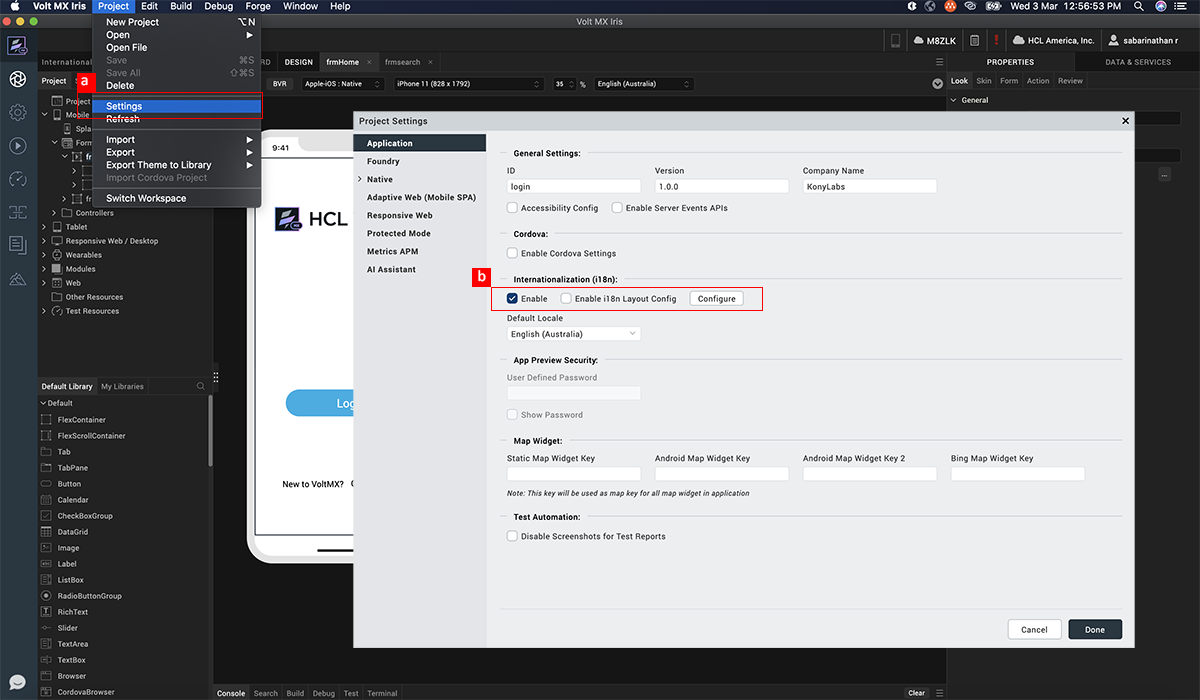
Click on Project Settings.
-
In the Project Settings dialogue that opens up, click Enable i18n. Click Edit to configure the required locales.
2. Add Locales
-
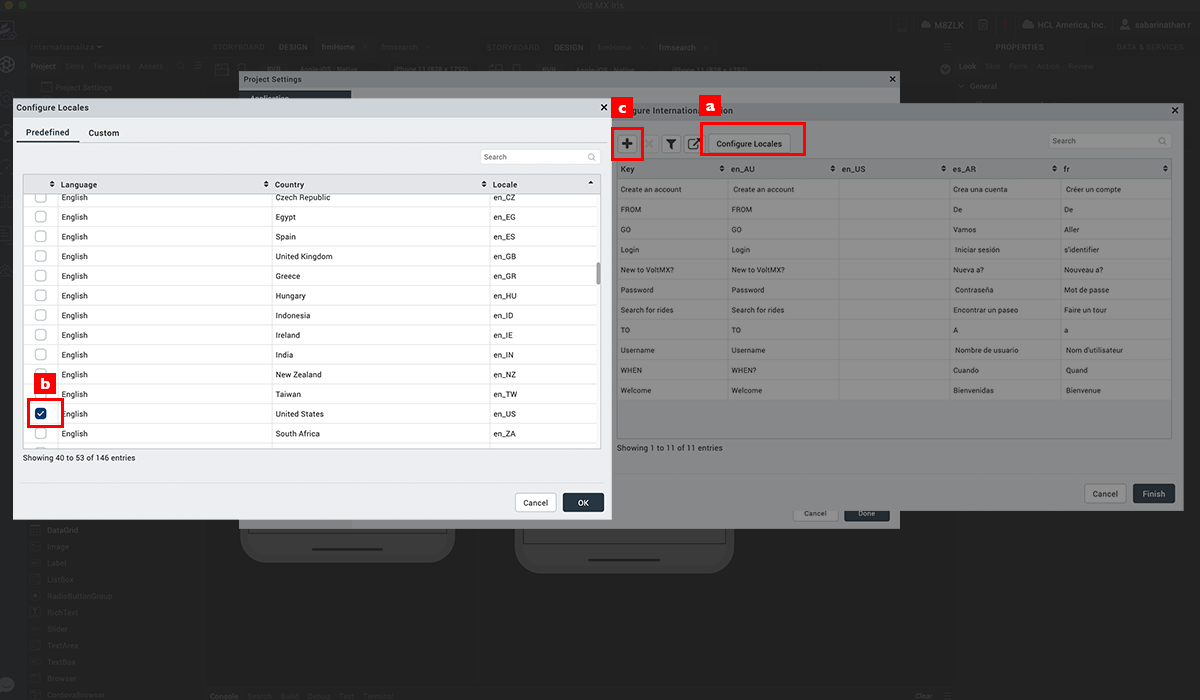
Click Configure Locales button to add locales to the application.
-
Select all the required locales. If the locale you are looking for is not available in the predefined locales, go to the Custom tab and define the required locale.
-
Once the locales are selected, go back to the Configure Internationalization tab and add the required keys.
3. Assign Keys
-
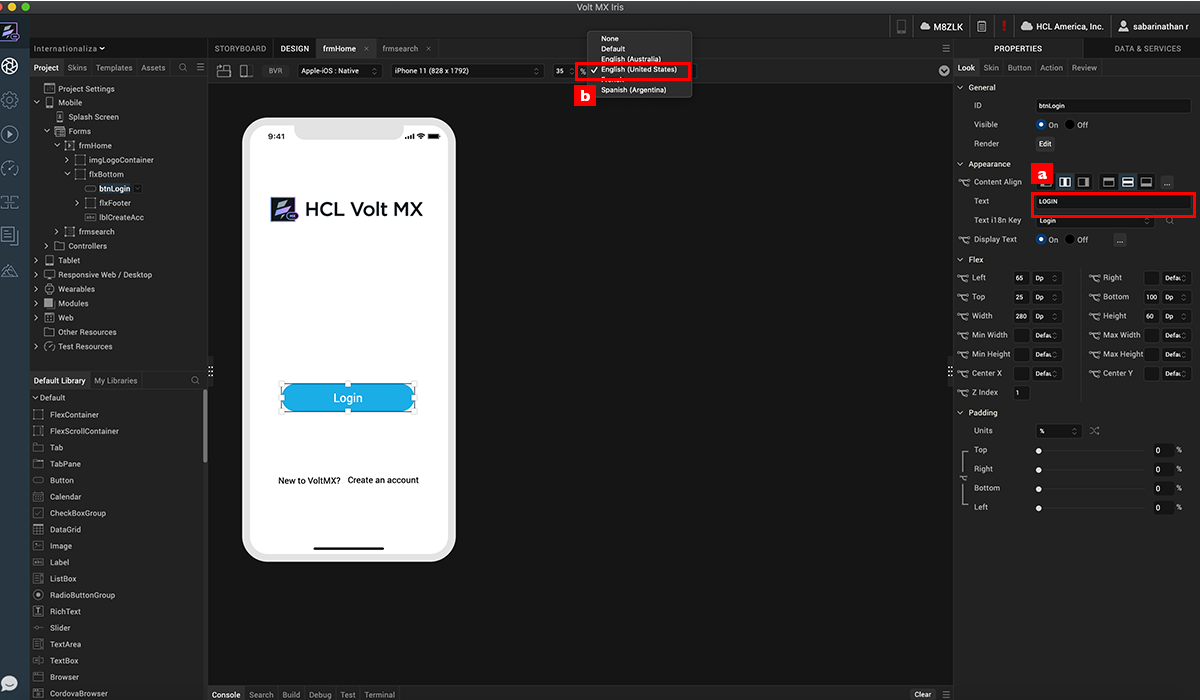
Once internationalization is enabled in the application a drop down to assign the i18n key will appear in the Look panel. Select an widget and assign the required i18 key to the widget.
-
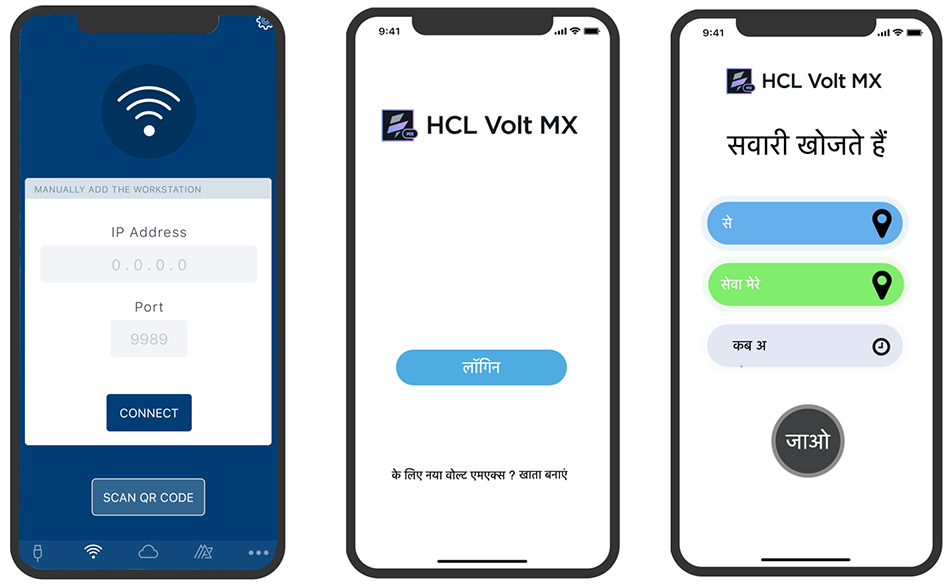
Locale can be switched right from canvas.
4. App Preview