Adding Segments
Based on a user's attributes, you can create new segments.
To add a segment, follow these steps:
-
On the Segments page, click the Add Segment button.
The Add Segment page appears. The Add Segment page includes two sections: Segment Information and Define Conditions.
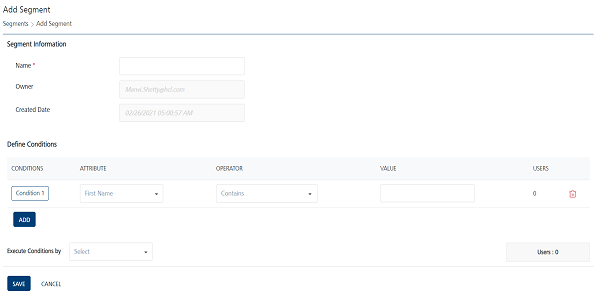
Segment Information
-
In the Segment Information section, do the following:
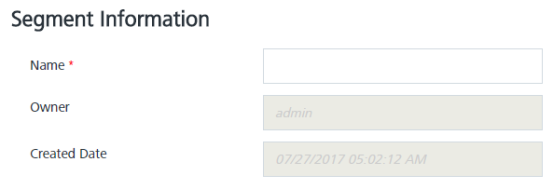
- Name (mandatory): Enter a name for the segment that you want to define. Your segment name should include alphanumeric characters only. The Name is a mandatory field.
- Owner: The field is populated automatically with the segment owner's name.
-
Created Date: The field is populated automatically with the system's current date and the current time.
Define Conditions
In the Define Conditions section, do the following:
-
The Define Conditions list view contains the following fields:
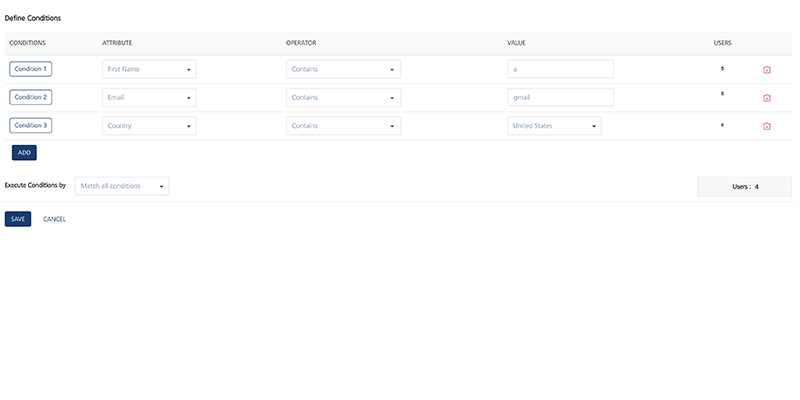
- Conditions: Click Add to add a new condition row. A new condition is added with a number under the Conditions column in the grid such as Condition 2.
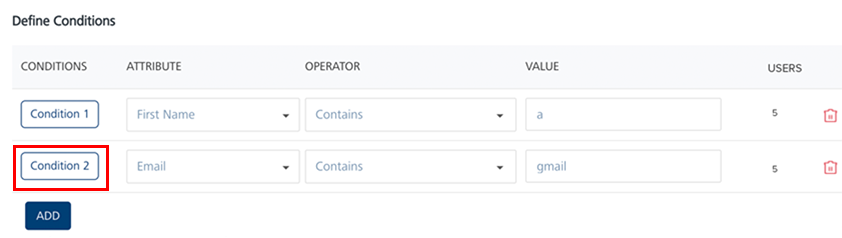
The condition numbers are the references to the user attributes associated with that condition. For example, Condition 1 refers to the First Name user attribute. The numbered conditions can be used to define different combinations for a segment definition. -
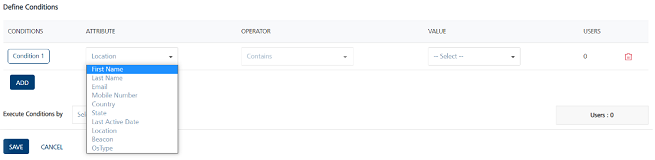
Attributes: Under the Attributes column, select the attribute from the drop-down list. You can select any user attributes or platforms as required. For example, First Name, Last Name, Email, Mobile Number, Country, State, Location, Beacon, Last Active Date, OSType, and any dynamic user attribute type.
For more information about Attribute type - Date (Dynamic User Attribute), see Attribute type - Date (Dynamic User Attribute)
Beacons
For the user attribute as Beacon, select the beacon from the drop-down list under the Value column.

OS Type
For the user attribute as OsType, select the OS type from the drop-down list under the Value column.
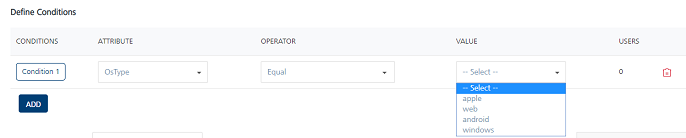
Using the OSType attribute, you can create segments that pertain to various native platforms (Android, iOS, Windows) or the Web channel.
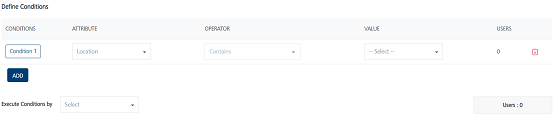
Geofence
-
For the user attribute as Location, select the location from the drop-down list under the Value column. For more information about how to add geolocations and beacons, see Engagement > Geofence
-
Operator: Under the Operators column, select the required operator from the drop-down list. You compare a user attribute with a value by using a specified operator such as Contains, Equal, or NotEqual. The following table describes operators to define a segment.
Operator Description Contains The operator checks if the attribute value for all users have a common substring given in the value field Equal The operator checks if both operands have the same value NotEqual The operator checks if both operands do not have the same value GreaterThan The operator checks if the value of the left-hand operand is greater than the value of the right-hand operand LessThan The operator checks if the value of the left-hand operand is less than the value of the right-hand operand GreaterThan CurrentDate + {days} The operator checks if the date value of the attribute is greater than the current date plus number of days specified in the value field GreaterThan CurrentDate - {days} The operator checks if the date value of the attribute is greater than the current date minus number of days specified in the value field LessThan CurrentDate + {days} The operator checks if the date value of the attribute is lesser than the current date plus number of days specified in the value field LessThan CurrentDate - {days} The operator checks if the date value of the attribute is lesser than the current date minus number of days specified in the value field. -
Value: Helps you configure values for conditions. Enter a value in the Value field. For example, you create a condition where a user has a gmail account.

- Conditions: Click Add to add a new condition row. A new condition is added with a number under the Conditions column in the grid such as Condition 2.
-
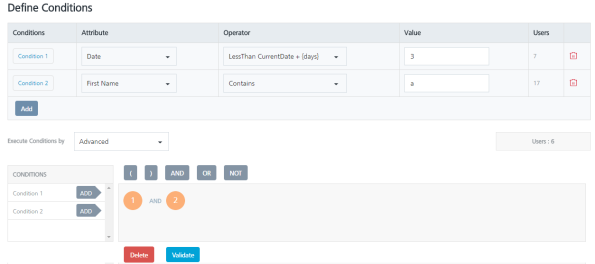
Execute Conditions by: Select the required condition from the drop-down list to define the segment definition.

-
Select the execute condition as Match all conditions or Match any condition. Based on the fulfilled condition, the system inserts the number of users that qualify for the segment under the Users column.
-
If you select the executive condition as Advanced, logic buttons appear. You can validate different conditions by using logic buttons while applying the segment definition. They are (), AND, OR, and NOT to create expressions.
-
Click the Logic button to apply the conditional logic. The system inserts the logic button next to the condition number in the Segment Definition area. You can refer the following table to know more about logic buttons.
Logic Button Description AND If an AND operator is used between two conditions or among conditions, then all the common users satisfying both set of conditions are included in the segment criteria OR If an OR operator is used between two conditions or among conditions, the users satisfying either of the conditions are included in the segment criteria NOT The logical operator NOT reverses the logical value of a condition on which it operates. The condition can be a simple condition or a condition containing AND and OR. -
Follow the order of operation to calculate the conditional logic for the Segment definition:
- Work on brackets first.
- Otherwise just go from left to right.
You can delete any elements inserted in the segment definition window by clicking the Delete button. The system deletes the elements from right to left order.
-
Click the Validate button.
If conditional logic is not used correctly, the system displays the error message that the segment criterion is invalid. The system displays the confirmation message if the logic is correct. The message states that the validation is successful. -
Click OK to continue.
The system displays the Add Segment screen. The number of added users appears under the Users column.
-
Click the Cancel button to exit from the window without saving any information.
The system displays the Segments home page. - Click the Save button.
The system adds the new segment into the segments list view with a confirmation message that the segment is saved successfully.