Support for Multi-Factor Authentication from MFCLI
User Guide: VoltMX Foundry Command Line Utility - Continuous Integration > Support for Multi-Factor Authentication from MFCLI
Support for Multi-Factor Authentication from MFCLI
The Multi-Factor Authentication (MFA) feature helps you activate a user account for an added security authentication on Cloud. If you activate MFA for your account, and you use MFCLI, you must provide additional details such as a secret key along with other attributes.
How to Enable Multi-Factor Authentication (MFA)
To run MFCLI in MFA mode, you need to pass the --mfa argument. If MFA is enabled, you must also provide the secret key for multi-factor authentication, which is required to generate one time password (OTP). You must supply the secret key through a property file.
How to configure a secret key in a .properties file
You need to provide the secret key value for the mfa.secret.key in a .properties file, for example, Sample_mfcli.properties.
mfa.secret.key = jrlr dm5t vlze clew b64f cptg fwhs d6f2
For more details on secret key for MFA, refer to How to Generate a Secret Key.
How to invoke MFCLI in MFA mode
To invoke MFCLI in MFA mode, pass the command as follows:
java \-DVOLTMX_MFCLI_PROPERTIES_FILE\=\Sample_mfcli.properties -jar mfcli.jar <command> \--mfa .........
How to Generate a Secret Key
To generate a secret key, follow these steps:
-
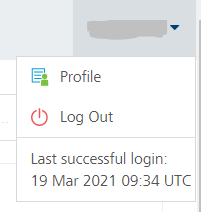
Click Profile in the user account drop-down menu.
-
Click the Security tab.
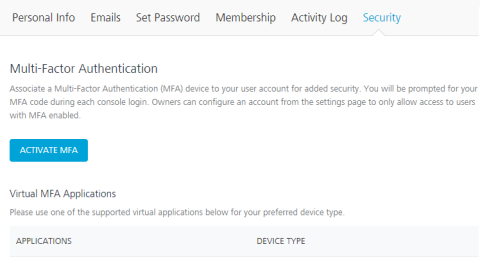
Important: The Secret key can only be obtained during registration. If a user is already registered, deactivate the user and then activate the user again to get the secret key.
-
Click ACTIVATE MFA.
-
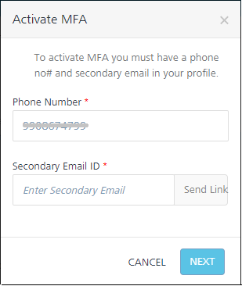
In the Activate MFA dialog, do the following:
- Enter the phone number.
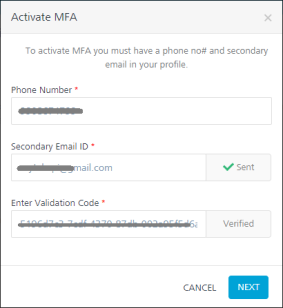
- Enter the secondary email and click Send Link. An email from Volt MX Accounts is sent to your registered secondary email ID. The email contains a security code. Also, the Enter Validation Code field is enabled under the Secondary Email ID field.
-
In the Enter Validation Code, enter the security code and validate the code by clicking the Verify button.
-
Once the code is verified, click NEXT.
-
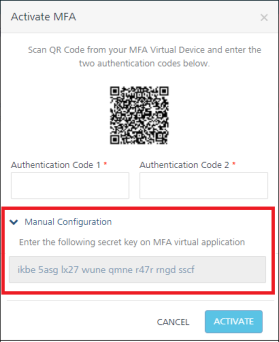
Expand the Manual Configuration, and then copy the secret key.
-
Update the secret key in the
Sample_mfcli.propertiesfile.You must supply the
Sample_mfcli.propertiesfile as-dparameter for MFCLI.
-
Click ACTIVATE.