VoltFormula tutorial
About this task
This tutorial shows you how to use VoltFormula in Volt Iris to convert formulas from OpenFormula and NotesFormula into Volt MX Go Rosetta JavaScript. This feature in Volt Iris allows you to enter into source OpenFormula  and Notes Formula Language and have it translated automatically into JavaScript code.
Before you begin
-
You have completed the Volt MX Go installation.
-
You have created your Volt Foundry admin account.
-
You know how to use Actions
.
Launch Volt Iris
-
Open Volt Iris. When the Sign-in dialog opens, close it.
Note
If you have already configured the login settings while performing the other tutorials, enter your email and password for Volt Foundry on the Sign in to your account page and click Sign In. You don't need to execute the steps below for configuring the login settings and logging in.
-
Configure the login settings.
-
Go to Preferences.
For Windows, select Edit → Preferences.
For Mac, depending on your macOS, select Volt Iris → Preferences or Settings.
-
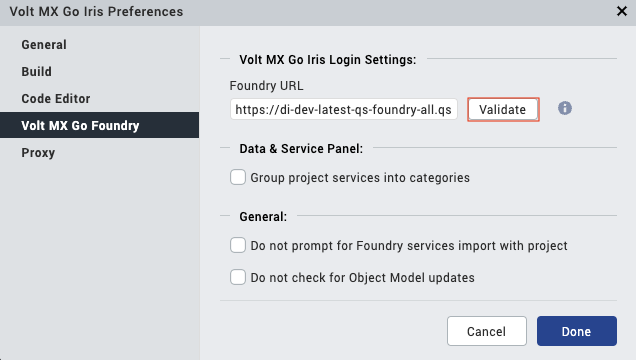
In the Volt Iris Preferences dialog, click Volt Foundry.
-
On the Volt Foundry tab, enter your Foundry URL in the Foundry URL text box, and then click Validate.
You should see the “Validation Successful” message at the top of the dialog.
-
Click Done.
-
-
Log in to Volt Iris.
- Click Login on the upper right corner of the Volt Iris screen.
- Enter your email and password for Volt Foundry on the Sign in to your account page.
- Click Sign In. Your username appears next to the profile icon.
Open VoltFormula using the Action Editor
-
On the Project tab, find and expand the Forms directory.
Info
If you cannot see the Project tab, click the Design tab beside the Storyboard tab.
-
Select a form under the Forms directory. The selected form opens.
- Drag a widget or component to the form.
-
Right-click the widget and select an action from the menu.
The example image shows the Button widget added to the form and the onClick action selected from the menu.
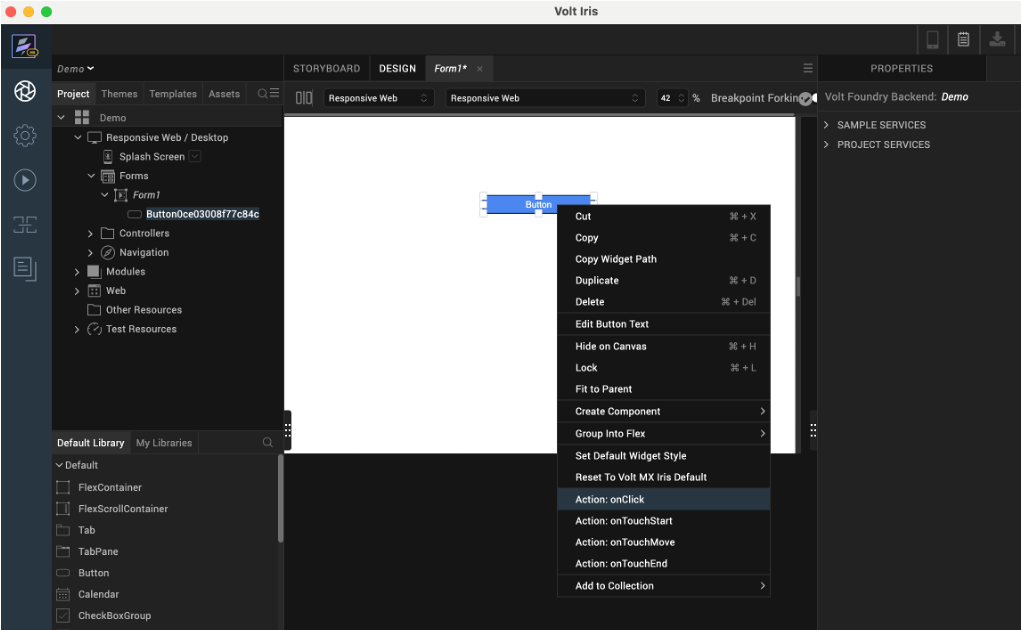
The Action Editor opens and creates an action sequence for you to configure.
-
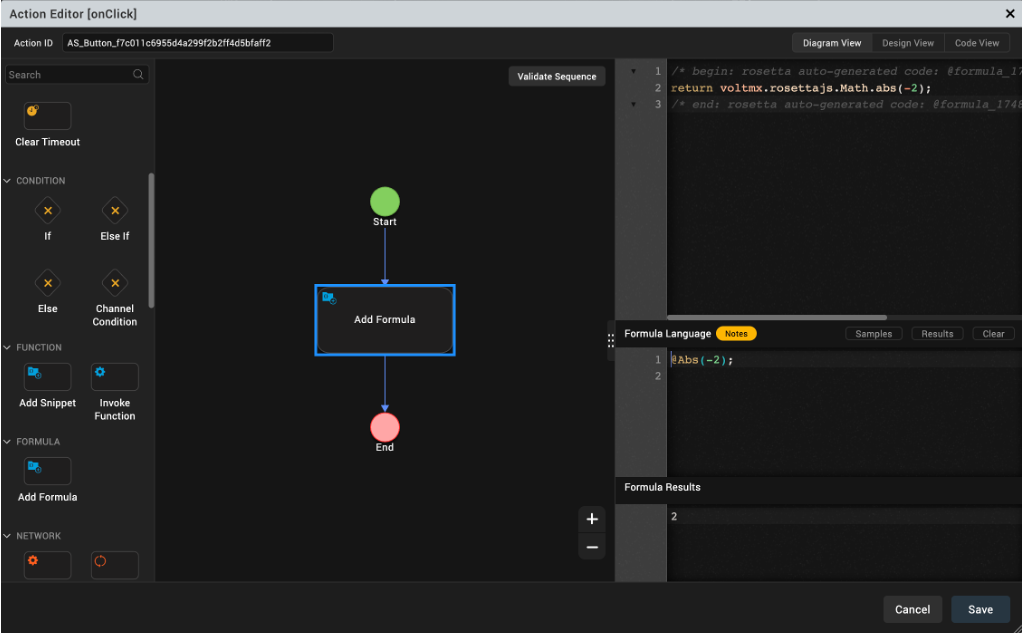
On the left side of the Action Editor, click Add Formula under Formula to add it to the action sequence and open the Formula Editor on the right side of the Action Editor.

Translate OpenFormula and Notes Formula into JavaScript
-
On the Action Editor, enter a valid formula in the Formula Language window of the Formula Editor.
Tip
- Enter a Notes Formula by starting with the @ character or enter an OpenFormula by starting with the = character.
- IntelliSense will provide formula suggestions and corresponding formula descriptions, examples, and details as you enter your formula in the Formula Language window of the Formula Editor.
-
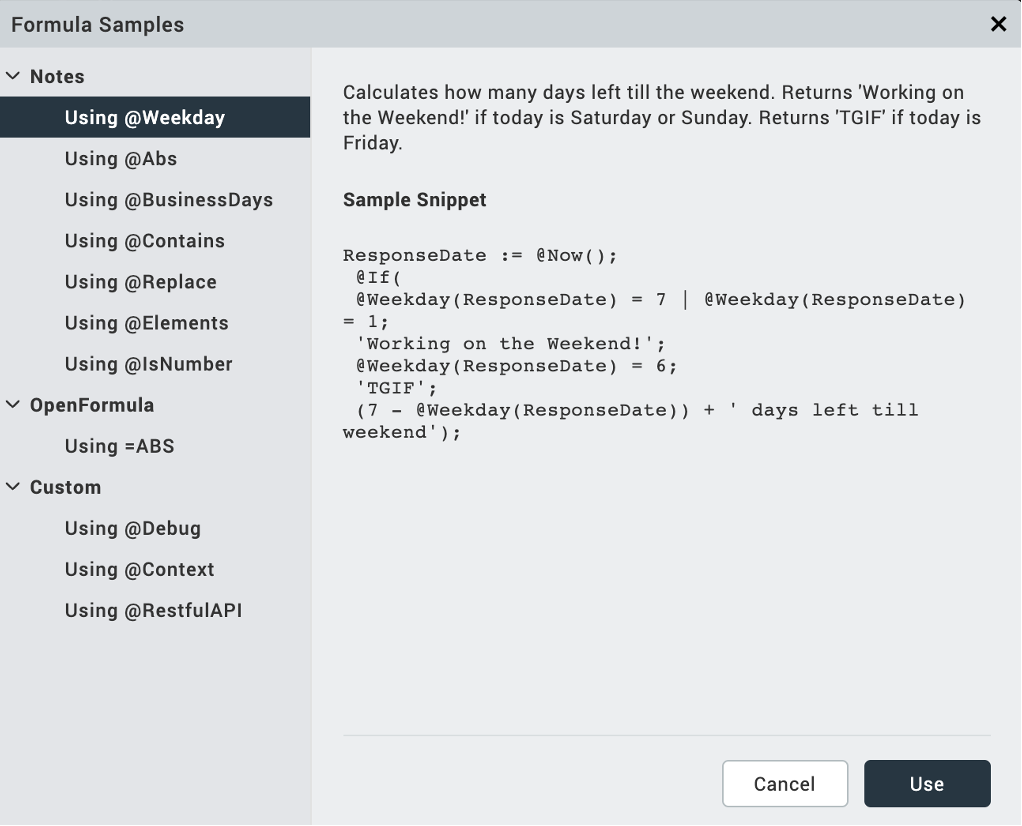
You can click Samples to open the Formula Samples dialog that provides descriptions and sample snippets for Notes, OpenFormula, and Custom formula samples.
-
Click Results to open the Formula Results window below the Formula Language window and see the result of the entered formula.
The formula you entered in the Formula Language window is automatically converted to JavaScript code and is viewable from the window on top of the Formula Language window.
-
Click Save.
Use VoltFormula in a Controller module
Add formula in a controller
- On the Project tab, find and expand the Controllers directory.
- Select a controller under the Controllers directory. The selected controller opens.
-
Right-click the code window and select Add Code from Formula.
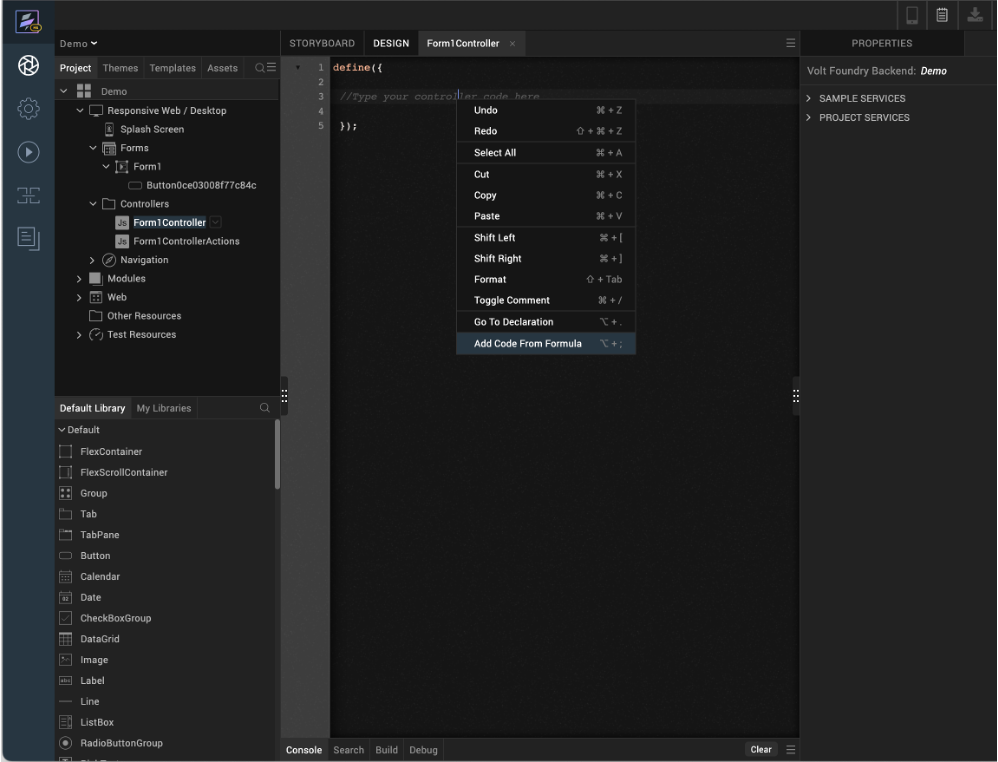
The Formula Language window appears.
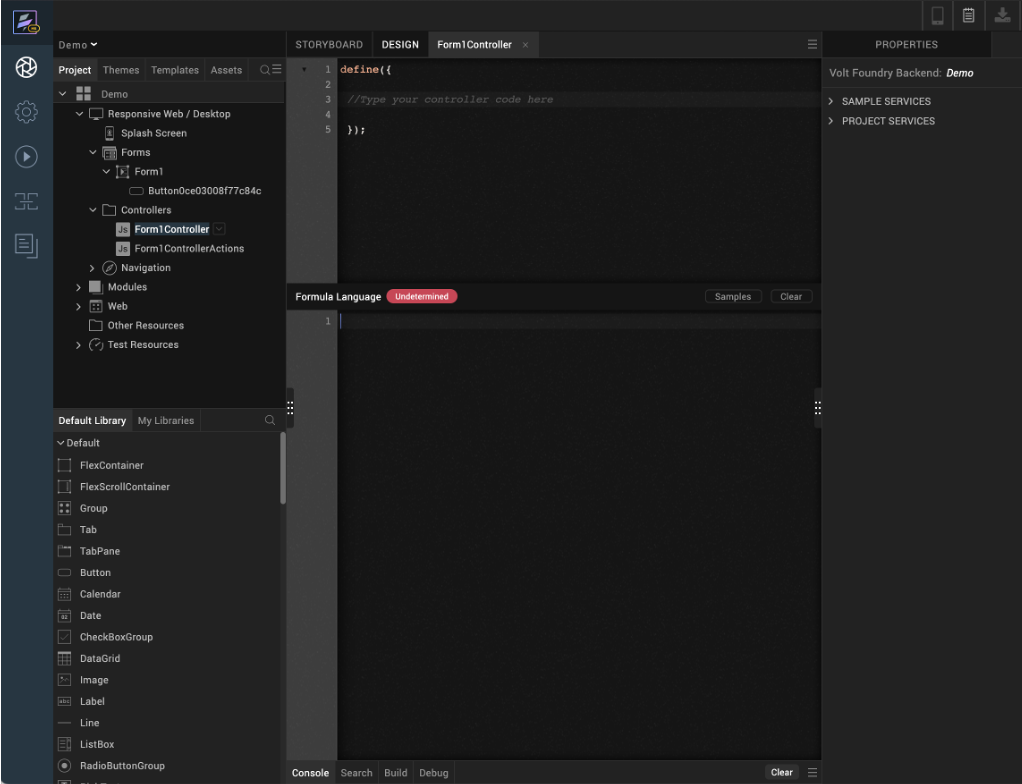
-
Enter a valid formula in the Formula Language window
Tip
- Enter a Notes Formula by starting with the @ character or enter an OpenFormula by starting with the = character.
- IntelliSense will provide formula suggestions and corresponding formula descriptions, examples, and details as you enter your formula in the Formula Language window.
-
You can click Samples to open the Formula Samples dialog that provides descriptions and sample snippets for Notes, Open Formula, and Custom API formula samples.
-
Click Formula Results to open the Formula Results window below the Formula Language window and see the result of the entered formula.
The formula you entered in Formula Language window is automatically converted to JavaScript code and is viewable in the code window on top of the Formula Language window.
The following example image shows a formula being entered in the Formula Language window and with IntelliSense providing suggestions.

-
Save your changes.
Edit formula in a controller
- On the Project tab, find and expand the Controllers directory.
- Select a controller under the Controllers directory. The selected controller opens.
-
Right-click the existing code and select Edit Formula Code.
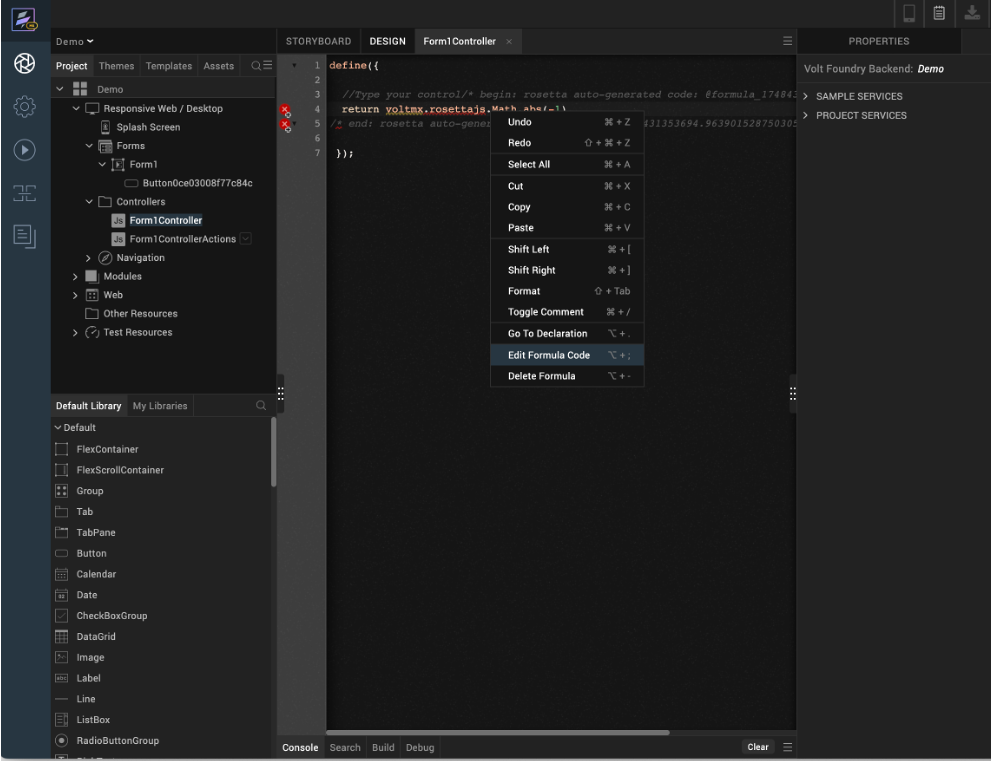
The Formula Language window appears.
-
Edit the formula in the Formula Language window.
Note
- Make sure to follow the correct syntax.
- You can add more than one line of code.
- IntelliSense will provide formula suggestions and corresponding formula descriptions, examples, and details as you enter your formula in the Formula Language window.
-
Save your changes.
Edit Rosetta JavaScript
- On the Project tab, find and expand the Controllers directory.
-
Select a controller under the Controllers directory. The selected controller opens.
The piece of rosetta autogenerated code from OpenFormula or Notes Formula is provided between comments as shown in the following image.
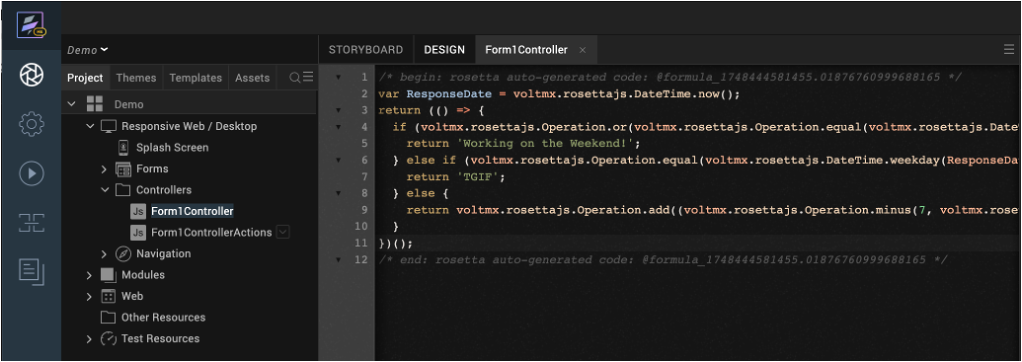
-
Edit or update the JavaScript code in the code window of the controller.
Note
Make sure you know the syntax for coding the
rosettaJavaScript.IntelliSense provides suggestions as you edit or update the code as shown in the following image.

-
Save your changes.
Additional information
-
The default Rosetta VoltFormula setting can be modified according to your need for your app. To change the configuration, see Configure VoltFormula.
-
To know more about the proper way of handling codes, see VoltFormula coding exercise examples in Volt Iris.