Design Import tutorial
Important
The information in this document is based on the latest version of HCL Volt MX Go, HCL Domino REST API, and HCL Domino.
About this task
The tutorial guides you through the Design Import process in Volt MX Go. You will create a project in Volt Iris and then run the Design Import Wizard to enable you to import Domino application forms, views, and agents, then build those forms and views within Volt Iris. You will also perform CRUD operations on the imported Domino application published via Volt Iris.
At the end of this tutorial, you will gain enough competence to use the Design Import Wizard to successfully import a Domino application.
Before you begin
Before starting this tutorial, you must meet prerequisites based on the situational scenario that applies to you:
- All access scenario is for a user with all the necessary access rights to install and configure Volt MX Go and with the correct access to all required Domino databases and the Domino REST API.
- Limited access scenario is for a user who is most likely a Volt Iris developer and doesn't have all the necessary access. In this case, you must coordinate with a Volt Foundry administrator and a Domino/Domino REST API administrator to obtain the required access and fulfill other requirements.
Kindly follow and complete the prerequisites that apply to your situation.
Volt MX Go prerequisites
- You have completed the Volt MX Go installation.
- You have a Volt Foundry admin account.
- You have created an Environment in Volt Foundry.
Domino/Domino REST API prerequisites
Tip
Contact your Domino administrator/Domino REST API administrator for any needed assistance.
- You have set up Domino REST API in the Domino server containing the Domino database you are importing.
-
You have at least Designer access to the Domino database where you are creating or updating a schema and to the Domino Keep Configuration database
keepconfig.nsfto create a scope and OAuth application for the Domino application.For more information on access levels, see Access Levels in the ACL
 in the HCL Domino documentation
 -
You have accessed Domino REST API.
- You have configured a schema with:
- All necessary forms:
- having active status
- including the
$FILESfield and having the Formula for Delete Access set to@True(see Change form configuration for more information) - having a default mode and a dql mode, and both modes having matching fields (see Clone a mode and Compare modes for more information)
- having active status
- All necessary views having active status
- All necessary agents having active status
- All necessary forms:
- You have configured a scope for your schema :
- having a scope name not exceeding 15 characters, which can include alphanumeric characters and underscore "_" and hyphen "-" special characters
- having a Maximum Access Level set to Designer, Editor, or Manager
-
You have created an OAuth application
:-
having your configured scope and
$SETUPadded to the Scope field.Tip
If you want all the scopes in Domino REST API to be available to Design Import, just add
$DATAand$SETUPto the Scope field. -
having a placeholder callback URL that you will replace with the callback URL from the Identity Service you will create using the Design Import Wizard
-
-
You have taken note of the Domino REST API URL, and the App ID and App Secret
of the OAuth application.
Tip
Refer to the Domino REST API prerequisites for Design Import video in the Video tutorials section to learn more.
Volt MX Go prerequisites
- You have completed the installation of Volt Iris.
- You have contacted the Volt Foundry administrator to:
- have access to Volt Foundry
- have a Volt Foundry admin account
- have an Environment created in Volt Foundry in case there is none
Domino/Domino REST API prerequisites
-
You have contacted the Domino/Domino REST API administrator to:
- ensure you have at least Designer access to the Domino database you will be importing
- configure a schema for the Domino database that you will be importing with:
- All necessary forms:
- having active status
- including the
$FILESfield - having the Formula for Delete Access set to
@True - having a
defaultmode and adqlmode, and both modes having matching fields
- All necessary views having active status
- All necessary agents having active status
- All necessary forms:
-
configure a scope or scopes for your schema:
- having a scope name not exceeding 15 characters, which can include alphanumeric characters and underscore "_" and hyphen "-" special characters
- having a Maximum Access Level set to Designer, Editor, or Manager.
-
create an OAuth application:
-
having your configured scope or scopes and
$SETUPadded to the Scope field.Tip
If you want all the scopes in Domino REST API to be available to Design Import, just add
$DATAand$SETUPto the Scope field. -
having a placeholder callback URL that will be replaced with the callback URL from the Identity Service you will create using the Design Import Wizard
-
-
provide you with Domino REST API URL, and the App ID and App Secret of the OAuth application.
Tip
Refer to the Domino REST API prerequisites for Design Import video in the Video tutorial section to learn more.
Launch Volt Iris
-
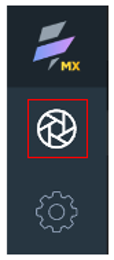
Open Volt Iris. When the Sign-in to your account page appears, close it by clicking the Volt Iris home icon.
-
Configure the login settings.
-
Go to Preferences.
For Windows, select Edit → Preferences.
For Mac, depending on your macOS, select Volt Iris → Preferences or Settings.
-
In the Volt Iris Preferences dialog, click Volt Foundry.
-
On the Volt Foundry tab, enter your Volt Foundry URL in the Foundry URL text box, and then click Validate.
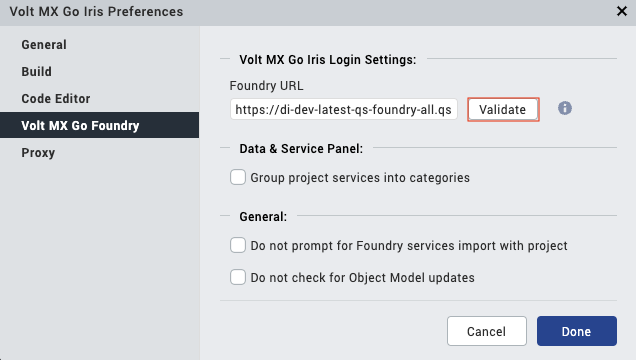
You should see the Validation Successful message at the top of the dialog. If you entered an incorrect Volt Foundry URL, you will see an error message at the top of the dialog advising you to try the validation again.
-
Click Done.
-
-
Log in to Volt Iris.
- Click Login on the upper right corner of the Volt Iris screen.
- Enter your email and password for Volt Foundry on the Sign in to your account page.
- Click Sign In. Your username appears next to the profile icon.
Create a new project
In this tutorial, we will use a web app project. The following steps will enable you to create one. If you want to create a native app, see create a native app project for more information.
- In the top menu, select Project → New Project.
-
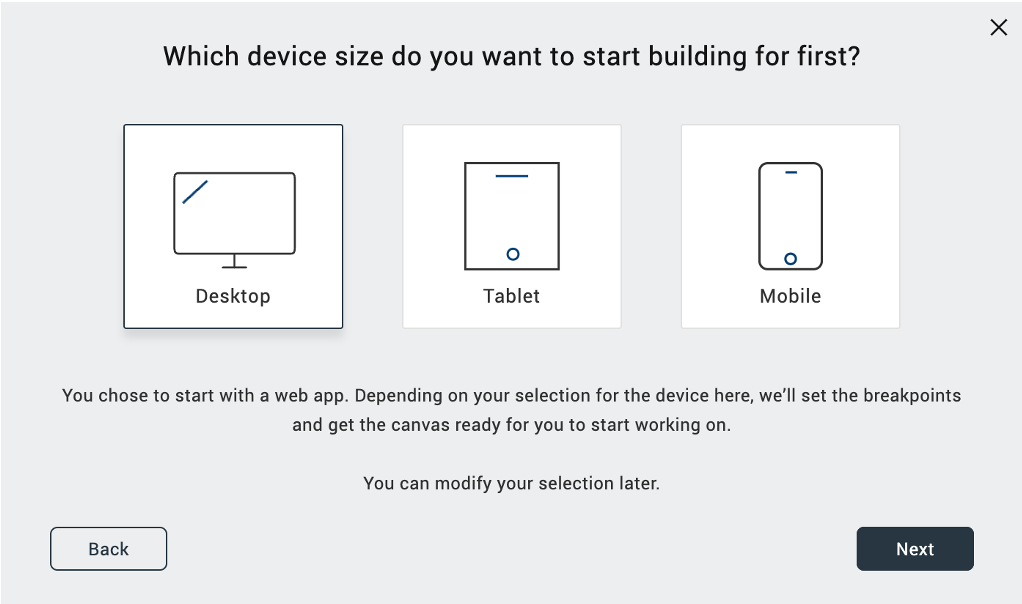
In the What do you want to start with now? dialog, select Web App and click Next.

-
In the Which device size do you want to start building for first? dialog, select Desktop and click Next.
-
Enter your Project Name and click Create.

You can now see your project name in the upper-left corner of the Volt Iris UI.
Import a Domino application
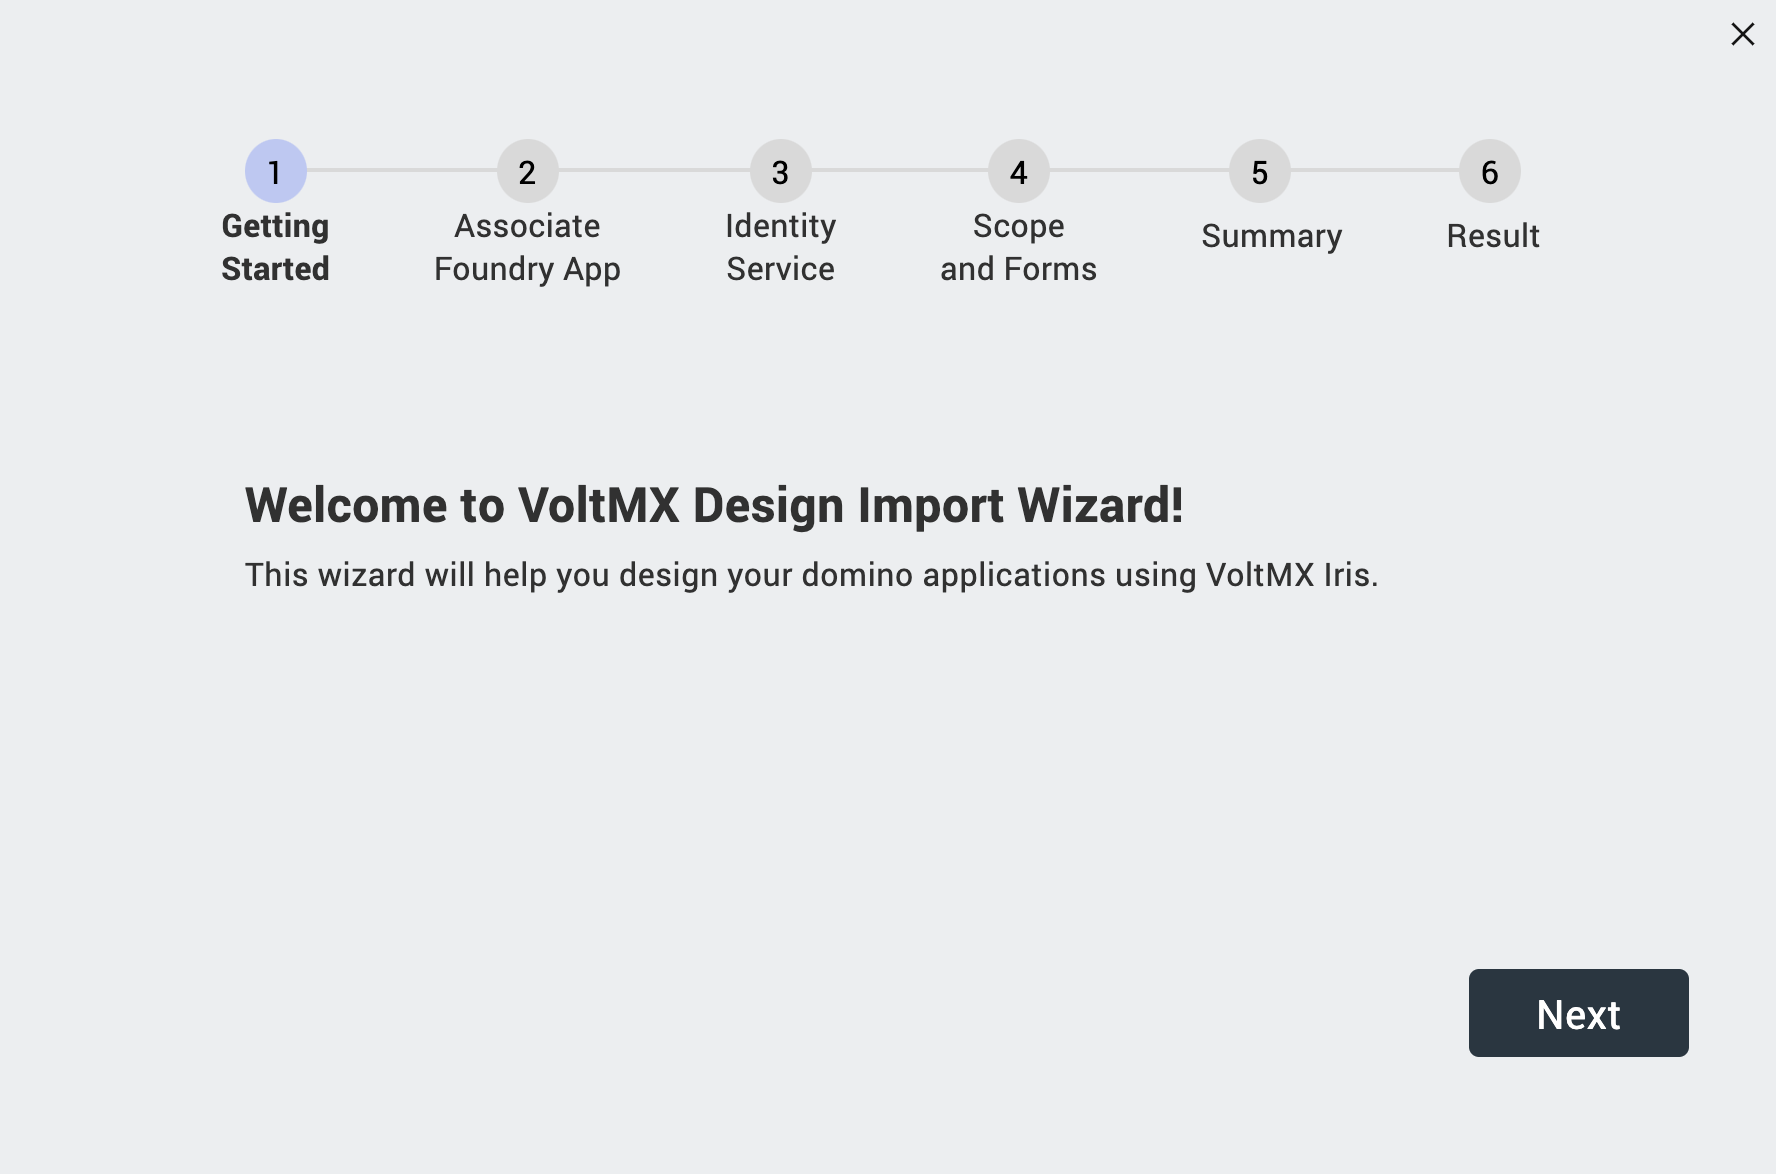
-
In the top menu, select Project → Import → Domino Application. The VoltMX Design Import Wizard opens.
-
On Getting Started step, click Next.
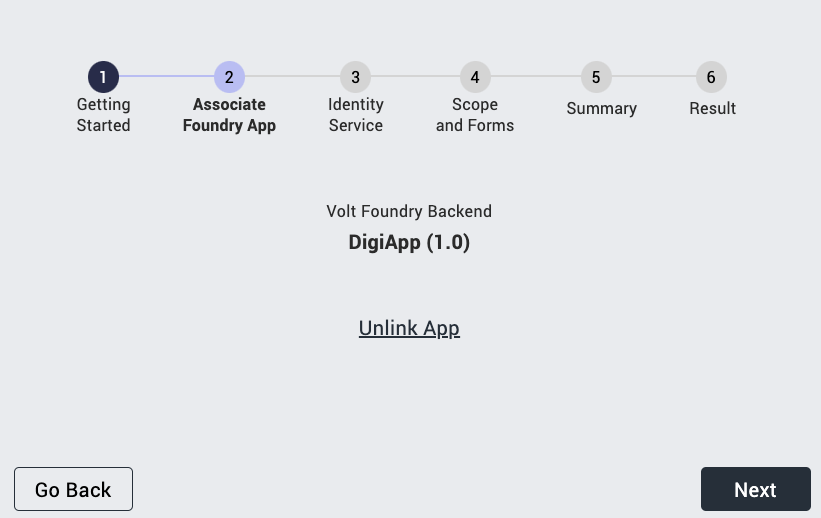
-
On Associate Foundry App step, click Create New.
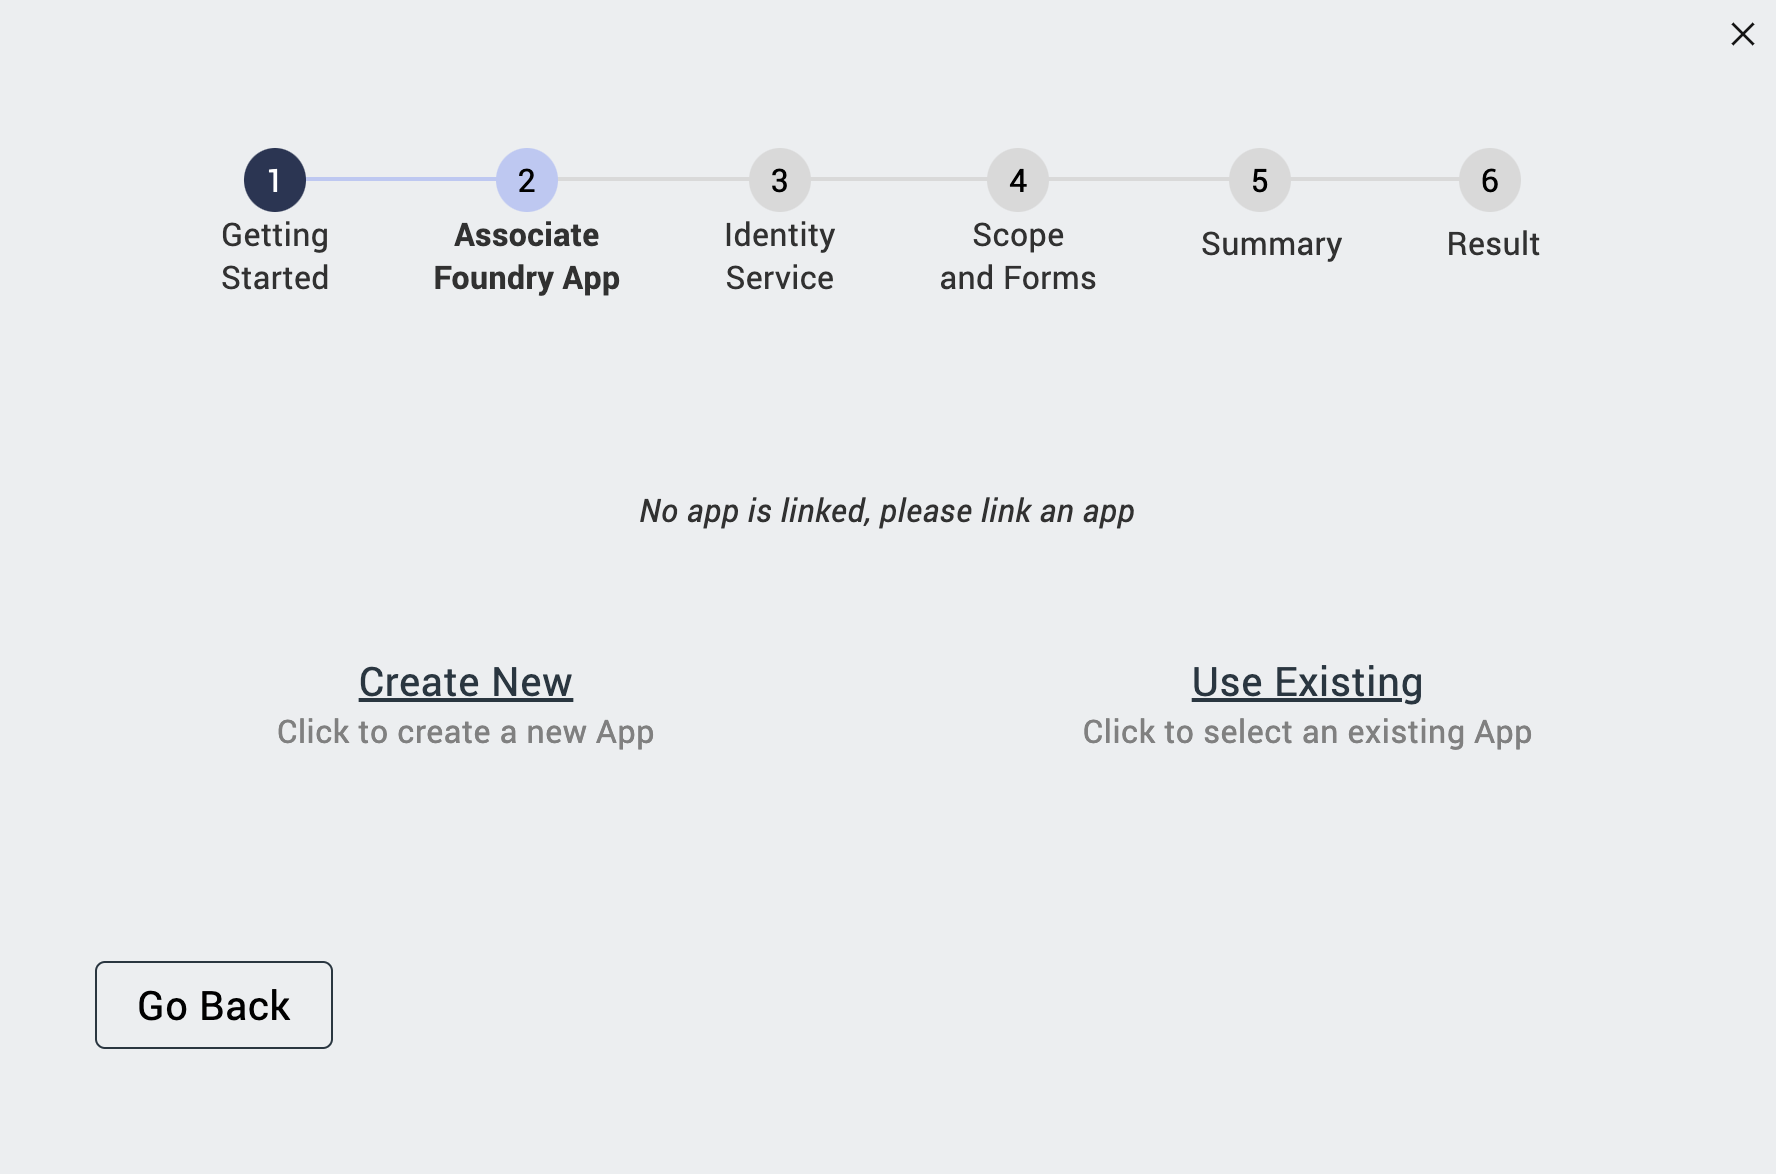
-
After creating the Foundry app having a default name similar to your Project Name, click Next.
-
On Identity Service:
-
Enter the required details in Create New Identity Service and click Next.
Fields Description DRAPI URL This refers to the Domino REST API URL you are working with. Scope This refers to the name of the scope that's set up in the OAuth app you are using in the Domino REST API.
If multiple scopes are configured in the OAuth app, and you wish to use specific scopes, ensure that you separate these scopes with commas when you enter them. For example:scope1,scope2
If you intend to use or access all the scopes available in Domino REST API, enter$DATA. Just make sure that you only configured$DATAand$SETUPin the OAuth app in Domino REST API.App ID This is the App ID of the OAuth app you are using in Domino REST API. App Secret This is the App Secret of the OAuth app you are using in Domino REST API.
You can click and hold on the eye icon to verify the entered value.Service Name: Any name that identifies the Volt Foundry Identity Services.
The service name must have a maximum of 10 alphanumeric characters without spaces.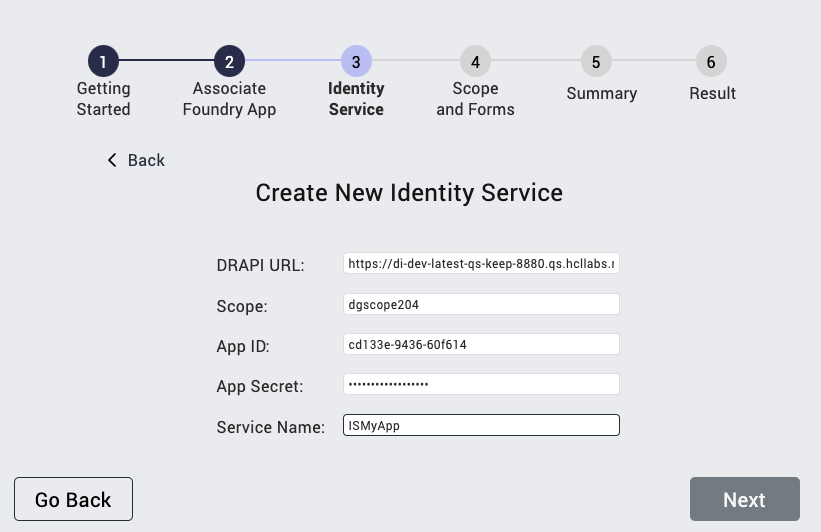
-
Select the Identity Service.
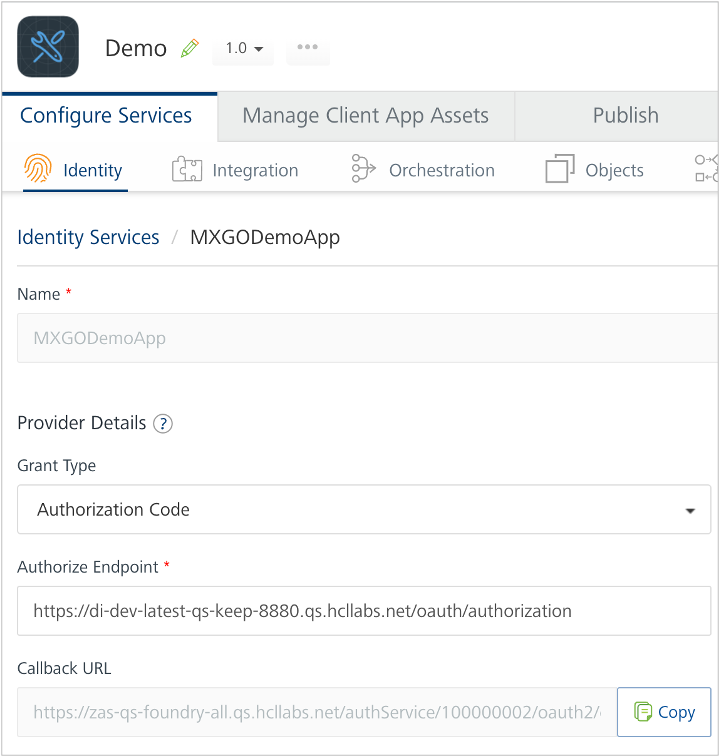
The name of the Identity Service is the service name you provided prefixed with MXGO. As shown in the image, the name of the Identity Service is MXGODemoApp

Important
You need to pause here and do not click Next until you update the callback URL in the OAuth app in Domino REST API with the callback URL from the Identity Service in your Volt Foundry app. If you click Next without updating the callback URL in the OAuth app, a validation error occurs and prevents you from proceeding.
To update the callback URL of the OAuth app in Domino REST API
-
Get the callback URL of your Identity Service.
- Log in to Volt Foundry.
- On the Apps page, click your Volt Foundry app.
- On the Identity tab under Configure Services, click your Identity Service.
-
Under Provider Details, click Copy corresponding to the Callback URL field to copy the callback URL.
-
Close Volt Foundry.
-
Update the callback URL of the OAuth app in Domino REST API.
- Log in to Domino REST API.
- Select Application Management – OAUTH from the home page or Applications from the side navigation pane to access the Application Management page.
- Click the Edit Application icon corresponding to your OAuth app.
- Update the Callback URLs field with the callback URL you copied from your Identity Service.
- Click Update.
- Close Domino REST API.
- Send the copied callback URL to the Domino REST API administrator and request to update the callback URL of the OAuth app.
- Get confirmation that the callback URL of the OAuth app is already updated before proceeding.
Note: If you don't receive immediate confirmation that the callback URL in the OAuth app has been updated, you can close the Design Import Wizard and Volt Iris. Once you receive confirmation, follow these steps:
- Open Volt Iris and sign in using your MX Go Volt Foundry account.
- Make sure that the opened project is what you used in this tutorial.
- In the top menu, select Project → Import → Domino Application to open the VoltMX Design Import Wizard.
- On Getting Started, click Next.
- On Associate Foundry App, you will see that the Volt Foundry app is still linked. Click Next.
- On Identity Service page, click Use Existing and then select the identity service under Select Existing Identity Service.
From here, you can continue with the next step in this tutorial.
-
-
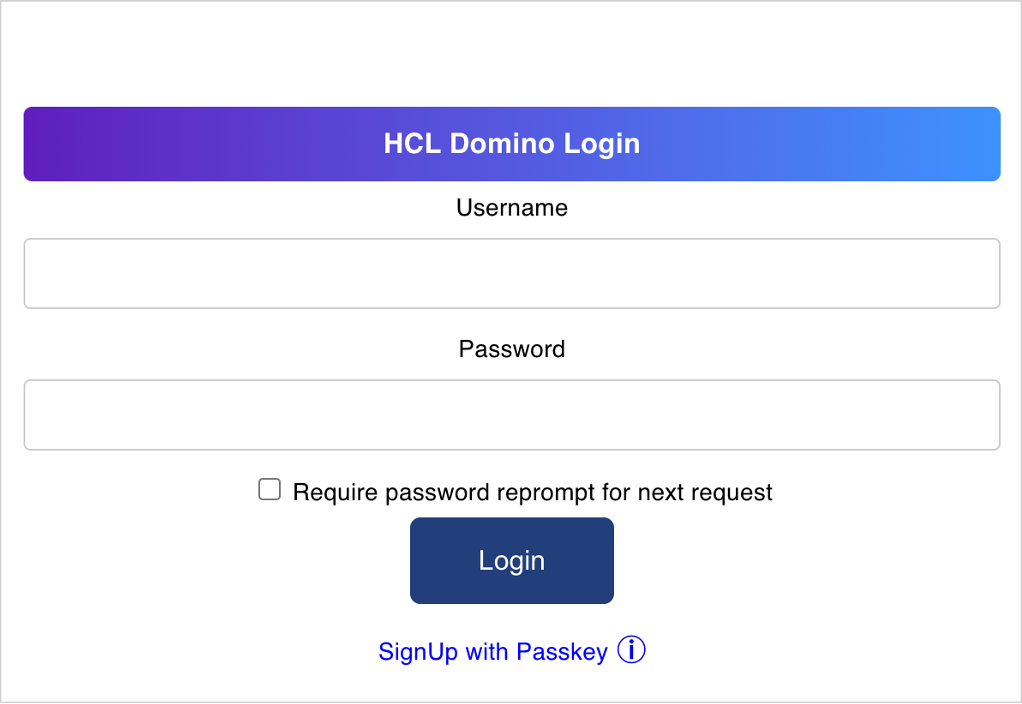
Click Next. The HCL Domino Login dialog opens.
Note
In case of an error due to incorrect entry in the Scope, App ID, or App Secret fields in the Create New Identity Service, a dialog shows an error message and information on how to address the error. Clicking OK in the dialog will redirect you to the Create New Identity Service, where you can correct the entry in the relevant text field.
-
Login with your Domino credentials in the HCL Domino Login dialog.
-
In the Permission Requested dialog, click Allow.

-
Choose the identity service related to your app on Volt Foundry in Foundry App Identity Service and click Next.

-
-
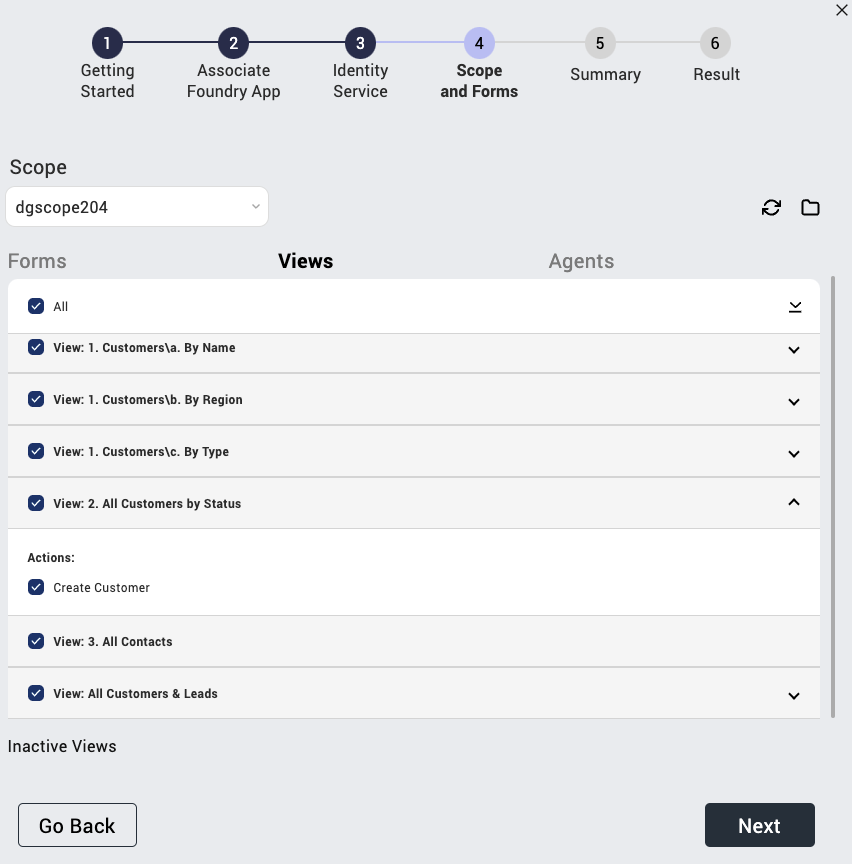
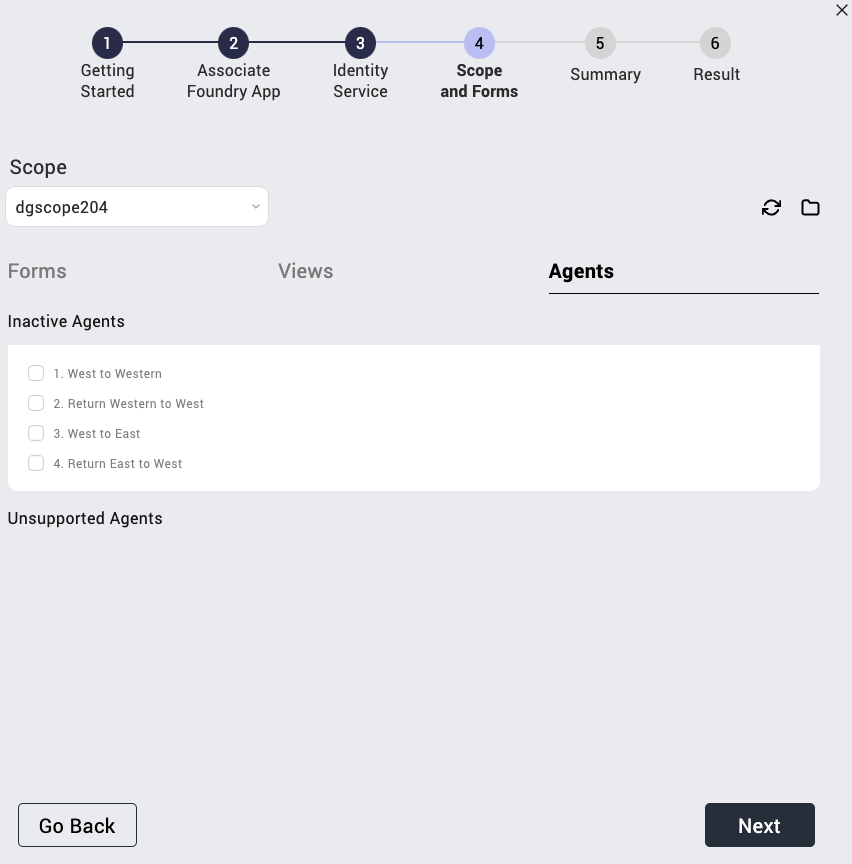
On Scope and Forms:
Note
- Selectable forms, views, and agents are only those set to the active status when configuring the schema in the Domino REST API. Those in inactive status can still be seen but won't be selectable. Unsupported agents are also shown but won't be selectable.
- Actions are often active within the Domino database and can only be modified using Domino Designer. Imported actions might not function as expected. If this happens, you modify or update the actions to function as expected. For more information, see Modify or update imported actions using VoltFormula.
- If a dialog opens indicating that your Domino REST API schema has misconfigured settings, kindly see Troubleshooting for more information on addressing the issue.
- If you see a warning icon appear beside any form, form field, view, or agent, click the Reports folder icon and click a report to open a detailed report explaining the cause of the warning.
- You can click the Refresh icon to update the scope in case there are changes in the Domino REST API schema without exiting the wizard.
- You can use the All, Active, Inactive, and Unsupported buttons in each tab to filter what's displayed.
- You can use the Search box to find forms, fields, actions, views, and agents. The search results will automatically update as you type the letters of your keyword in the Search box. If you want to clear the search, simply click the clear icon.
-
Select the Scope you want to use from the drop-down list.
The available scopes are based on the scopes defined when creating the identity service.

-
Click the Forms tab and select the forms, fields and actions you want to include in the import.

-
Click the Views tab and select the views and actions you want to include in the import.
-
Click the Agents tab and select the agents you want to include in the import.
-
Click Next.
-
On Summary, review the selected
forms,fields,views, andagents. Once you confirm that you have selected everything that you want to import, click Build Iris Application.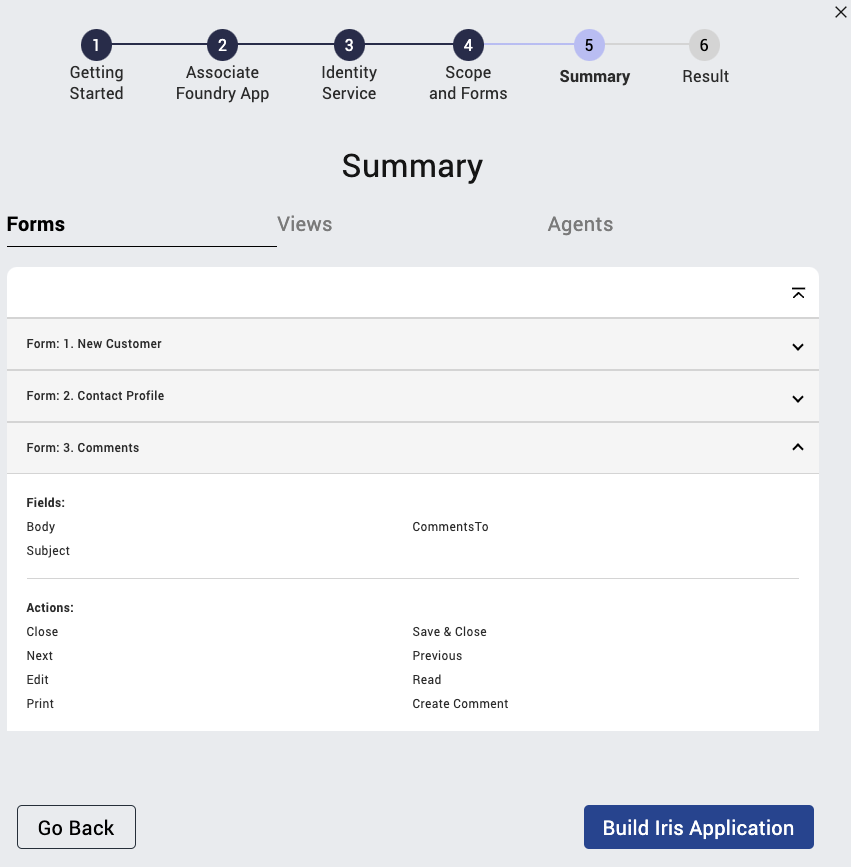
Note
- It may take a while to complete the publishing of the imported Domino app.
-
If a dialog indicating that existing Iris forms are detected appears, click Yes to overwrite the detected forms and proceed with the building of the application. The existing Iris forms were automatically generated when you created the project in Volt Iris.

-
On Result, see the final
forms,views,actions,agents, and then click Done.Tip
- A checkmark icon indicates a successful import.
- A warning icon indicates a successful import, but the imported component might not work as expected due to, for example, its data type not being currently supported.
- An error icon indicates a failed import.
- Click the Show failed imports toggle in a specific tab to the on position to see all elements with the error icon in that specific tab. The Show failed imports toggle won't be visible in a specific tab when there are no failed imports in that particular tab.
- You can click view report to see a results report of imported forms, views, and agents in a new window.
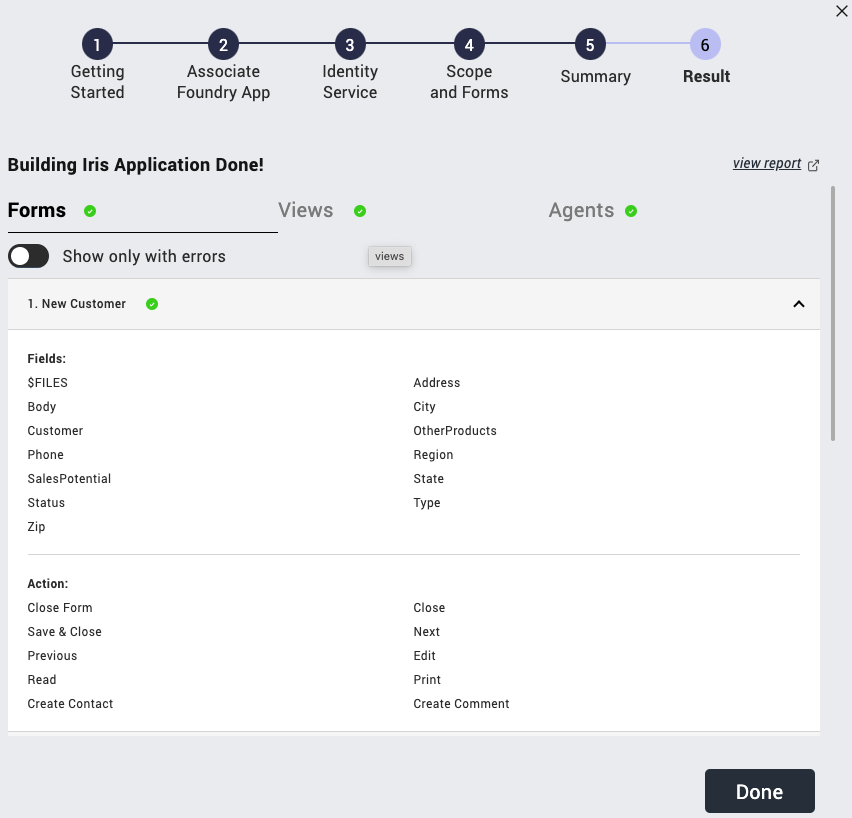
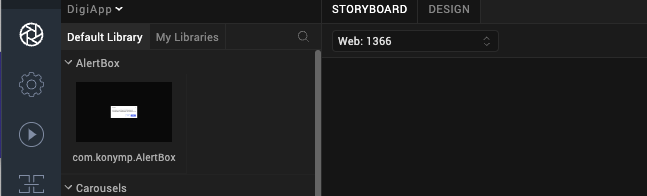
Once you click Done, you can see the imported forms and views in a storyboard view in Volt Iris.
To see the imported forms in a directory, click the DESIGN tab to show the Project tab. You then expand the Responsive Web / Desktop and the Form directory to show the imported forms, views, and actions.
Perform CRUD operation in imported Domino app
Before you can do the CRUD operation in your imported Domino app, you must first build and publish the imported app in Volt Iris.
If your app is a Web App, follow the instructions in Building a Web App in the HCL Volt MX documentation.
If your app is a Native App:
-
After configuring your mobile app browser, follow the instructions in Building a Native App
in the HCL Volt MX documentation to view the mobile app.
Note
For the following topics, the steps are based on an example Domino application. The example images will be different from what you will see when you try the steps using your imported application.
Create entry
-
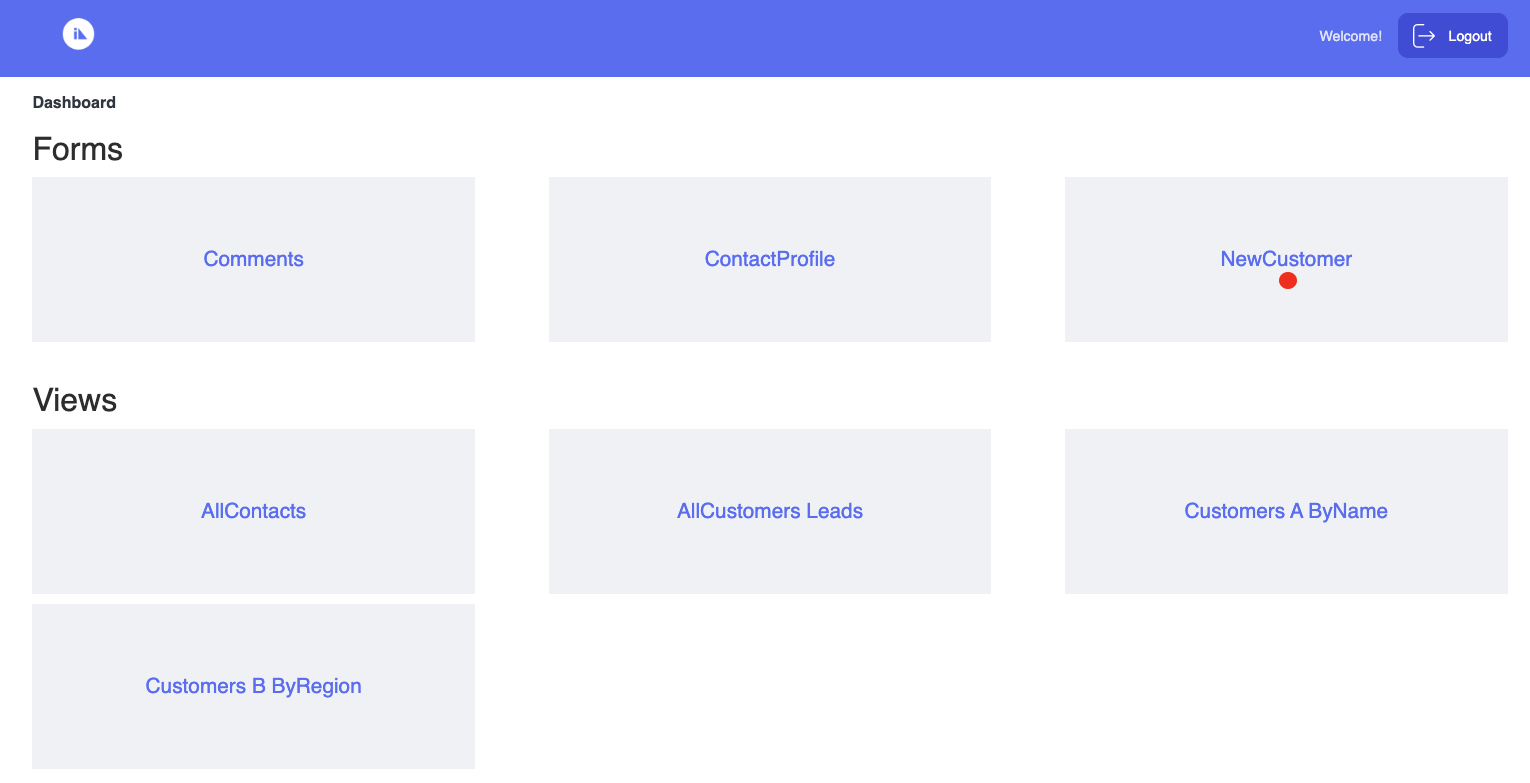
On the Dashboard, go to Forms and click your preferred document. In the example image, we're selecting NewCustomer.
-
Fill in the fields.
-
Click Select Files to upload a file. The File Upload dialog appears.
Note
This step only applies to fields that need you to upload an attachment. The File Upload also appears only if the configured forms of your schema in Domino REST API include the
$FILESfield. -
Select the file you want to upload. You can select more than one file to upload.
Note
To see the details of the uploading size limit, see HCL Notes and DOMINO file limits
in the HCL Domino documentation. -
Click Open. If the file is pre-existing, a dialog prompt appears with the option to overwrite it.
-
Click Add.
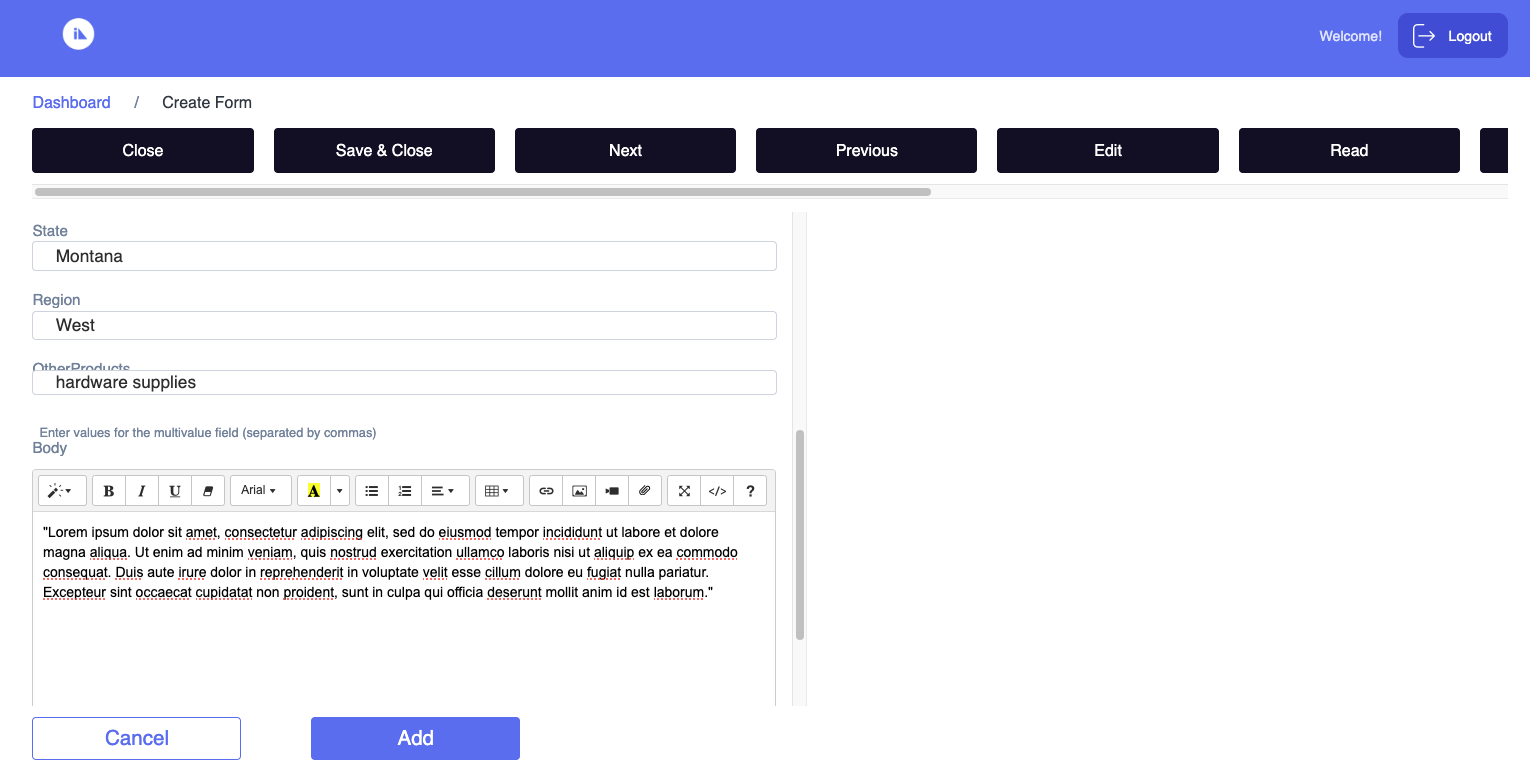
This adds the data to the Domino database.
Viewing data
-
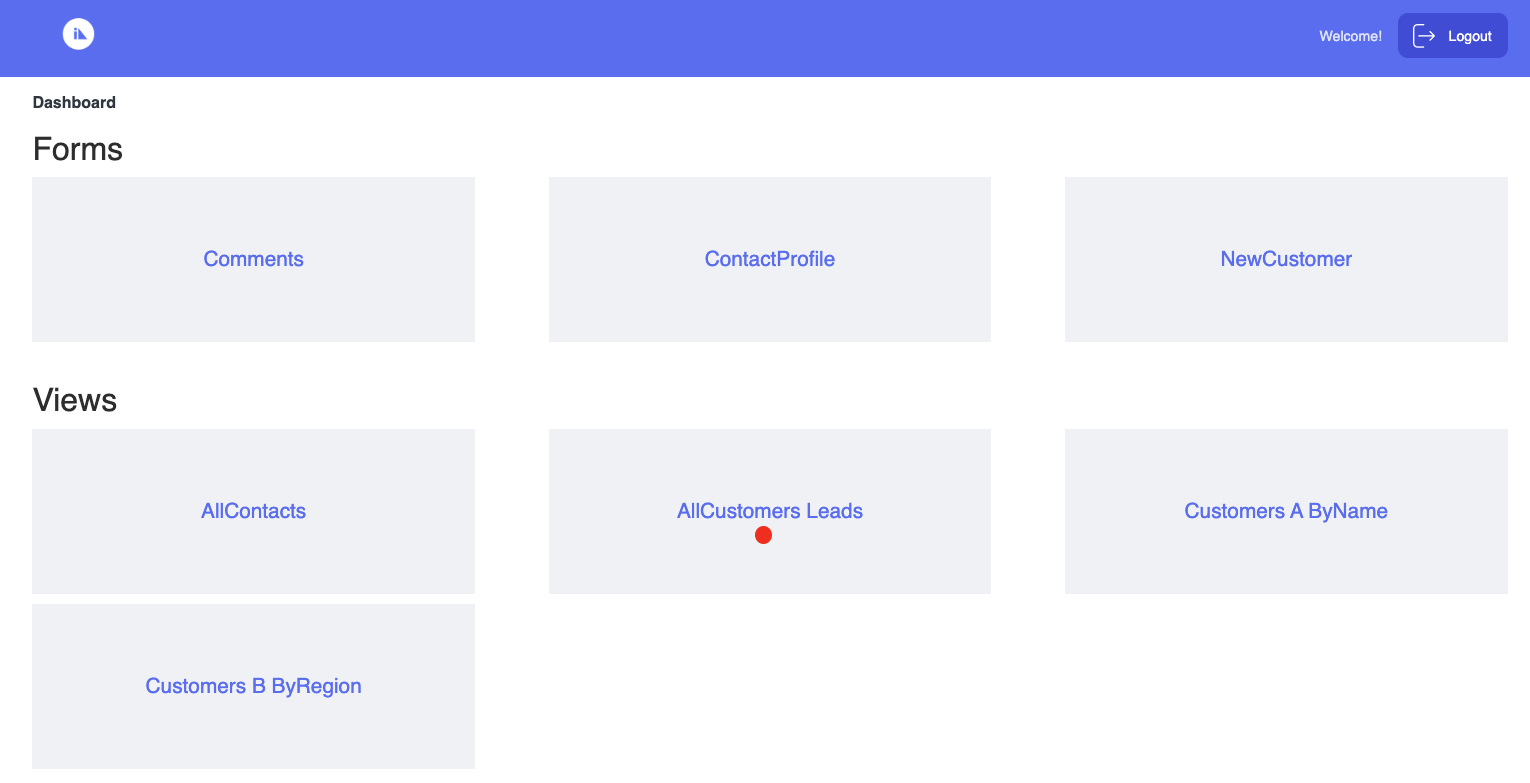
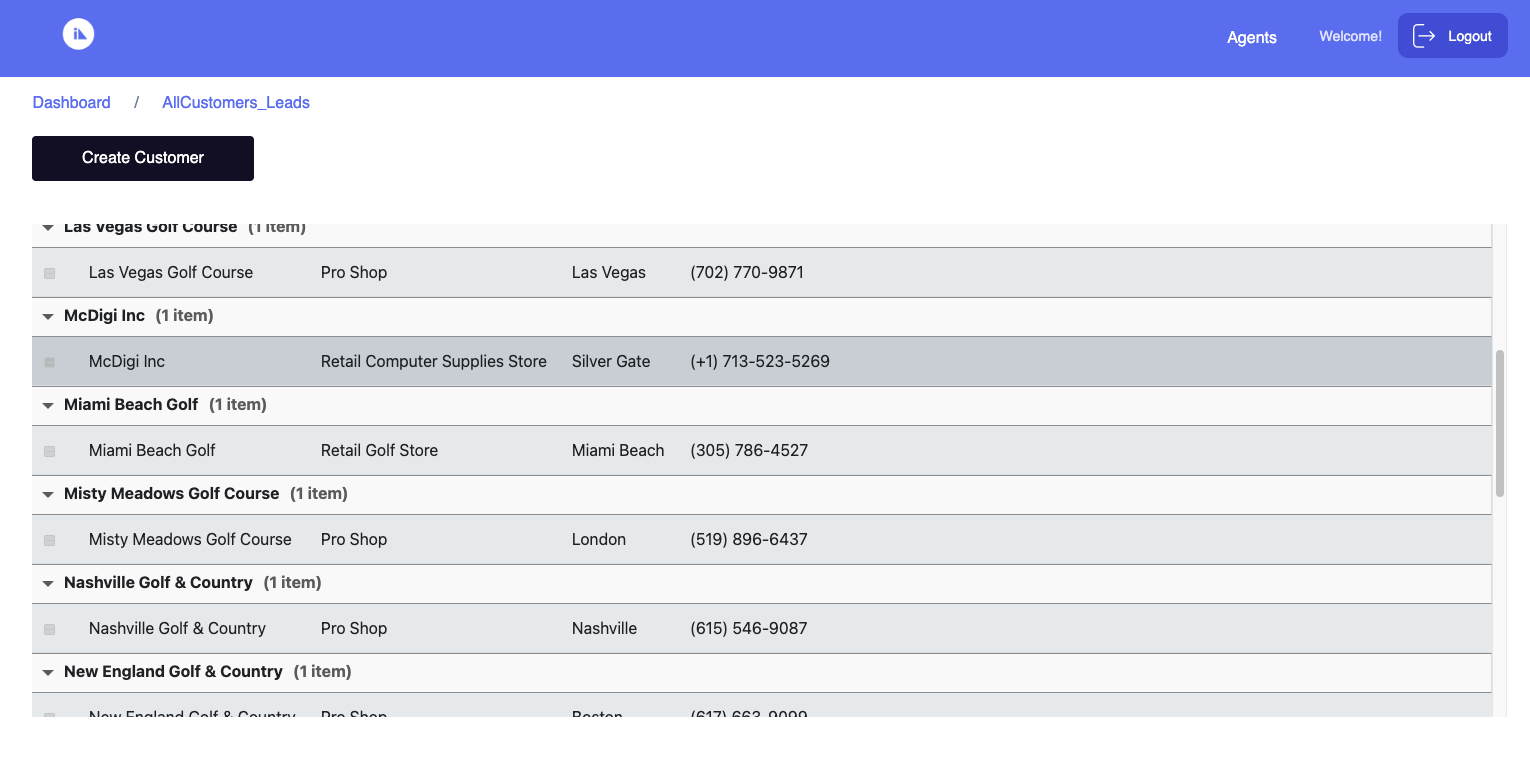
On the Dashboard, go to Views and click your preferred document. In the example image, we're selecting AllCustomers Lead.
-
On the AllCustomers_Leads page, go to your preferred AllCustomers_Lead and click View to open the AllCustomers_Lead detail.
-
Select the Download All Attachments link to download the attachment files.
Note
You can download the attachments only if the
$FILESfield is configured in the form in your schema in the Domino REST API.
Update data
-
On the Dashboard, go to Views and click your preferred document. In the example image, we're selecting AllCustomers Leads.
-
On the AllCustomers_Leads page, select a customer, and then select Edit from the context menu.
Note
If the detail view DOESN'T show, check the Database Views in Domino Rest API
under schema to confirm that the selected database view is active. Also, confirm whether the columns in the view were added during the import.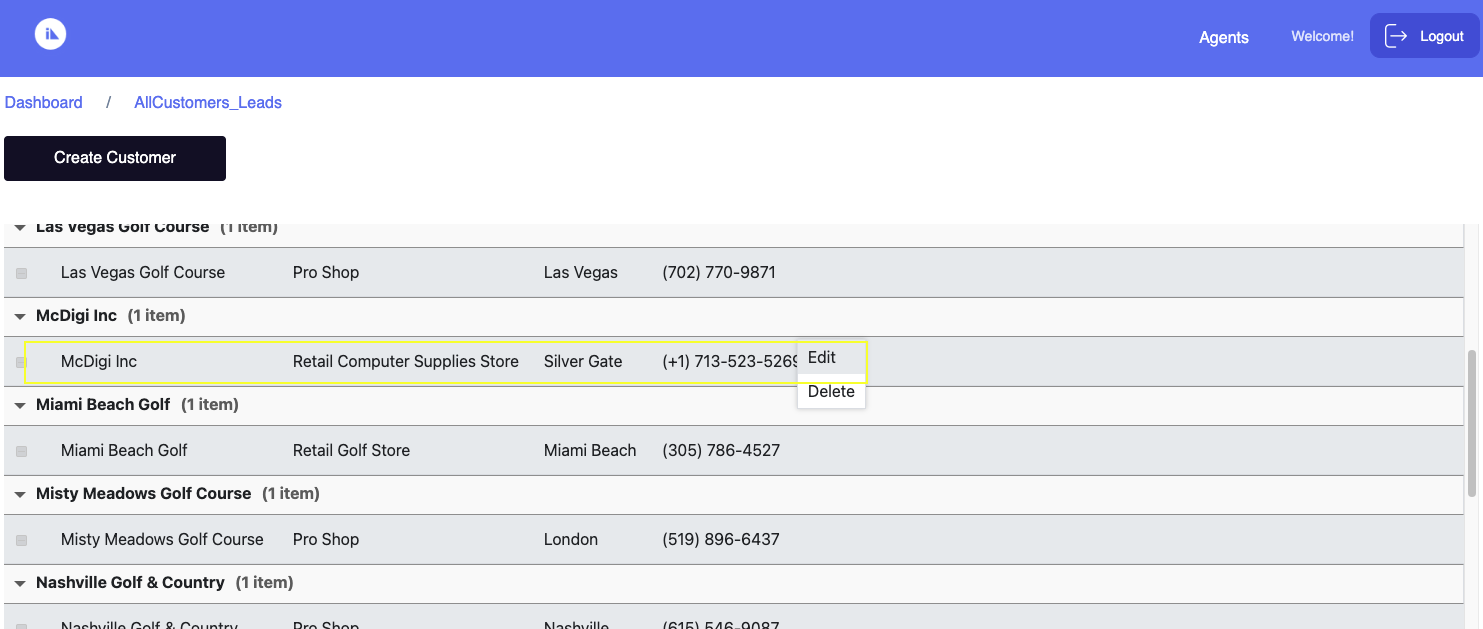
-
Edit the fields that you want to modify.

-
Click Select Files to upload a file. The File Upload dialog appears.
-
Select the file you want to upload. You can select more than one file to upload.
-
Click Open.
-
Click Save to save your updates.
Delete entry
Note
To delete data, make sure that the Formula for Delete Access is set to @True in both the default and dql modes of your forms during schema configuration in the Domino REST API.
-
On the Dashboard, go to Views and click your preferred document. In the example image, we're selecting AllCustomers Leads.
-
On the AllCustomers_Leads page, select the customer you want to delete, and then choose Delete from the context menu.
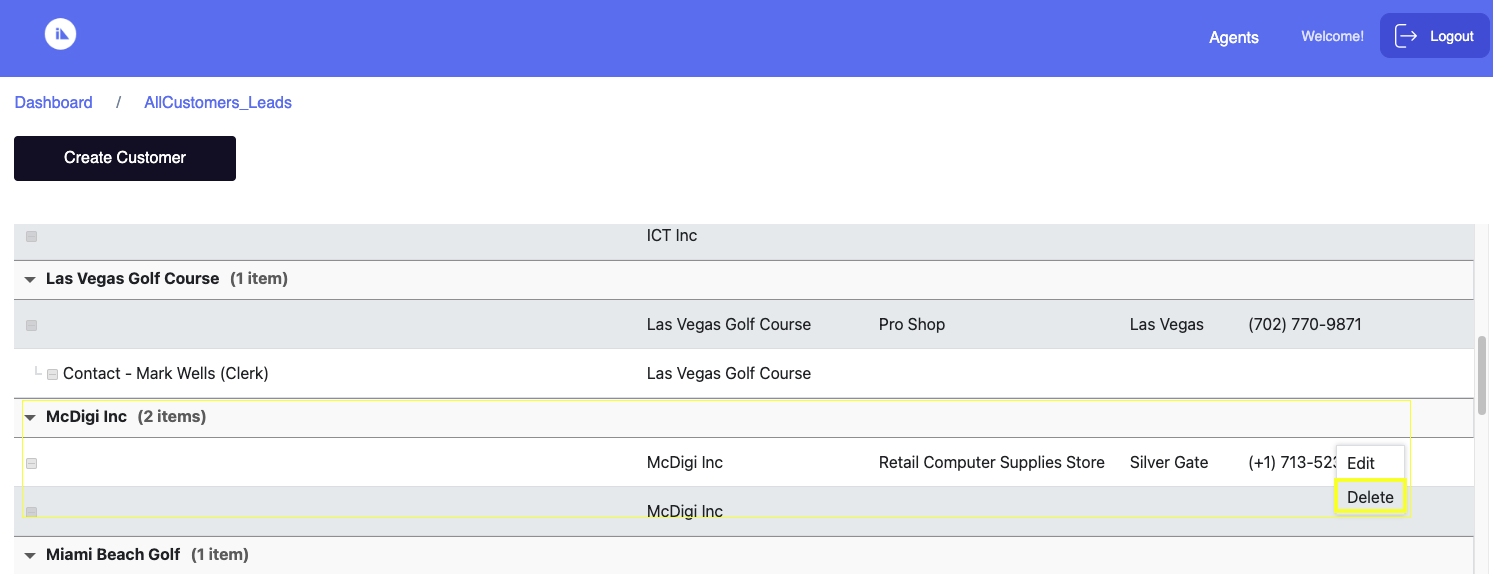
-
When the confirmation dialog appears, click OK.

-
When the notification dialog indicating that the record has been deleted appears, click OK.

Note
Since the changes to the form are reflected in the Domino Server, they're also visible in the Notes Client.