Scope Management
Overview
The Scope Management page in the Admin UI lets you manage scopes. A scope is a name or identifier used to access a Domino database via the REST API, where each scope points to a specific schema in the database. A database can have many schemas for different use cases and a schema can be pointed to by more than one scope.
For more information about scopes, see Schema and Scope and Scopes.
Access Scope Management
- Log in to the Admin UI.
-
On the home page, select Database Management - Activation to open the Scope Management page.
You can also access the Scope Management page by clicking Scopes in the side navigation pane.
View scopes
On the Scope Management page, you can see existing scopes in different layouts:
- Stack View
- Card View
- Alphabetical View
- NSF View
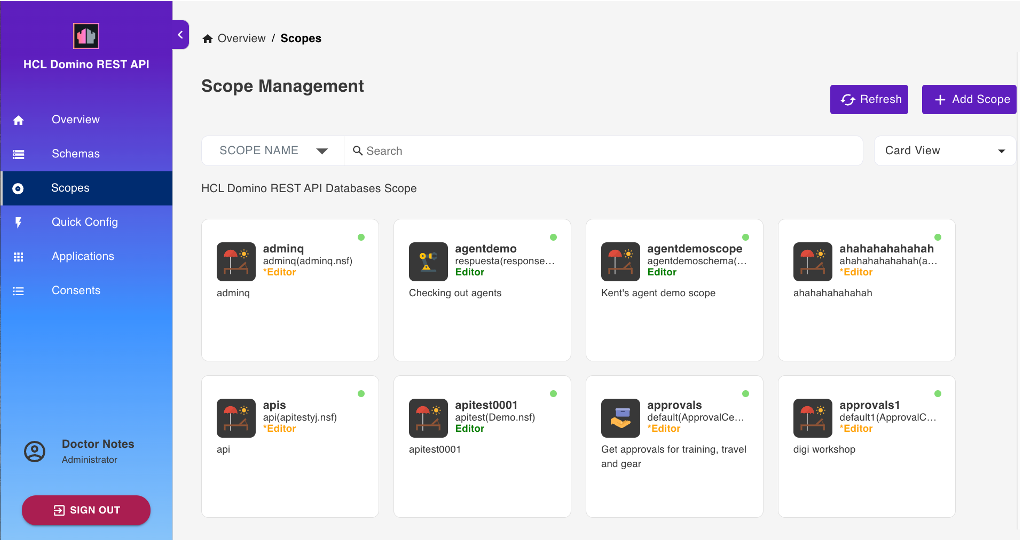
Use the Search field and the search filter to find scopes by Scope Name or by NSF Name.
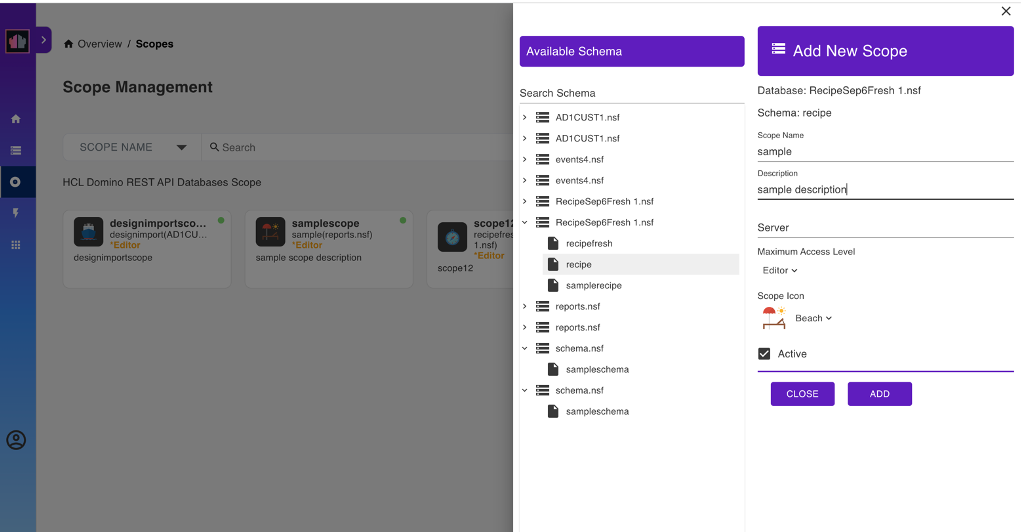
Add a scope
A Domino administrator typically creates scopes after a developer has created the corresponding schema.
-
On the Scope Management page, click Add Scope

-
Under Available Schema, select the schema to associate with the new scope.
-
Under Add New Scope, fill in the fields:
- Scope Name — Enter a name for the scope.
- Description — Describe what this scope represents.
-
Server — Enter the name of the Domino server where this scope will be available or leave blank to use the current server.
The server name must be either the server's hierarchical name, for example MyServer/MyOrg or in canonical format, for example CN=MyServer/O=MyOrg.
Note
Accessing a scope on a different server will always return an HTTP 302 response. The server to be redirected to will be dictated by the
Fully qualified Internet hostnamefrom the server connection document of the server that owns the scope. -
Maximum Access Level — Select the level of access permitted through this scope, with the default set to Editor. This setting defines the maximum level of access available via the Domino REST API but does not override the database ACL. A user’s effective access is determined by the lower of their assigned ACL permissions and the scope’s configured maximum access level.
Note
The Maximum Access Level prevents an app that has inherited a user's access rights when the user grants the app access from unauthorized altering of schemas or access control lists. To know more about what each access level allows and to whom the access level is assigned, see Access levels in the ACL.
-
Scope Icon - Choose an icon to help visually identify the scope.
-
Click Add to create the scope.
Edit a scope
To modify an existing scope:
- On the Scope Management page, click the scope you want to update.
-
In the Edit Scope pane, update the fields that you need to change. You can edit the following fields:
- Description
- Server
- Maximum Access Level
- Scope Icon
-
Click Update to save your changes.
Delete a scope
- On the Scope Management page, click the scope you want to delete.
- In the Edit Scope pane, click Delete.
- In the confirmation dialog, click Yes.
Deleting a scope removes its API access mapping but does not delete the underlying schema or database. Ensure no client applications depend on this scope before deleting it.