Apache CouchDB Adapter tutorial
About this task
This tutorial guides you through the process of using the Apache CouchDB1 Adapter in Volt MX Go. You will learn how to configure an object service for Apache CouchDB, generate a data model, review and adjust field mappings and HTTP methods, and test these methods for interacting with the data model.
By the end of this tutorial, you will be able to configure an Apache CouchDB object service, including generating the data model, modifying field mappings as needed, and testing the supported methods to effectively interact with the data model.
Before you begin
- You have an active CouchDB instance, and your Volt Foundry server is able to connect to the CouchDB host via HTTP/HTTPS.
-
Within your Volt Foundry server, a test environment is already defined. It will be used for API testing, as will be described in the latter part of this tutorial.
For more information on creating a test environment, see Add an environment.
Assumptions
Before starting this tutorial, review the following assumptions to make sure you can follow the procedures.
For the purpose of this tutorial, it's assumed that:
-
You already have a test environment set up. The name of the test environment in the following procedures is going to be referred to as localdevenv.
-
You have a CouchDB database hosted on a machine.
In the following procedures, the CouchDB database is named population and it's hosted on a machine with the hostname couchdb.
The population database contains data on the populations of cities across multiple continents, including Asia, Africa, and North America. A sample document in this database looks like the following:
{ "_id": "11381c61-b182-4fed-bd1b-6453a24c6b8b", "_rev": "6-5bdb9d619b82cb45db1d656c849c5c6c", "continent": "AS", "country": "China", "name": "Beijing", "population": 513, "censusdate": "2023-10-15T00:00:00Z", "grads": 100, "phds": 50 } -
The population database includes fives views named:
- african_cities
- all_cities
- asian_cities
- eu_cities
- north_american_cities
For example, the african_cities view uses the following map function to filter what documents should show up.
function (doc) {
    if (doc.continent === 'AF')
        emit(doc.country, doc.name, doc.population);
}
The asian_cities view has the following map function:
function (doc) {
    if (doc.continent === 'AS')
        emit(doc.country, doc.name, doc.population);
}
Log in to Volt Foundry
-
Open your browser and navigate to the Volt Foundry hostname followed by
/mfconsole/.Tip
Use the Console URL provided in the Install Complete window or from the Installation Complete details displayed in the command line to access Volt Foundry.
-
On the Sign in to your account page, enter your username and password.
- Click Sign In.
The Volt MX Foundry Console opens, displaying the Apps page by default.
Configure an object service for Apache CouchDB
- In the left pane of the Volt MX Foundry Console, click API Management.
- On the APIs page, navigate to Objects, then click Configure New.
- Enter the object service name in the Name text field.
- From the Business Adapters options under Endpoint Type, select Apache CouchDB.
- Set the Metadata Security Level to Authenticated App Users.
-
Under Connection Parameters:
-
Enter the host name and port where the CouchDB instance is hosted in the CouchDB host URI and Port text fields.
Note
Cluster is not yet supported.
-
Enter your CouchDB credentials in the User name and Password text fields.
- Click Test Connection to verify the connection.
Tip
- Ensure you select the environment you added before clicking Test Connection.
- If the test fails, double-check and update the connection parameters as needed.
-
-
Click Save and Configure.
Note
The Apache CouchDB adapter communicates with the CouchDB instance using CouchDB’s RESTful HTTP/HTTPS API. For proper functionality, the HTTP or HTTPS traffic must be allowed between the Volt Foundry server and the CouchDB instance.
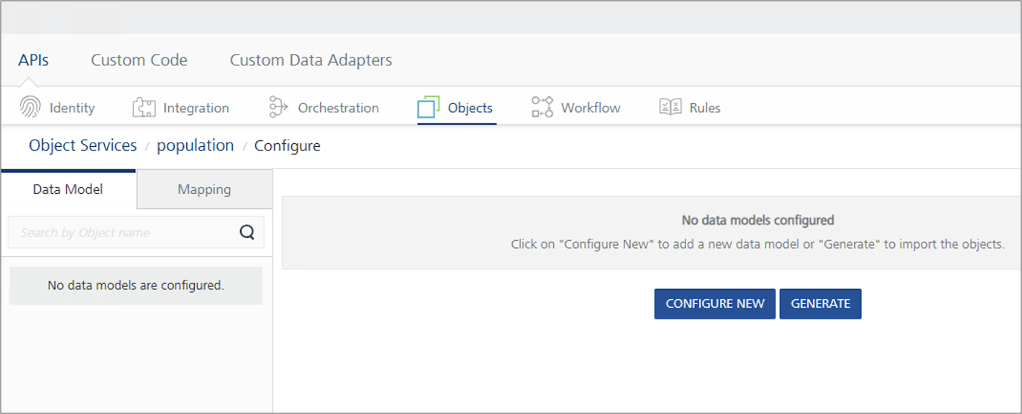
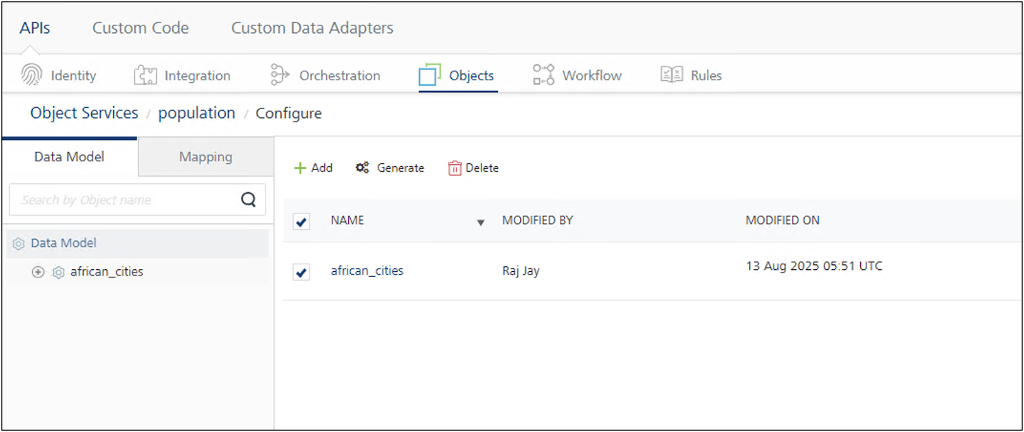
Generate a data model
-
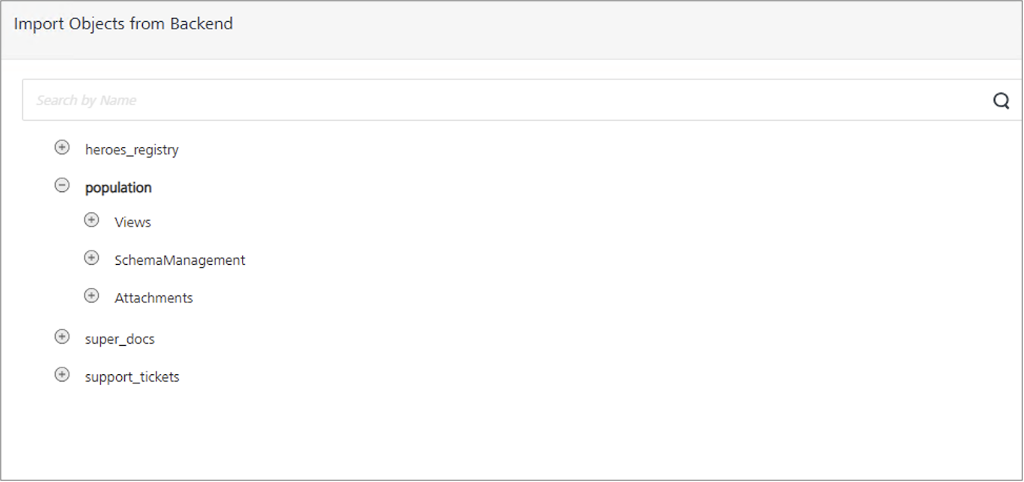
On the Data Model tab, click Generate.
The Import Objects from Backend dialog appears, displaying the CouchDB databases. In the example image, heroes_registry, population, super_docs, and support_tickets are CouchDB databases. Expanding a database reveals a subset of objects available for import.
-
Expand Views and select the checkbox next to the view you want to import. You can import one or multiple views from the same or different databases.
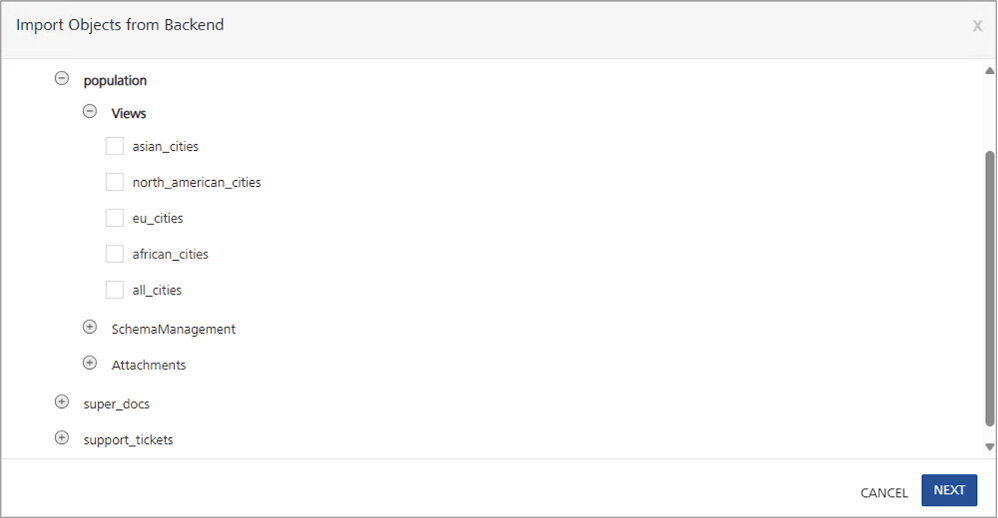
-
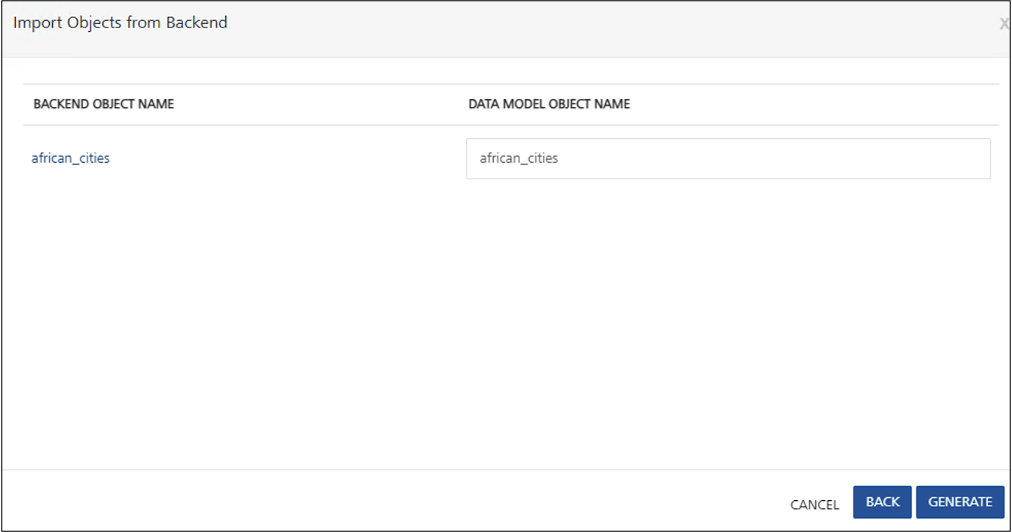
Click Next. The BACKEND OBJECT NAME and DATA MODEL OBJECT NAME of the selected view or views are shown.
Tip
You can modify the data model object names for the selected views.
-
Click Generate. The selected view or views are added to the Data Model.
Tip
If you need to add more views, click Generate and repeat the steps.
-
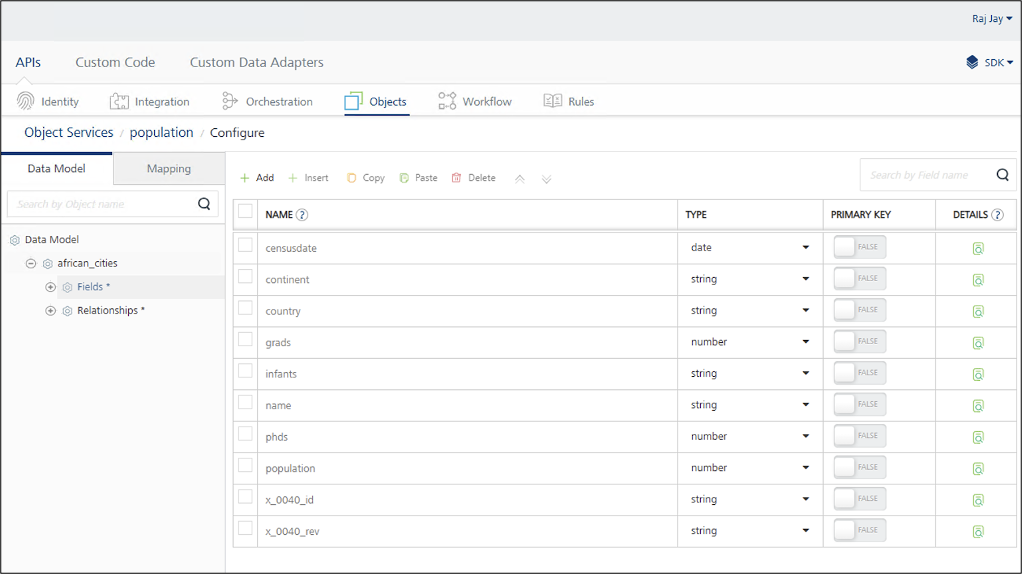
Expand a view and then click Fields to see the inferred schema for documents in that view.
The schema is infered from the first document in the view. Ensure that at least one document exists in the view with a complete set of fields and proper data integrity to guarantee an accurate inferred schema.
-
Modify fields or field types as needed, then click Save.
Warning
Don't change the field names ending with
_idand_rev, as these are reserved system fields maintained by CouchDB.
Check the mapping and methods
-
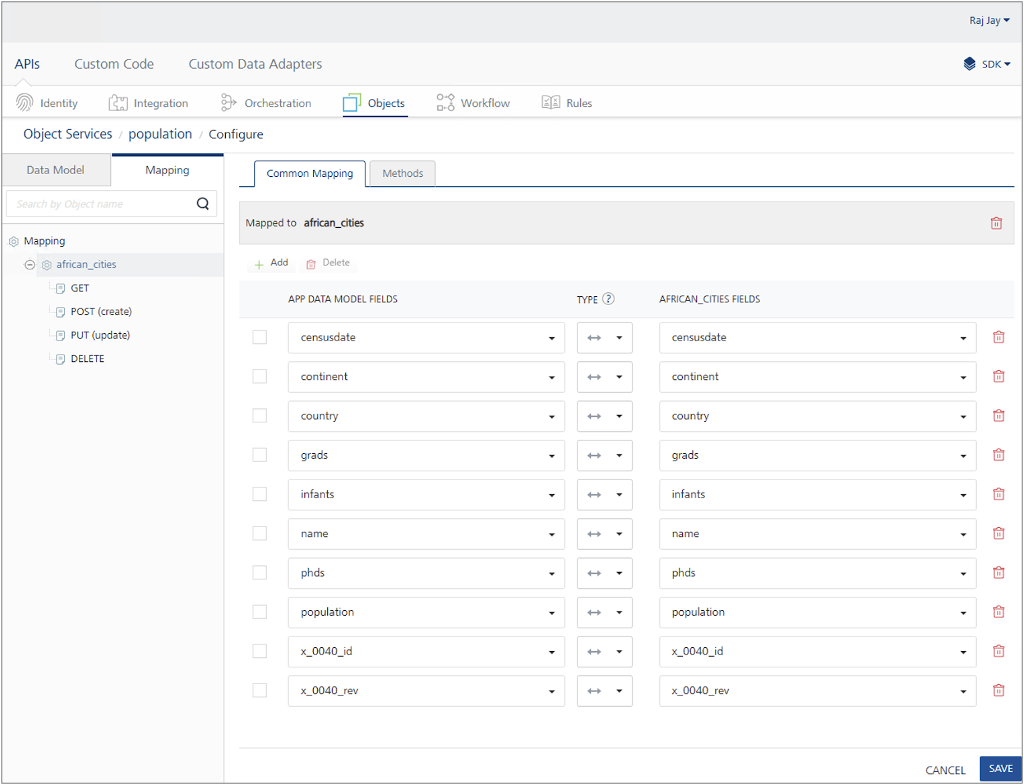
Click the Mapping tab, then select the view, named african_cities as shown in the example image. The Common Mapping tab appears, allowing you to map fields between Volt Foundry and CouchDB. The default mapping suits most cases.
-
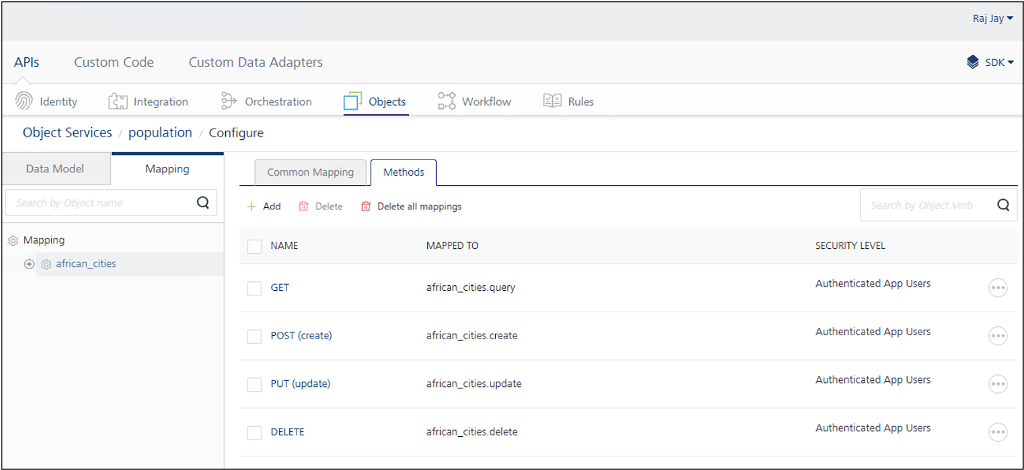
Click the Methods tab to view a list of HTTP methods available for the object model. In the example image, the GET, POST, PUT, and DELETE methods can be executed.
To disable a method, select its checkbox and click Delete.
Method description
- GET: Retrieves all documents in the view.
- POST: Creates a new document in the view. CouchDB views have selection criteria, so the new document must meet those to appear. For example, in african_cities view, the new document must represent an African city to be included.
- PUT: Updates an existing document.
- DELETE: Deletes an existing document.
Test the methods
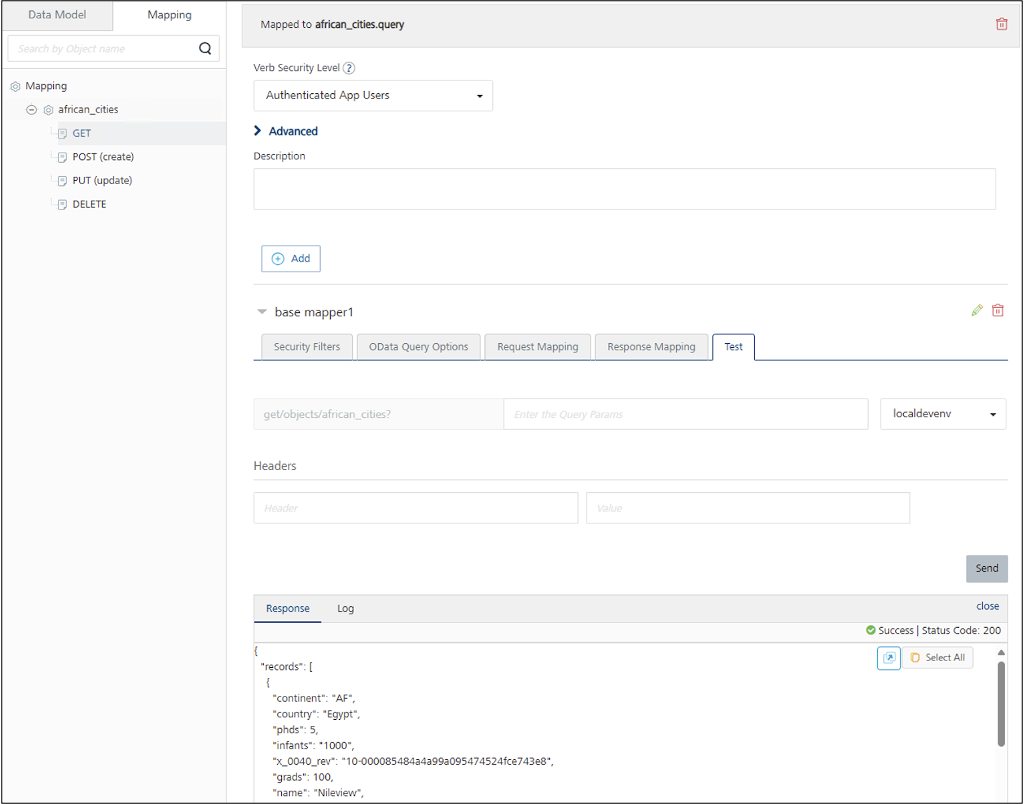
Test the GET method
- On the Mapping tab, expand the view and click GET.
- Expand the base mapper1, then select the Test tab.
-
Click Send.
All documents from the view are retrieved and displayed in the Response console. Using the african_cities view as an example, a sample response looks like this:
Test the POST method
- On the Mapping tab, expand the view and click POST.
-
Expand the base mapper1, then select the Test tab.
The Request Payload with the appropriate schema is displayed.
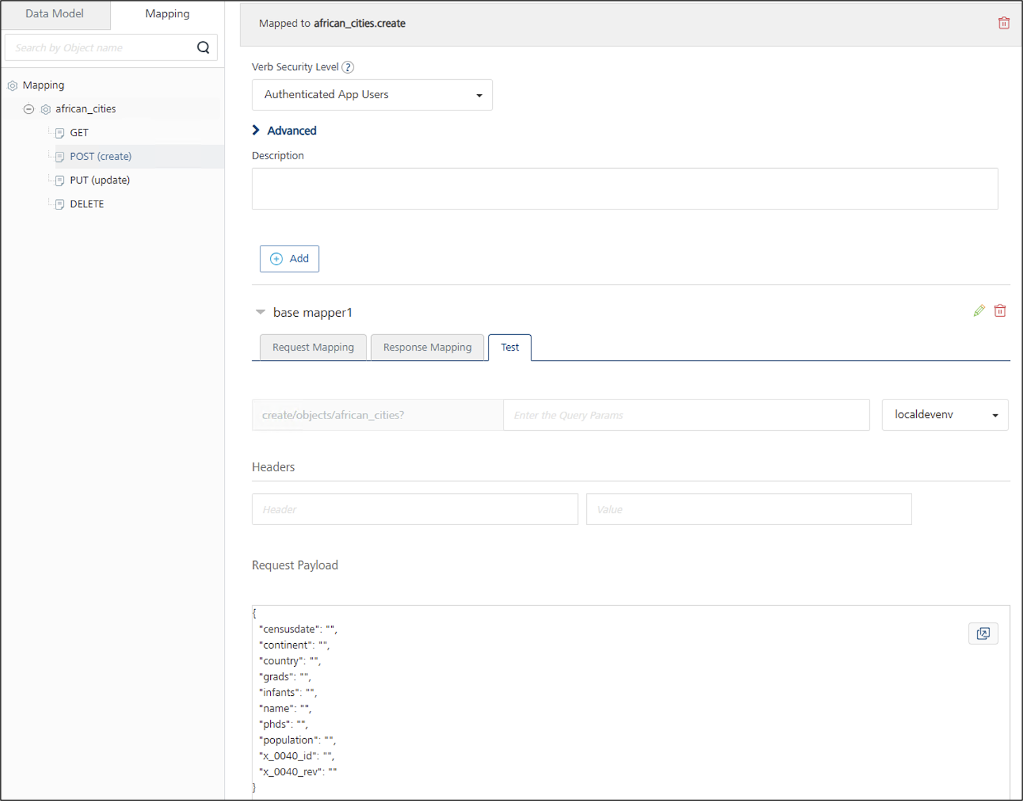
-
Fill in all fields with appropriate values, except for
x_0040_idandx_0040_revfields. CouchDB automatically generates values for these system fields when creating the new document.Example request payload:
{ "censusdate": "2023-12-31T00:00:00Z", "continent": "AF", "country": "Egypt", "grads": 150000, "infants": 80000, "name": "Cairo", "phds": 5000, "population": 9900000, "x_0040_id": "", "x_0040_rev": "" } -
Click Send to create the new document.
Test the PUT method
- On the Mapping tab, expand the view and click PUT.
-
Expand the base mapper1, then select the Test tab.
The Request Payload with the appropriate schema is displayed.
-
Enter the updated values for the fields you want to update.
- Click Send to update the documents.
Test the DELETE method
- On the Mapping tab, expand the view and click DELETE.
- Expand the base mapper1, then select the Test tab.
-
In the Request Payload, enter the
x_0040_idandx_0040_revfields with their appropriate values corresponding to the document you want to delete.Example request payload:
{ “x_0040_id”: “<appropriate id>”, “x_0040_rev”: “<appropriate rev>” } -
Click Send to delete the document.
-
Apache CouchDB and CouchDB are trademarks of The Apache Software Foundation. ↩