Setup Eclipse
This section describes how to install Eclipse, and set it up as a KEEP API development environment.
Note: Eclipse is a popular choice for IDE as it has a rich and extensible feature set, and is familiar to many team members. That said, since KEEP is Maven based and built from the command line, it does not require any one IDE. Other choices worth investigating include:
Installing Eclipse
Begin by downloading and installing the 64 bit version of Eclipse from Eclipse.org. Use the offical downlaods page to get your version
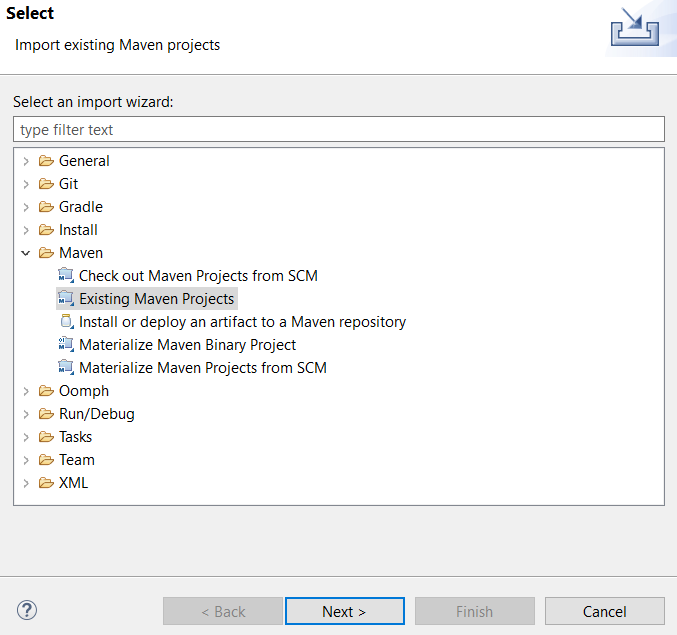
Once you have Eclipse properly installed, select: File / Import… from the top level menu to bring up the Import dialog:
-
Select Existing Maven Projects as shown above and click Next.
-
Click the Browse… button and select your domino-keep directory, and click Finish to import it. You should now see the KEEP source code in your Package Explorer.
Configuring Java
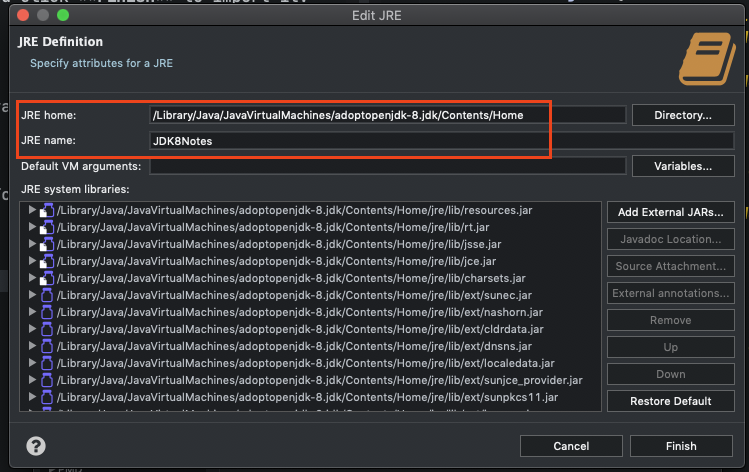
If you haven’t already, take a moment now to install the OpenJdk version of Java 8. Instructions are here:
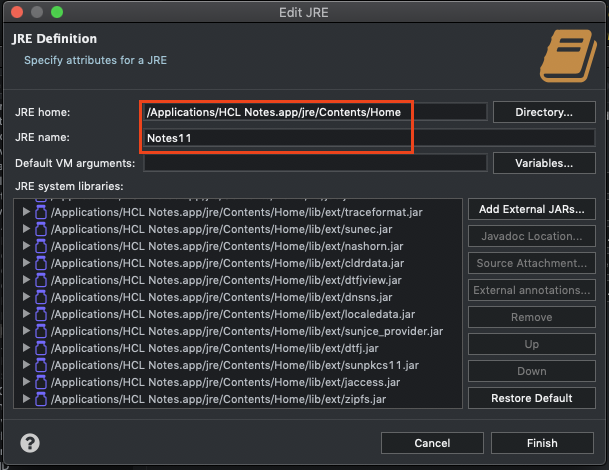
You will need to setup two versions of Java for your development environment: To Run KEEP successfully the Notes or Domino JVM is required. To run a successful Maven build, the Domino JVM is insufficient, since Maven requires a true JDK, as found in OpenJdk 8.
For Eclipse it could look like this:
Debugging KEEP within Eclipse
Once you have a Debug Configuration properly set up, it is very easy to debug KEEP APIs within Eclipse.
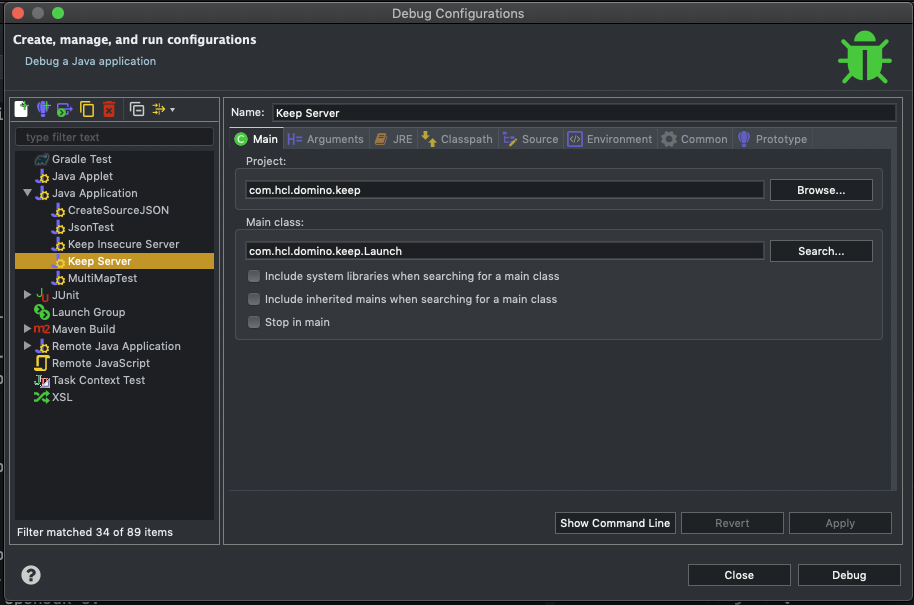
To get started, select Run \ Debug Configurations… from the top menu.
Next right click on Java Application and select New Configuration:
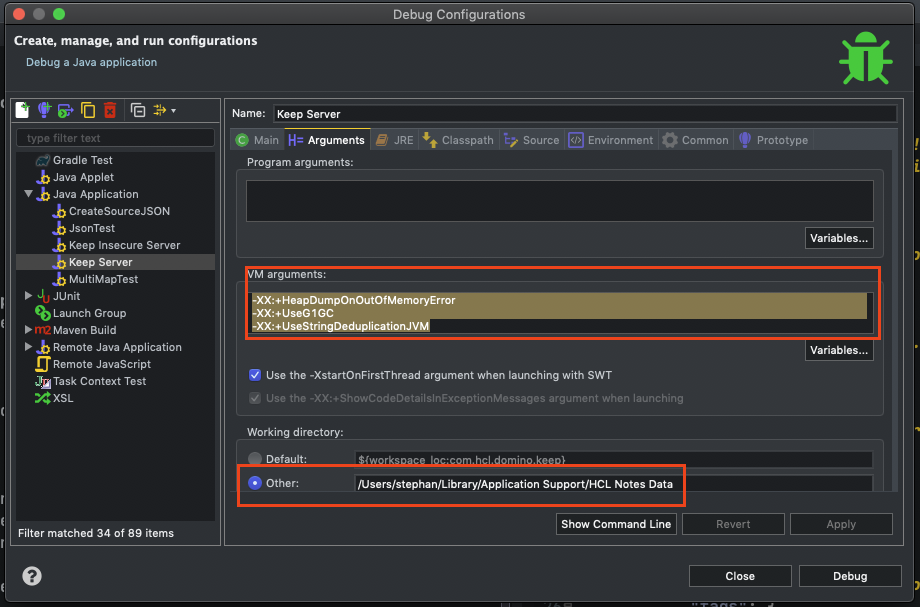
- Give your configuration a name, KEEP Server in this case, and set Project to com.hcl.domino.keep and Main Class to com.hcl.domino.keep.Launch
- Switch to the Arguments tab and provide the following arguments (one per line)
-XX:+HeapDumpOnOutOfMemoryError-XX:+UseG1GC-XX:+UseStringDeduplicationJVM
Set the Working directory to your Notes DATA directory (And if your data directory on Windows is below Program Files... or on Linux below /opt a kitten must die each time you launch!)
- Switch to the JRE tab and select Alternate JRE. Select the Notes 11 JRE you created above from the dropdown list. (Using the Notes 11 JRE will allow Eclipse to resolve Notes and Domino classes.)
|  |
- Now switch to your Classpath tab. You should see a layout like the one below, with the Notes 11 JRE on your classpath.
|  |
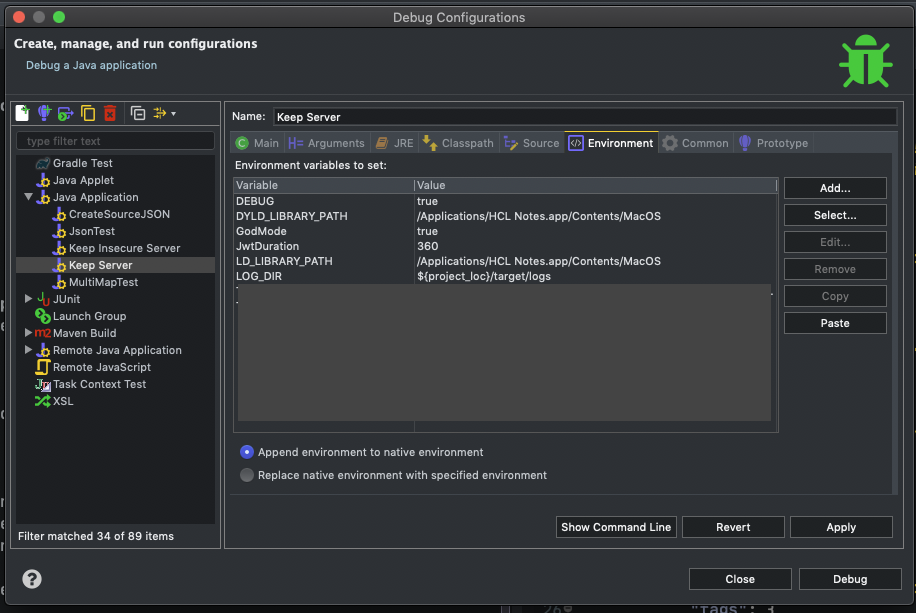
- Next switch to your Environment tab, and enter the environment variables shown below. Of course you will need to adjust the Notes path to match your system.
DEBUG=trueDYLD_LIBRARY_PATH=/Applications/HCl Notes.app/Contents/MacOSLD_LIBRARY_PATH=/Applications/HCl Notes.app/Contents/MacOSGodMode=trueJwtDuration=360LOG_DIR=${project_loc}/target/logs
NOTE Entries are CaSe SeNsItIvE
When you have a valid SSL cert, you also might need
TLSFile=somekey.pfxTLSPassword=geheim
-
When you’re done, remember to hit Apply, and you should be good to go.
-
When you wish to start debugging, select Run \ Debug Configurations… from the top menu. Make sure your KEEP Debug configuration is selected (KEEP Server in this example), and press Debug to begin debugging. If you’ve done everything correctly you should see Project KEEP API open for business at the bottom of the console window.
Note There is a separate setting for debugging a KEEP server in a container.
Java editor preferences
Before you use Eclipse to edit and submit code, you should import two XML files that help to enforce good coding practices.
-
Select Window / Preferences from the top level menu.
-
In the Preferences dialog, select Java / Code Style / Clean Up.
-
Next select the Import button in the right panel and import CodeCleanupSettings.xml from your domino-keep directory.
-
Make sure stw.default is now set as your active profile.
-
Now select Java / Code Style / Formatter and import eclipse-java-google-style from your domino-keep directory.
-
Make sure GoogleStyle is now set as your active profile. Click Apply and Close to save your settings.
Now the next time you edit a Java file, you can take advantage of four commands on the Source menu:
Correct Indentation: Control I
Format: Control Shift F
Format Element
Cleanup…