Setup HCL Notes
This section describes how to install the proper version of Notes and then configure it to connect to a mail server.
Preinstallation
If you have a Windows environment, take a moment to make sure that your system is up-to-date. For Windows, this means running Windows Update repeatedly until there are no new updates found. Although running the updates is not always strictly necessary, some team members encountered a mysterious “Error 1935” when trying to install Notes on Windows systems without the latest updates.
Install Notes
The next step is to download the Notes installer and run it.
-
Download the Notes Installer that matches your system.
-
Next run the installer, and on the installation page, select the Notes Client, Domino Designer, and HCL Domino Administrator features along with all their subdirectories.
Configure mail
After Notes has been installed, it must be configured to find your Mail file on your Mail server.
-
Your Domino Administrator should have provided you with all your mail settings.
-
Next bring up Notes and select: File \ Locations \ Manage Locations \ Locations and select the Online entry. Click Edit.
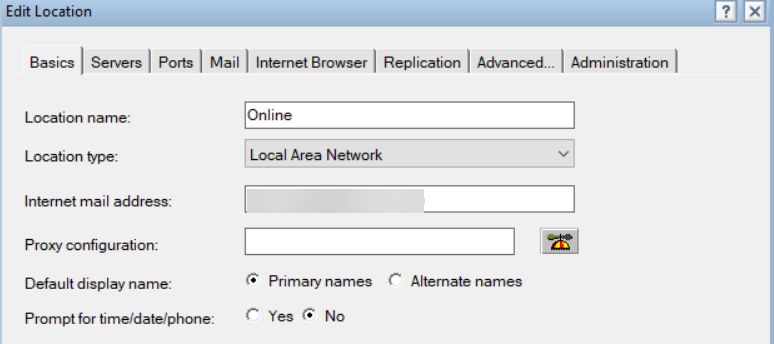
-
On the Basics panel enter your Internet mail address (example: john.dough@acme.com).
-
Switch to the Servers tab and enter your mail server (example: Mail1/Acme).
-
Switch to the Ports tab and check TCPIP.
-
On the Mail tab, set your Mail file location to on Server, set your Mail File (example: jdough.nsf), and your Domino mail domain (example: Acme).
-
Finally, on the Advanced tab, select User ID to switch to and point it to your Notes ID. If you have previously been using a web version of Notes Mail, you can bring up your web mail client and export your Notes ID to your Notes 11 data directory and then import it into Notes 11 from there.
-
Your location record is now complete so click OK.
Now that you’ve imported your Notes ID, do a quick check to verify that that’s the ID you’re actually using. This is necessary as Notes ships with a generic user.id file in the data directory, and if you’re using user.id your security is essentially turned off.
Select File \ Security \ User Security. Verify that the Notes ID in use is correct. If it’s not, go to File \ Security \ Switch Id to change it.
Create server connections records
Now that you’ve configured your mail settings, you need to create Server Connection entries so that your mail server can be found.
-
Bring up Notes, and click the Open dropdown menu in the upper left. Then select Contacts.
-
Next click Advanced to bring up the Advanced page and select Connections.
-
Finally click the New dropdown menu and select Server Connection to bring up the Server Connection form:
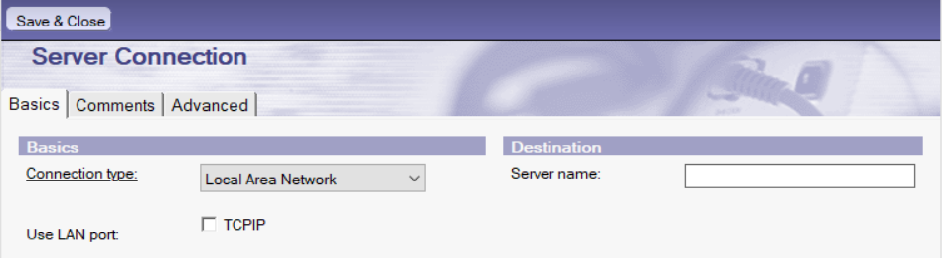
On the Basics tab enter the server name, and click tcpip. On the Advanced tab enter the server address, and click Save. Do this for each of the servers listed in the mail message from your Notes Administrator.
Once the Server Connections are created, you should be good to go.