Setting up Test Data for Docker KEEP
Once you have finished setting up a Docker based KEEP development environment, all the KEEP APIs will run, but only a handful will return actual data. The next step then is to create some test users and test data in your Docker environment so that you can get meaningful results back from the APIs.
Open your KEEP directory
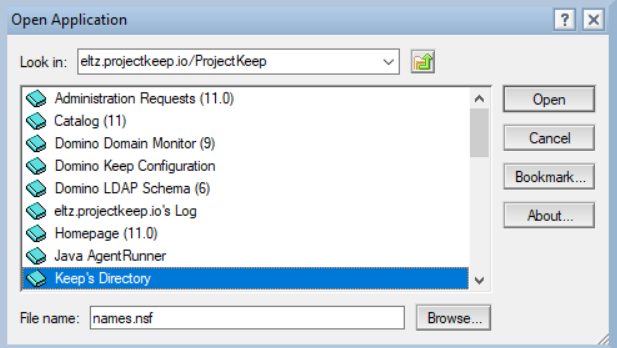
To begin, login to your Notes client and select File / Open / HCL Notes Application to bring up the Open Application dialog:
-
For the Look in field, enter name of your KEEP server, generally your_castle_name.projectkeep.io/ProjectKeep
-
For File Name, enter names.nsf and click Open to bring up your user file:
Creating test users
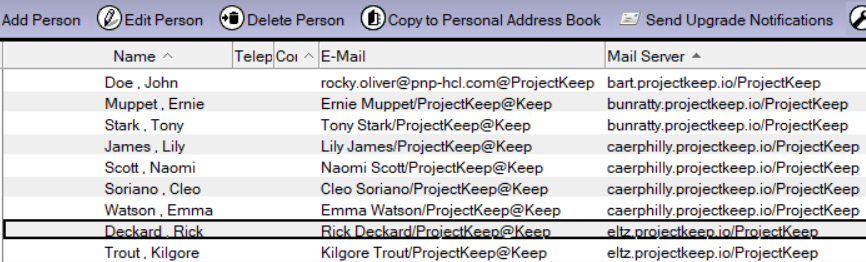
Once names.nsf is open, click Add Person to bring up an Add Person dialog. You’ll want to fill it in using the user shown below as a guide:
-
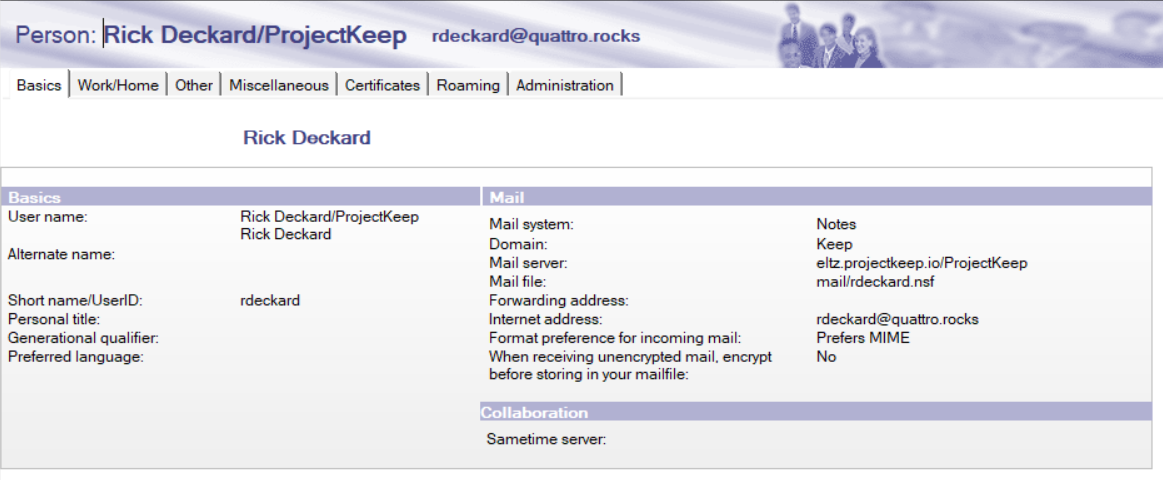
For User Name enter both a long and short user name. Most folks are choosing characters from favorite books or movies (Rick Deckard is the lead character in Blade Runner).
-
Next for Short Name, enter an abbreviated version of the name (Rick Deckard become rdeckard).
-
For Internet Password enter a simple password (security is not really an issue here).
-
Now set Domain to Keep and Mail Server to your_castle_name.projectkeep.io/ProjectKeep
-
For the Mail File, enter: mail/your_short_name.nsf
-
For Internet Address, enter: your_short_name@quatro.rocks
-
Finally, change the Format Preference to Keep in sender’s format
Creating mail files
After you’ve created a new user, the next step is to create their corresponding mail file.
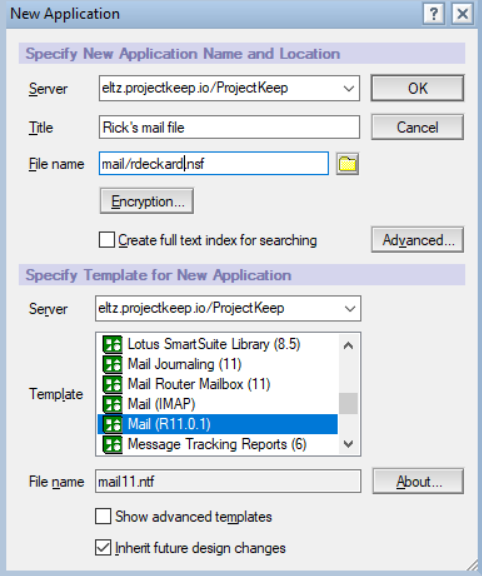
To begin, type ctrl-n to bring up the New Application dialog:
-
For Server, enter: your_castle_name.projectkeep.io/ProjectKeep
-
For Title, enter a brief description.
-
For File name enter: mail/your_short_name.nsf
-
Next you need to select a mail template, so for Server enter your server name again.
-
Now scroll down through the list of templates and select the Notes 11 template, mail11.ntf. Next, click Save in the upper right to create your mail file and open it automatically.
Setting access control
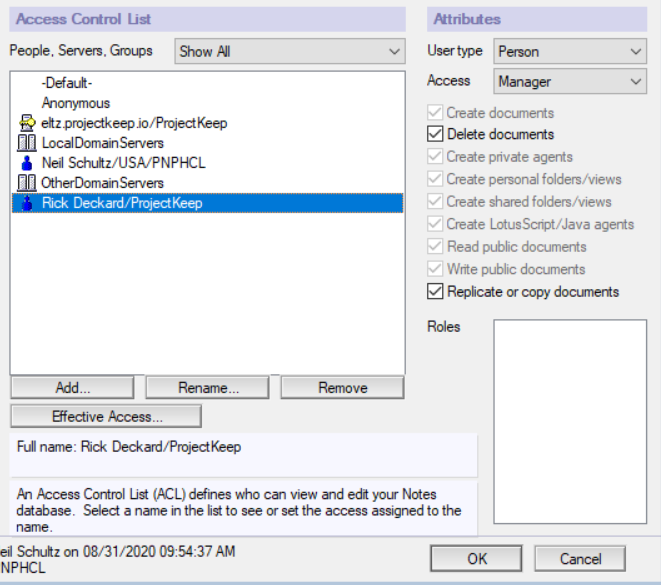
- The last step is to set the access control for the mail file. So with the mail file open, select: File / Application / Access Control… to bring up the Access Control dialog:
-
Select your own name from the list (because you have manager access) and click Add…, then add your new user name: my_new_user/ProjectKeep to the Access List. Now check the settings in the upper right, and make sure User Type is Person and Access is Manager. Click OK.
-
Now you should be good to go. If you want to create more users, just Cut and Paste this user and change the name fields appropriately.
Creating test data
Once you have a test user with a corresponding mail file, creating test data is very straightforward.
If you want Mail data, open up your own mail file, copy a list of emails, and paste them into the mail file you’ve just created.
If you want Calendar, Contact, or Todo entries, click the Open button at the top of the Mail page and create them directly in the mail file.
For Rules or Stationery, click Show More / Tools and add what you like.