Install Rancher Desktop
Important
This is only applicable when you install Volt MX Go to a development or test only environment.
The procedure guides you in installing Rancher Desktop on Windows, which is delivered as a desktop app.
Before you begin
Note
If you will use K3s in deploying Volt MX Go, you don't need to execute this procedure. Rancher Desktop includes a customized configuration of K3s and is geared to enabling developers with a small, desktop style Kubernetes cluster. It includes other developer centric tooling not included in K3s.
Before starting with the procedure, make sure that you have checked and verified that all system requirements for deploying Volt MX Go using Rancher Desktop running on Windows are met.
Note
You can use Rancher Desktop as a Non-Admin user on a Windows machine. However, an Admin's intervention is required during the installation process for the following components:
- WSL2 - Rancher Desktop requires Windows Subsystem for Linux (WSL2) on Windows. You need Admin privileges to install WSL2, which is an essential component of Rancher Desktop.
- Rancher Desktop Privileged Service - You need Admin privileges to install the Rancher Desktop privileged service, which is required to expose applications/services, running inside containers, on all interfaces on the host machine. However, you can skip the installation of the Rancher Desktop Privileged Service with the limitation that you will not be able to expose applications/services on any interface except 127.0.0.1.
Install or Update WSL2
Before installing Rancher Desktop, make sure you have an up-to-date installation of WSL2. If you are already using WSL2, update WSL2. Otherwise, install WSL2.
Update WSL2
If you are already using WSL2, open PowerShell or Windows Command Prompt in administrator mode by right-clicking and selecting Run as administrator. Run the following command to make sure WSL2 is up-to-date:
wsl --update
Follow any instructions given by the WSL update process. Afterward, from a Windows command prompt or PowerShell window, run the following command to make sure Ubuntu is the default distribution:
wsl --set-default Ubuntu-22.04
Proceed to install Rancher Desktop.
Install WSL2
Open PowerShell or Windows Command Prompt in administrator mode by right-clicking and selecting Run as administrator. Run the following command to install WSL2 using Ubuntu-22.04 as the Linux distribution:
wsl --install -d Ubuntu-22.04
Important
Restart your machine after this initial installation to complete the setup. Once the restart has completed, return to this documentation and complete the steps that follow.
Enter Ubuntu on the Windows search box and open the Ubuntu on Windows App. You should be prompted to create a username and password.
Tip
Use the first letter of your first name and your full last name as your username such as jdoe. Use a password that's easy for you to remember.
If you aren't prompted to create a username and password, run the following command to do so, adding your username such as sudo adduser jdoe:
sudo adduser
It's not required to enter more information, simply hit the Enter key and respond Y when prompted Is the information correct?.
Important
Make certain that Ubuntu-22.04 is your default WSL distribution. From a Windows command prompt or PowerShell window, run the following command:
wsl --set-default Ubuntu-22.04
You are now ready to install Rancher Desktop.
Install Rancher Desktop
-
Download the latest version of the Windows installer from the Rancher Desktop Releases page.
Note
Install the latest version of Rancher Desktop. Each new release comes with continuous improvements. Note that version 1.7.0 doesn't work well due to port forwarding issues. Older versions of Rancher Desktop require manual port-forwarding to enable the Windows browser to connect Volt MX Go Foundry applications running in Rancher Desktop. However, this is no longer necessary in the current versions (1.13 and above).
-
If you are upgrading from a prior version of MX Go (v2.0.2 or earlier), it's recommended to reset port forwarding prior to installing the latest version of Rancher Desktop by performing the following steps:
- Open a Windows PowerShell as the Administrator.
- Run the following command:
netsh interface portproxy reset -
Navigate to the directory where you downloaded the installer to and run the installer. This is usually the Downloads folder.
- Review the License Agreement, and then click I Agree to proceed with the installation.
- If prompted, choose between installing for everyone on the machine or installing just for the current user. Installing for everyone is preferred to installing the Rancher Desktop Privileged Service.
- Follow the prompts to confirm installation.
- When the installation completes, click Finish to close the installation wizard.
-
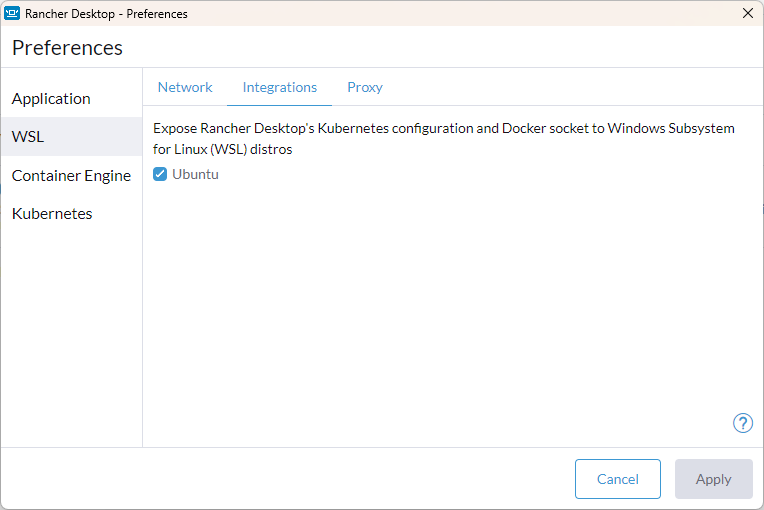
Make sure that Ubuntu is selected under WSL in Rancher Desktop:
-
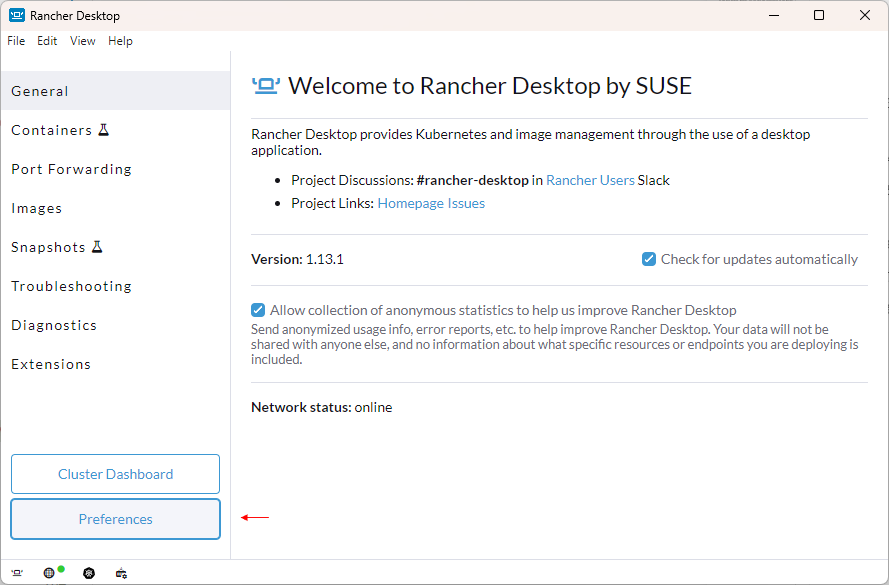
Open Rancher Desktop, and then click Preferences.
-
On the Rancher Desktop - Preferences dialog, click WSL and then click the Integrations tab.
-
Select the Ubuntu checkbox.
-
Click Apply.
-
Important
Use an Ubuntu terminal session to run all the commands presented in the Complete preparatory procedures and the other sections. To access the Ubuntu terminal, enter "Ubuntu" in the Windows search box and select the Ubuntu for Windows App. An Ubuntu terminal session opens with your home directory set as your current directory.
Additional information
When run for the first time or when changing versions, Kubernetes container images are downloaded. It may take a little time to load on the first run for a new Kubernetes version.
After Rancher Desktop installation, users have access to these supporting utilities:
- Helm
- kubectl
- nerdctl
- Moby
- Docker Compose
Next step
Proceed to Complete preparatory procedure.