Configure Microsoft Entra ID as IdP
About this task
The procedures guide you on configuring Microsoft Entra ID, formerly Azure Active Directory, as an IdP.
Client Ids
When configuring Microsoft Entra ID as your external identity provider (IdP), you must specify a client ID. This value must match the application (client) ID of the client application you configure in Microsoft Entra ID.
The client ID described here applies only to the Domino REST API server. Separate client IDs (application registrations) are required to support the Admin UI and Office Forms Based Authentication (OFBA).
To learn more about configuring Microsoft Entra ID for the Admin UI or Office Forms Based Authentication (OFBA), see the related topics:
Configuration in Azure Portal
Register an application
-
Go to the Azure portal and sign in.
Tip
Make sure you’re in the correct directory. Select your profile icon in the upper-right corner of the Azure portal, then select Switch directory. Use an account in the same directory where you plan to register the application.
-
In Microsoft Entra ID, select App registrations, then select New registration.
-
On the App registrations page, enter the application registration details described in the following table.
Form input name Description Name Enter a descriptive name for the application. Supported account types Choose who can sign in. Redirect URI Specify where authentication responses should be sent.
Select Web as the platform and use{{ origin }}/redirect/as the Redirect URI.
where:{{ origin }}is a template placeholder for the base URL where the Domino REST API server is hosted.
If you aren't sure about the value to use, usehttp://localhost:8080/redirect/. You can change this later on the Authentication page.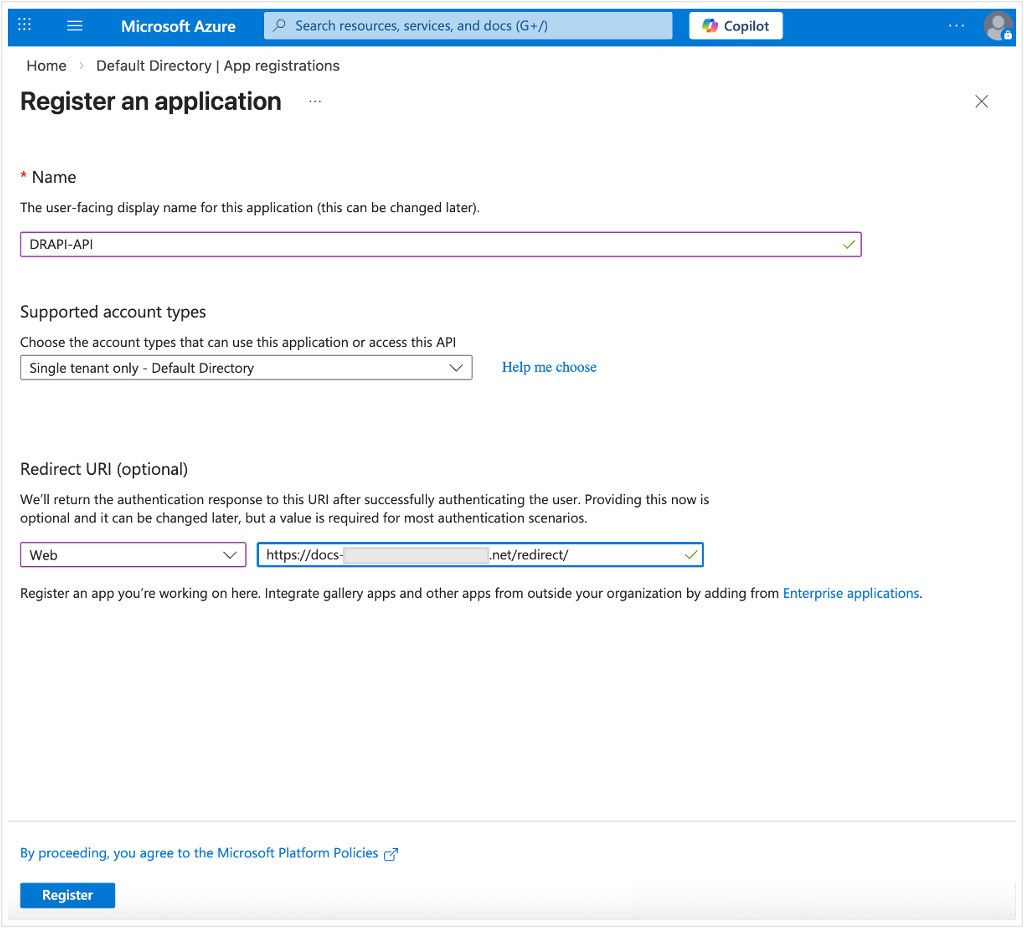
-
Click Register.
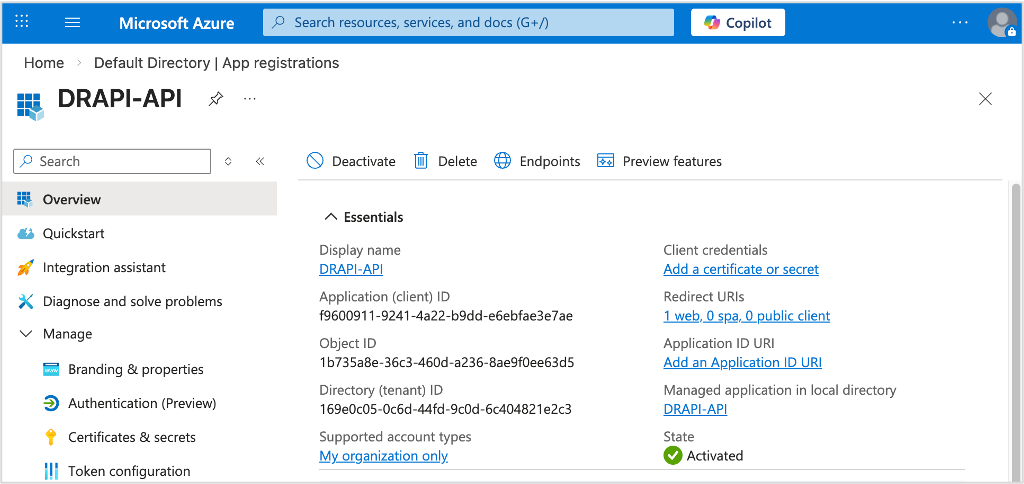
After the registration, you will see the Overview page. It is recommended to take note of the displayed values as they might be required for the application configuration.
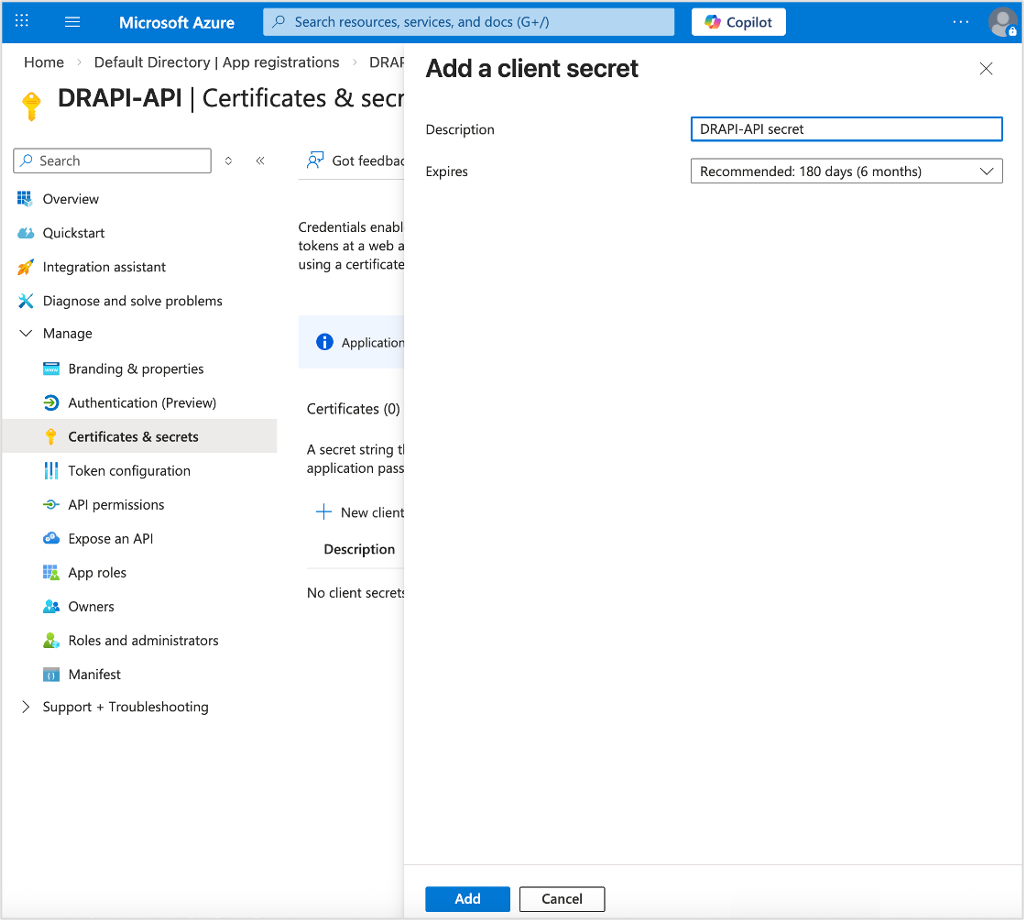
Add client credentials
- Under Manage, select Certificates & secrets → Client secrets → New client secret.
-
Add a description for your client secret, and select an expiration for the secret or specify a custom lifetime.
-
Click Add.
-
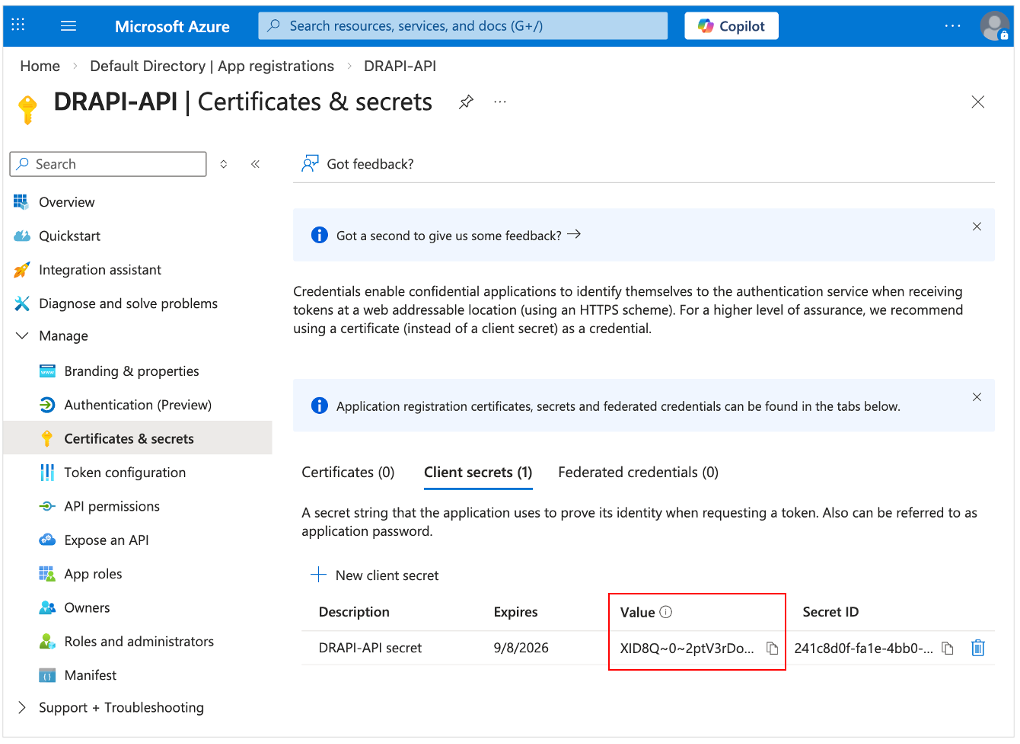
Record the client secret Value. This secret value is never displayed again after you leave the page.
Add a scope
- Under Manage, select Expose an API.
-
At the top of the page, select Add next to Application ID URI.
This defaults to
api://<application-client-id>. The App ID URI acts as the prefix for the scopes you'll reference in your API's code, and it must be globally unique.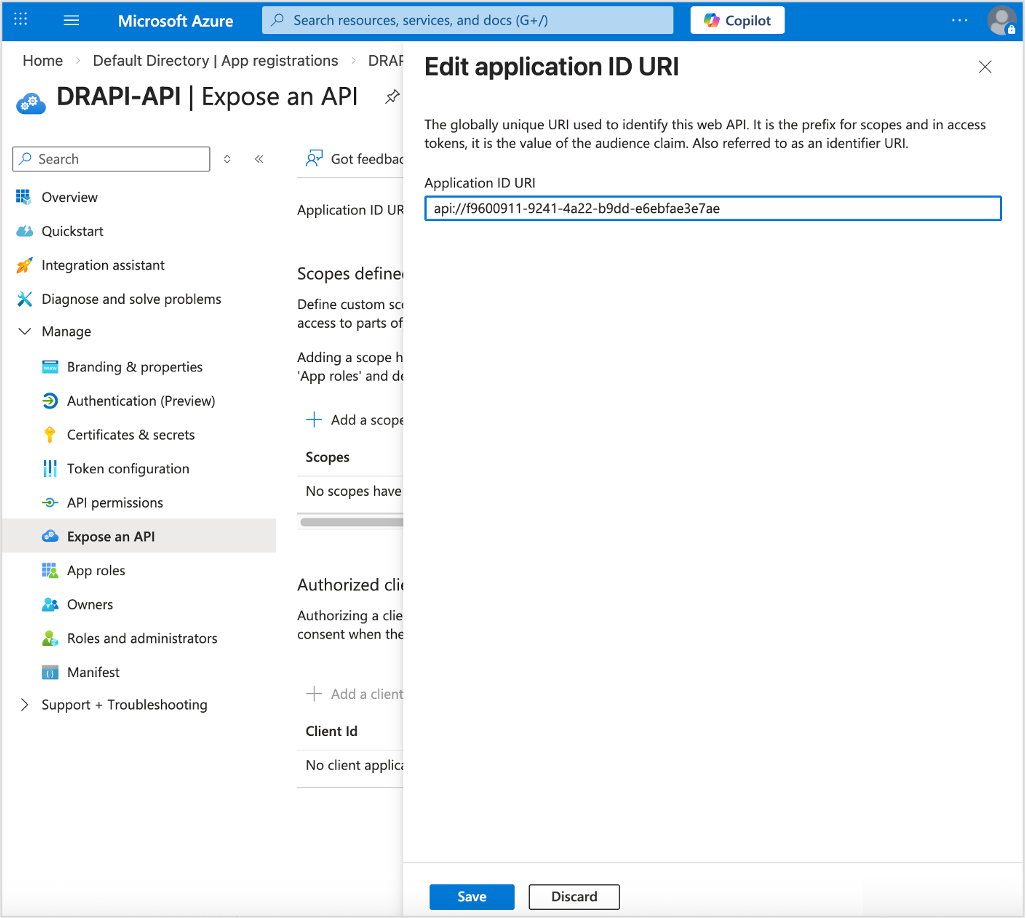
-
Click Save.
Note
If your application already has an Application ID URI and you want to add a scope, skip the preceding step and click Add a scope to open the Add a scope pane.
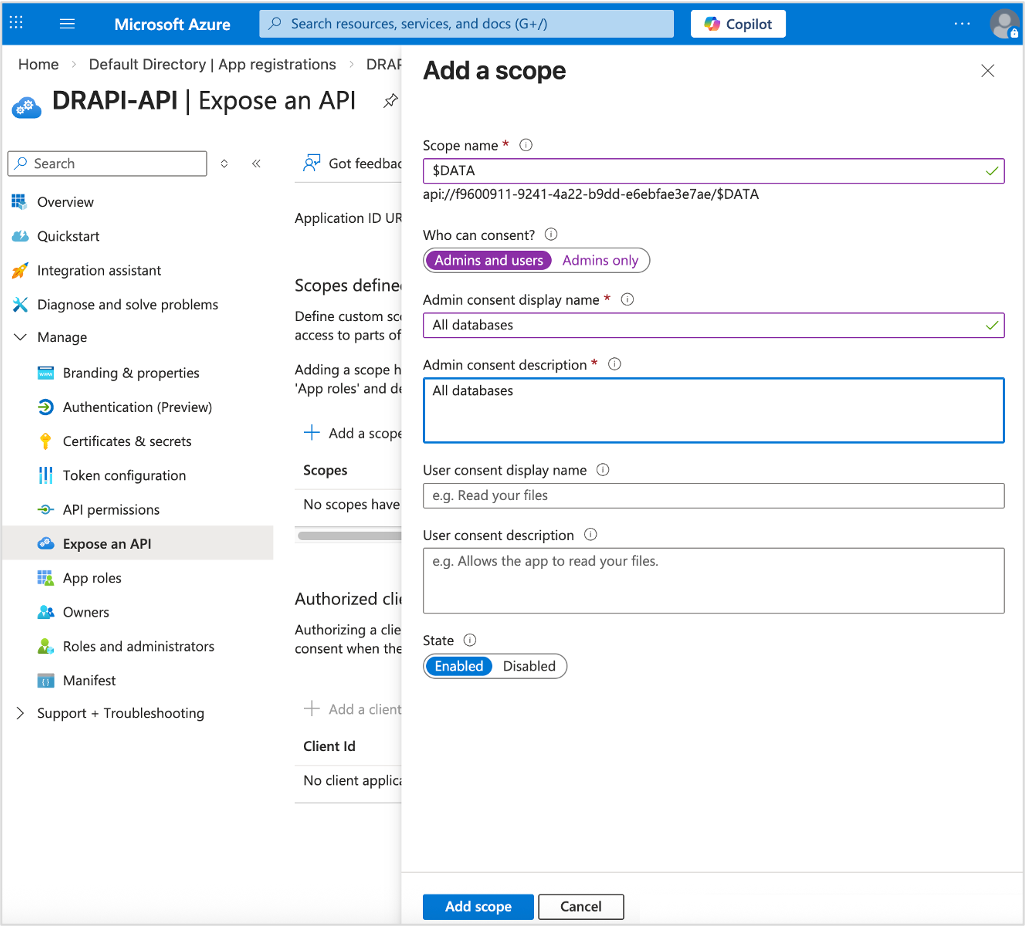
-
Click Add a scope and specify the scope's attributes in the Add a scope pane, and then click Add scope.
Ensure admins and users can consent and that the scope is set to Enabled. For more information about scopes in Domino REST API, see scopes reference and scope topic guide.
-
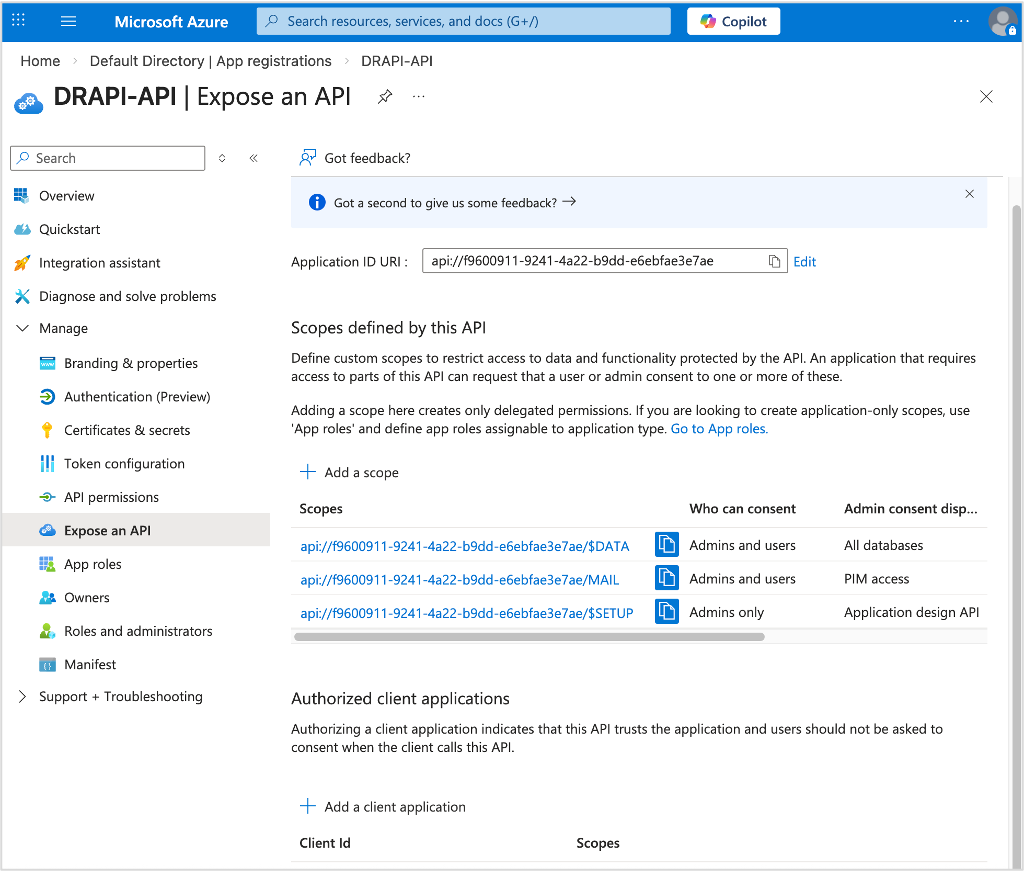
Repeat the steps to add necessary scopes.
Tip
If you plan to use Microsoft Entra ID as your IdP to log in to the Admin UI, you must add the
$SETUPscope.
The following example image shows how it would look after adding the scopes.
Configure API permissions
-
Under Manage, select API permissions. The API permissions page opens with the
User.Readpermission already configured.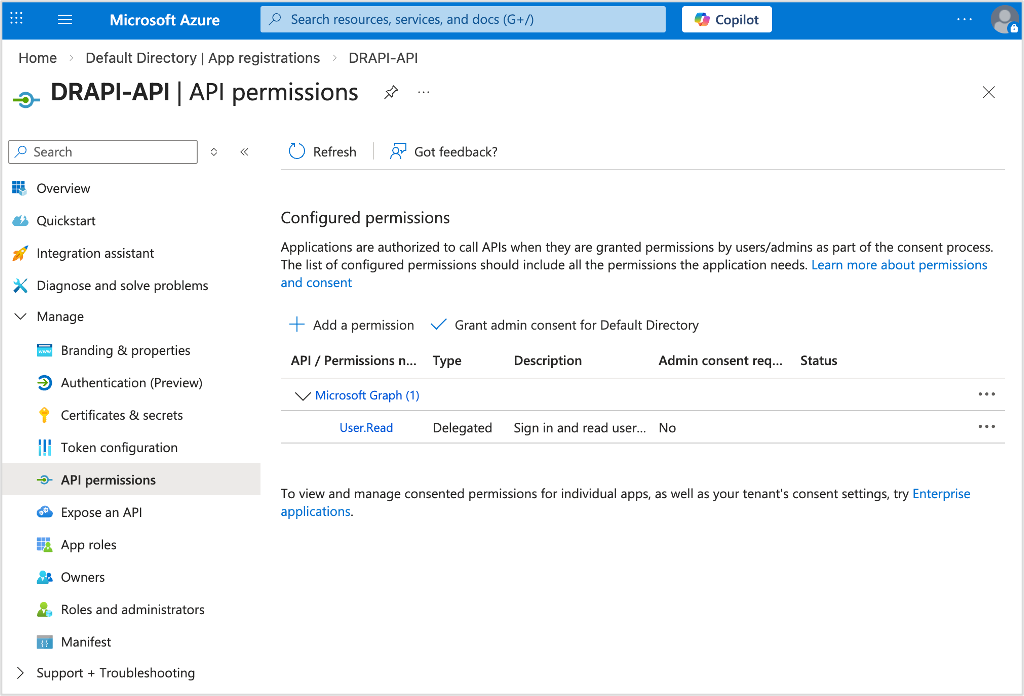
-
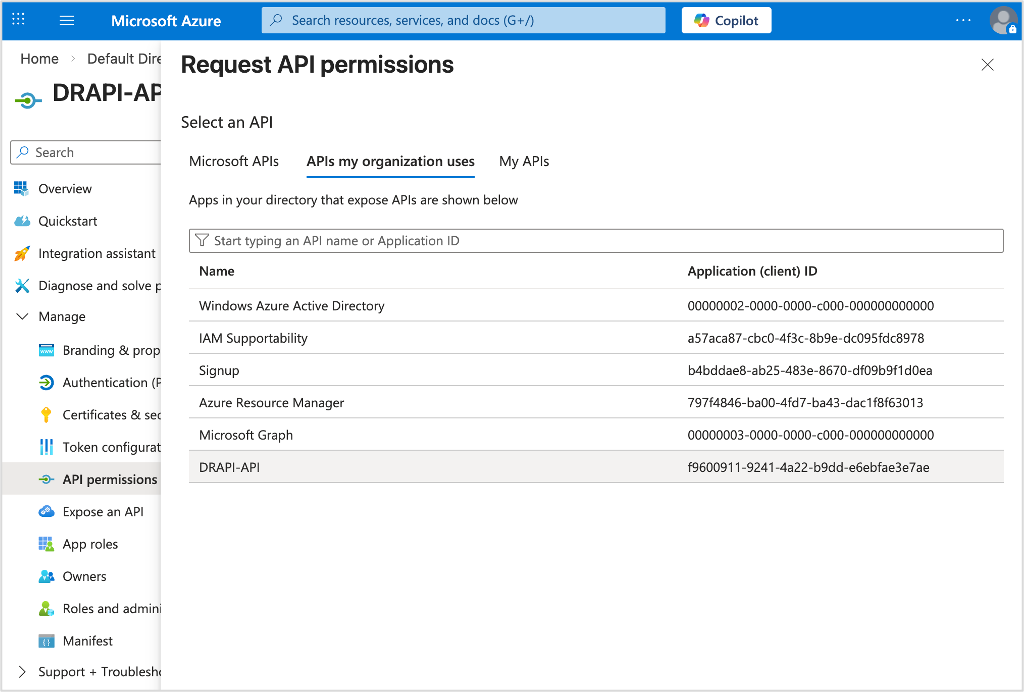
Click Add a permission. The Request API permissions pane opens.
-
Select the APIs my organization uses tab, and then select the application from the list.
-
Under Select permissions, select the required scopes and click Add permissions.
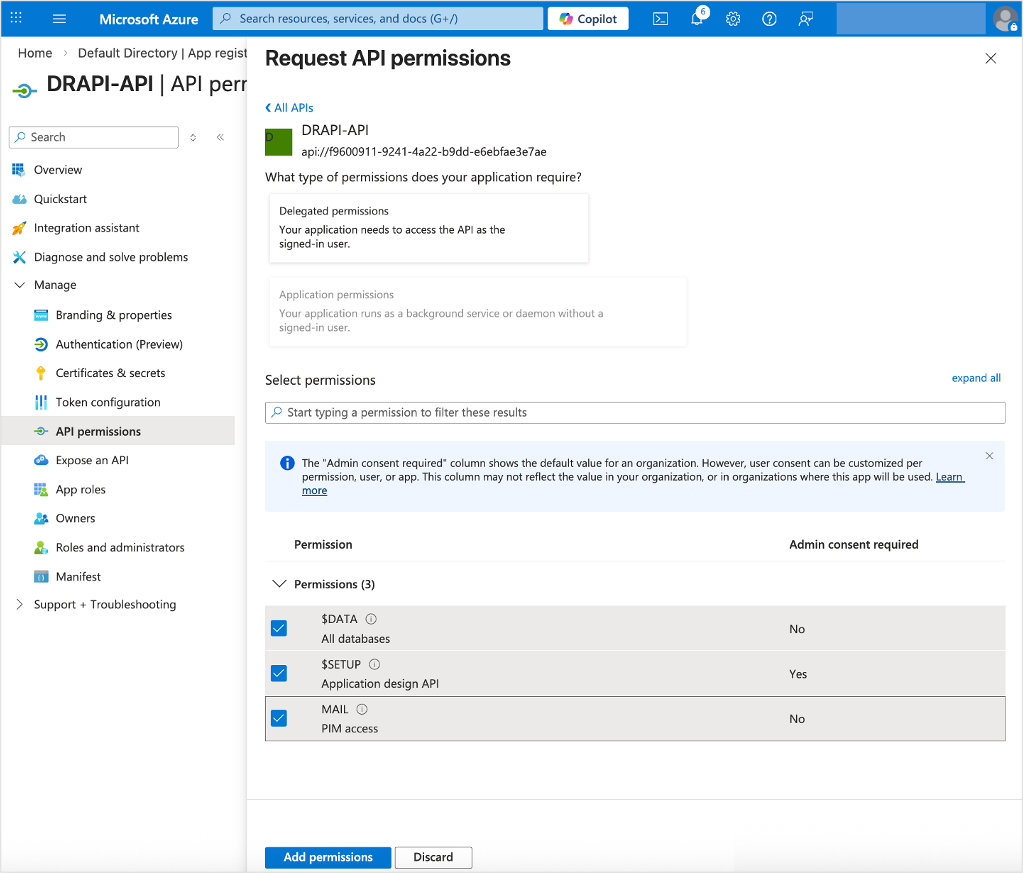
After adding permissions, you should see the selected permissions under Configured permissions on the API permissions page.
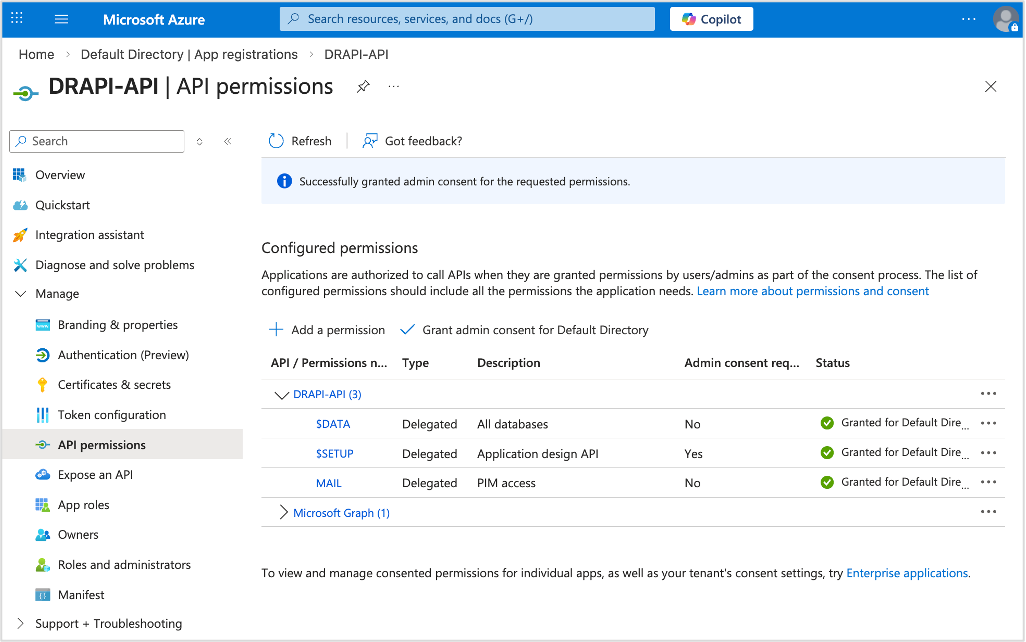
-
Click Grant admin consent for {your tenant} to grant admin consent to the permissions configured for the application.
-
In the Grant admin consent confirmation dialog, click Yes.
After granting consent, the permissions that required admin consent are shown as having consent granted.
Assign an owner
- Under Manage, select Owners, and then select Add owners. The Owners pane opens.
-
Search for and select the user account that you want to be an owner of the application.
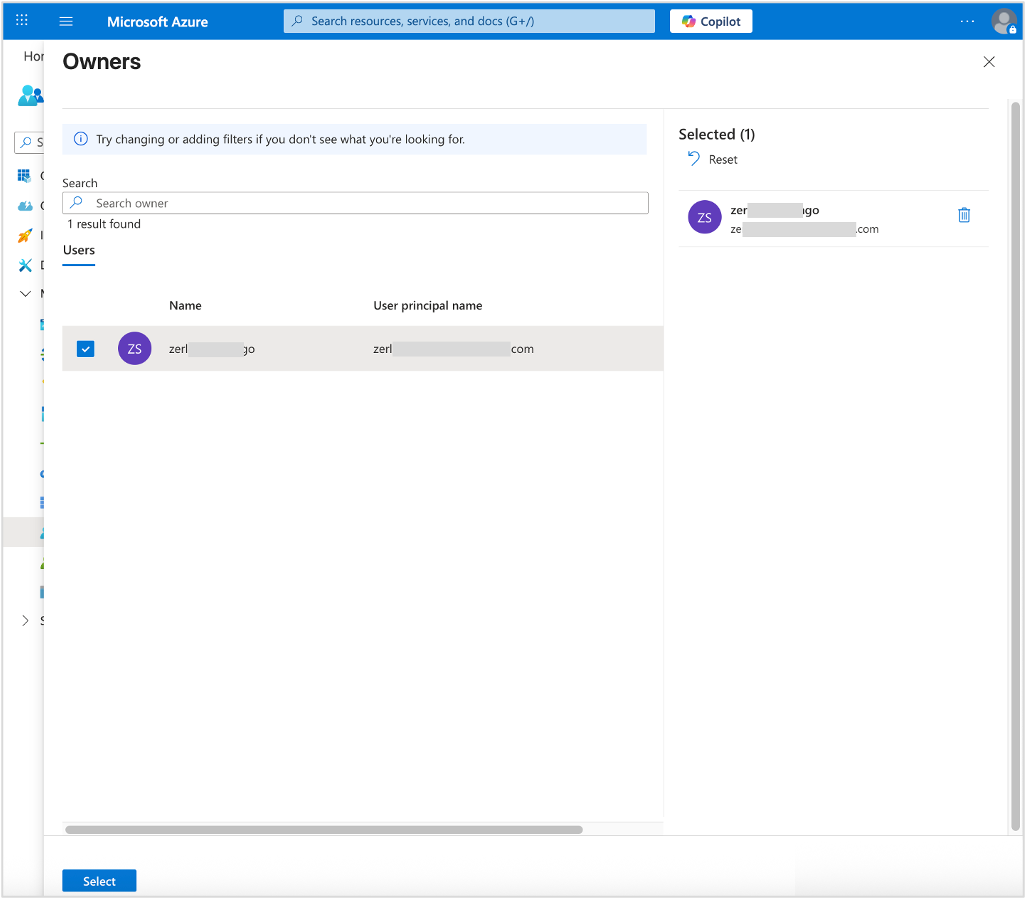
-
Click Select to add the user account that you chose as an owner of the application.
Check authentication
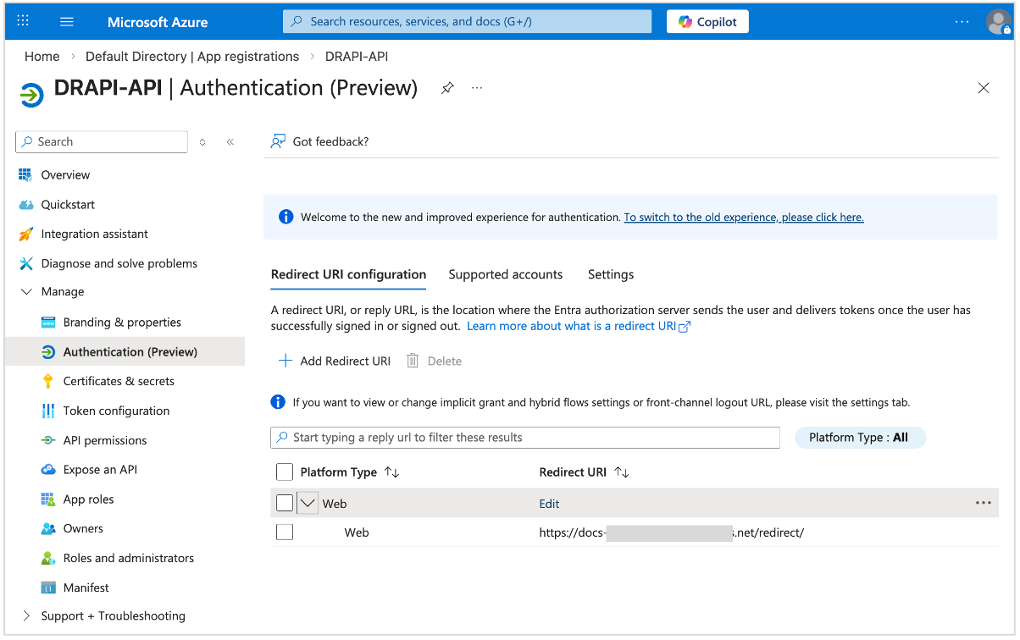
- Under Manage, select Authentication.
-
On the Redirect URI configuration tab:
- Make sure you have localhost for local development and https-based URLs for your test, staging, and/or production systems specified.
- Use
{{ origin }}/redirect/as the Redirect URI.{{ origin }}is a template placeholder for the base URL where the Domino REST API server is hosted.
-
On the Supported accounts tab, make sure the correct supported account type is selected.
-
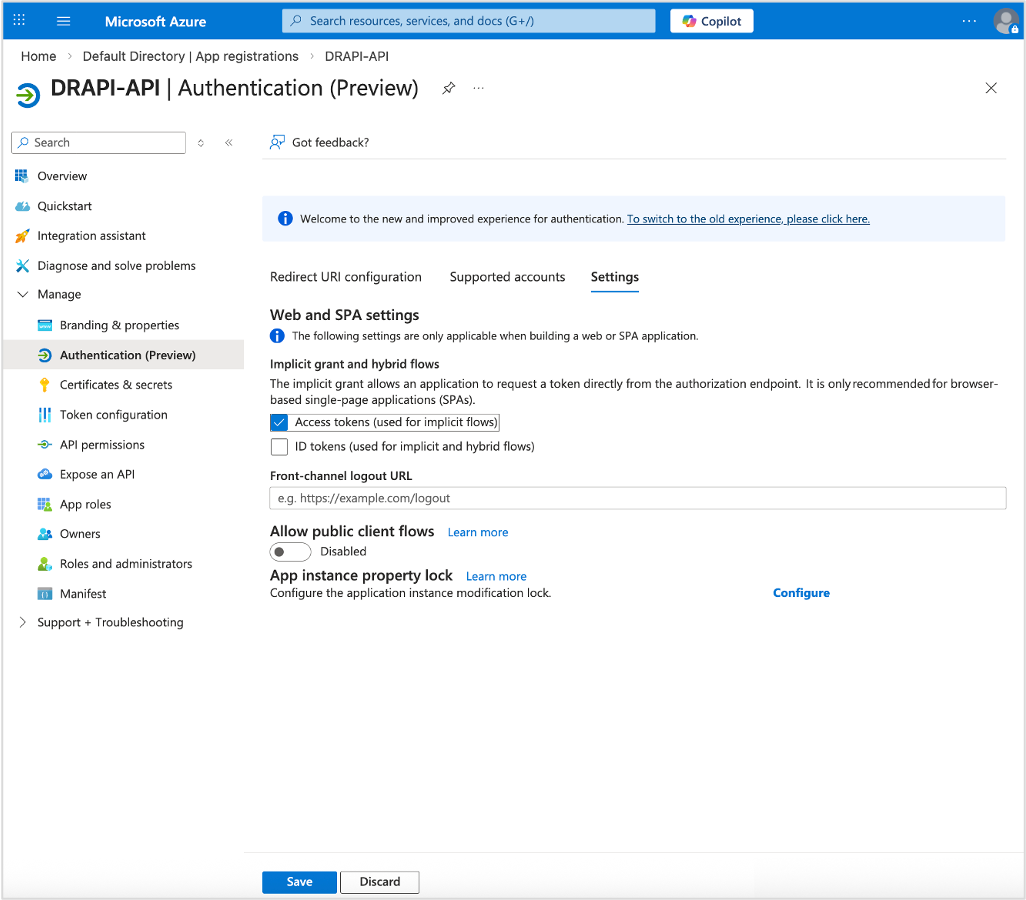
On the Settings tab, make sure Access token is selected.
-
Click Save if you made any changes.
Adjust app manifest
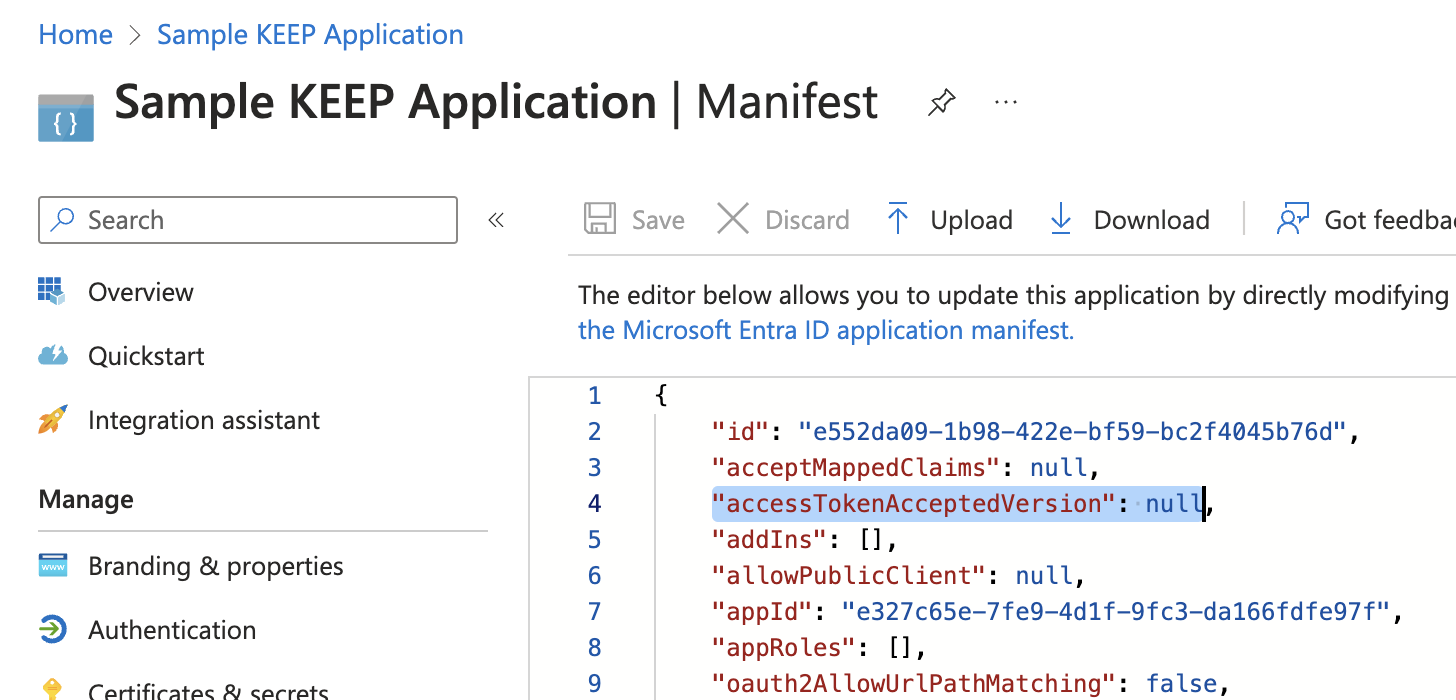
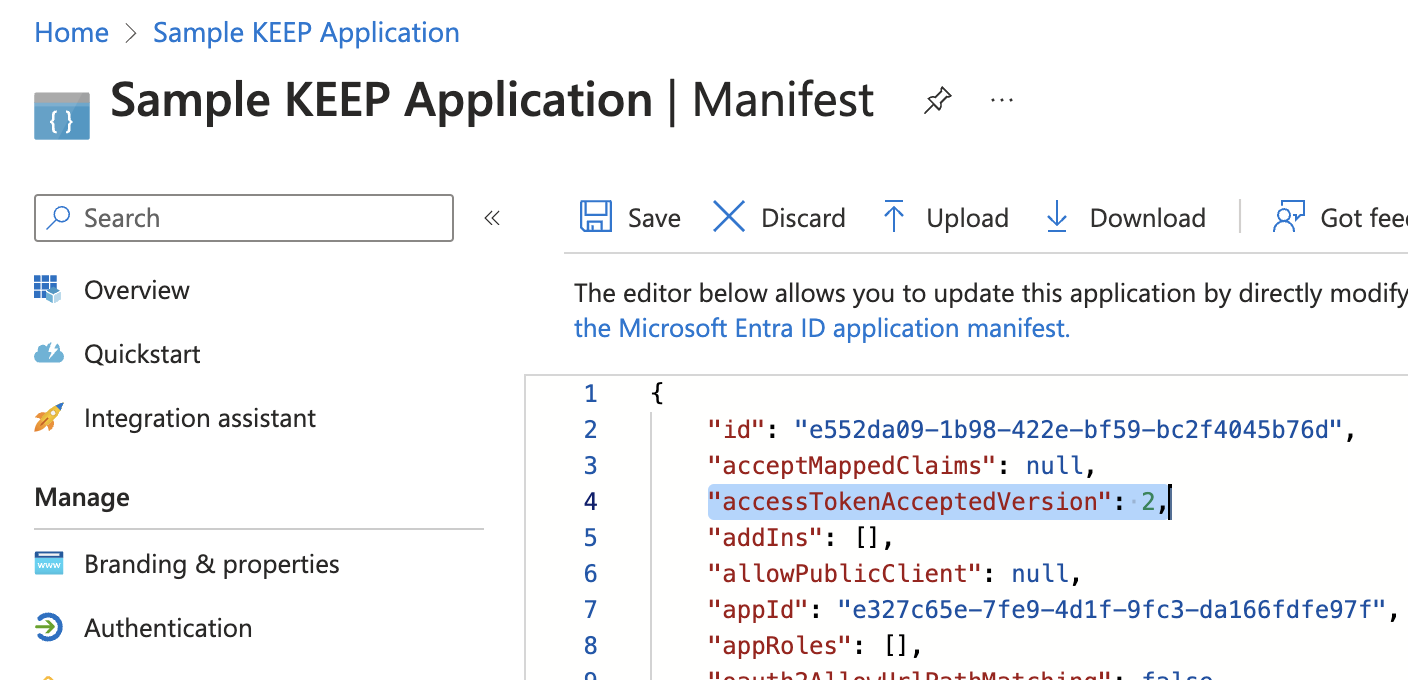
- Under Manage, select Manifest. A web-based manifest editor opens, allowing you to edit the manifest.
- Change the value of
accessTokenAcceptedVersionfromnullto2, and then click Save.
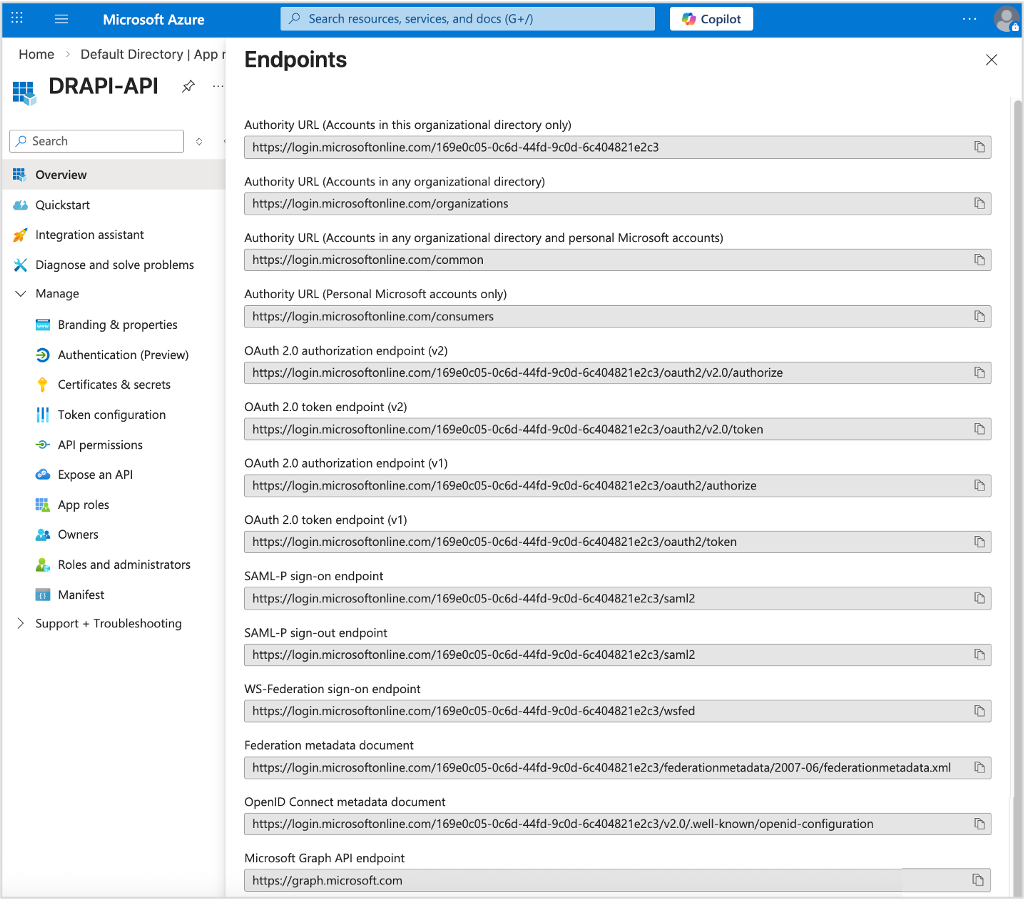
Check application endpoints
- Under Manage, select Overview.
-
Select Endpoints in the top menu to open the Endpoints page, which shows the authentication endpoints for the application. Take note of the following endpoints:
OpenID Connect metadata documentOAuth 2.0 authorization endpoint (v2)OAuth 2.0 token endpoint (v2)
Configuration in Domino REST API
-
Create a JSON file in the directory
[notesdata]/keepconfig.d.Use a filename for the JSON file that reveals its purpose. Make sure the filename only includes numbers and ASCII letters (
[0-9a-zA-Z]+). -
Add the following content to the JSON file.
{
      "jwt": {
            "AzureIdP": {
                  "active": true,
                  "providerUrl": "[value of the OpenID Connect metadata document endpoint]",
                  "aud": "[value of the Application (client) ID]",
                  "iss": "[iss value]",
                  "algorithm": "RS256"
            }
      }
}
Remarks:
- The
AzureIdPisn't a fixed value. Pick anything that makes it clear for you. You can use it as the filename too. - The
providerUrlparameter should have the value of theOpenID Connect metadata documentendpoint. - The
audparameter should have the value of the Application (client) ID that can be checked on the Overview page of the application in the Azure portal. -
The
issparameter should have a value of theOpenID Connect metadata documentendpoint without the/.well-known/openid-configurationsuffix.You can also check the value of the
issparameter by pasting theOpenID Connect metadata documentendpoint value on a browser and check theissuerkey. The value of the issuer key is the value to be used for theissparameter.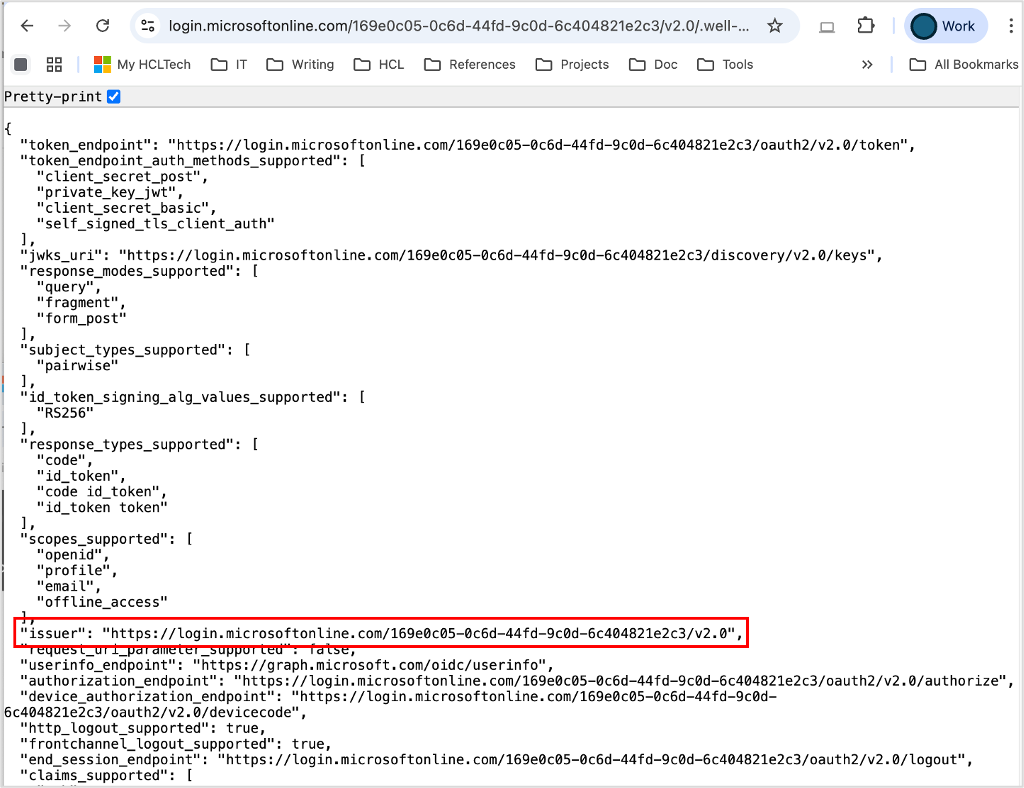
-
Currently, Azure AD doesn't return the
algclaim in thejwks_uri. You have to specify it here.
- The
-
Save the changes and restart Domino REST API.
Azure AD / Entra ID is a moving target
Depending on your configuration, you will need to adjust the aud and iss values in the configuration file. To determine the correct values, use the test application below to inspect what values are actually sent with the Azure access token. For aud, you might get the application ID and something different for iss. Also, the algorithm might be included somewhere. Use the test application below!
Test the application
-
Go to Downloads, and then download the
AzureTester.zipfile.The file contains an expressJS application and related static files (HTML/CSS/JS).
-
Extract the zip file.
-
Navigate to the directory and run the web server using the following command:
Note
You need a current NodeJS version installed.
npm install
node server.js
Warning
Do NOT use this code in production.
-
Open the URL http://localhost:8080/ and fill in the form details. You will find most of the values in the overview page of the Azure application registration. You should see a page like this:
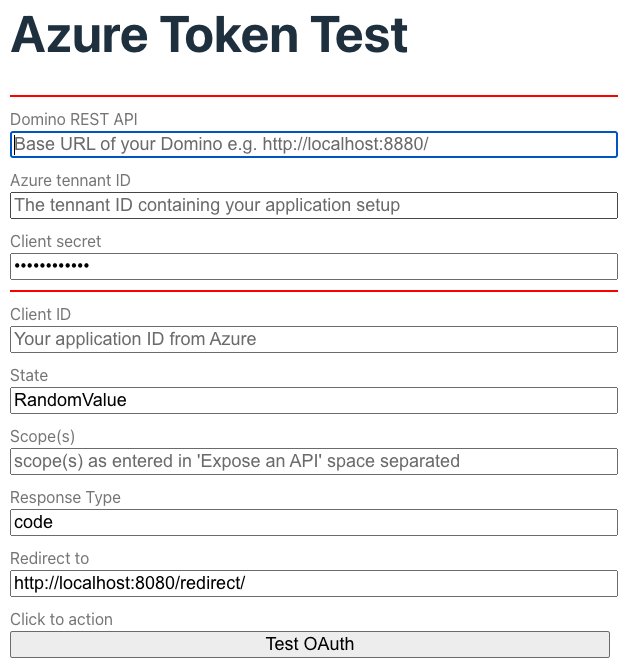
Note
When specifying scopes, include the Include the Application ID URI in the test form. The URI gets stripped from the resulting JWT token.
So to get scp : "$DATA MAIL demo" in the JWT, specify api://dominorest/$DATA api://dominorest/MAIL api://dominorest/demo where api://dominorest is whatever you specified as Application ID URI.
Azure redirects you to the /redirect URL. Typically, this page would auto process, but you want to marvel at the authorization code. When you click Exchange token, the ExpressJS server exchanges the code for a JWT and returns the list of configured endpoints as example. You can't do this with the browser alone, CORS prevents it.
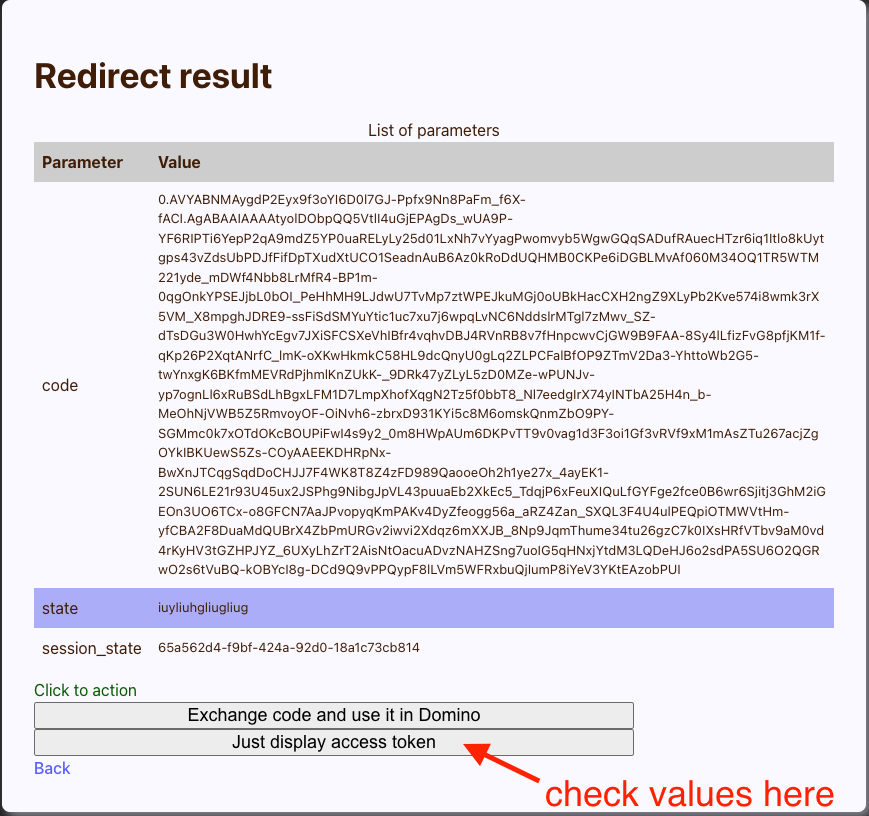
Check the results:

Troubleshooting
A few tips to troubleshoot the setup when the goalpost has been moved:
-
Grab the JWT token and paste it at the JWT.io website to decode the JSON payload.
-
If your corporate policy prohibits that, then extract the string between the two
.from your JWT token and send it through a Base64 decoder:echo [the string] | base64 --decode | jq. Kindly note that| jqis optional. - Compare the
issvalue from the JWT token with theissuervalue from theopenid-configurationendpoint. If they don't match, you need to add theissto the JSON configuration file you created or edited inkeepconfig.d. - Compare the
audvalue from the JWT token with theaudvalue of the configuration file. Adjust the configuration file if different. - Check the
scp, which is Microsoft's "alternative" toscope, and make sure it has the expected values matching the settings in the application configuration in the Admin UI. Adjust the scope in the DRAPI application (Admin UI) or your AzureAD IdP settings.
Additional information
Microsoft Entra ID follows OAuth 2.0 and OpenID Connect standards, but uses some Microsoft-specific conventions for JWT claims:
- The
audclaim identifies the target API and is typically set to the application ID, App ID URI (for example,api://<client-id>), or a resource URL. - Instead of a
scopeclaim, access tokens use thescpclaim to represent delegated permissions.