Lab 04 - Additional scope & schema
What you will learn
How to expose different sets of information from a database using different schemas.
Before your begin
- You have completed Lab 03 - Schema exploration.
- Your Domino server must be running.
- Postman is available.
Procedure
Create schema
- In the Admin UI, select Database Management - REST API or click Schemas from the navigation pane.
- On the Schema Management page, click Add Schema.
- In the Add New Schema dialog, click Create Schema.
- Select
ApprovalCentral.nsffrom the Database. -
Fill in the Schema Name with
trainingand the other fields as shown.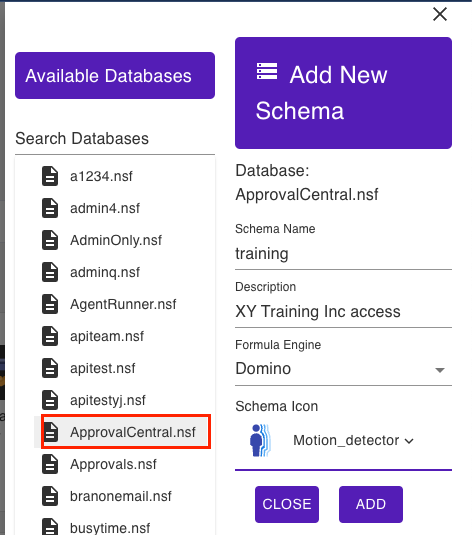
-
Click Save Schema.
-
On the Schema Management page, switch the page view to NSF View.
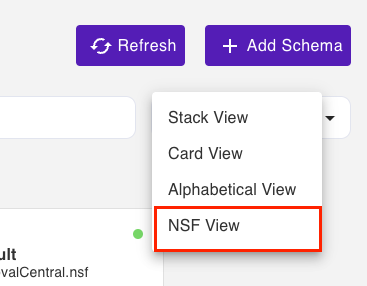
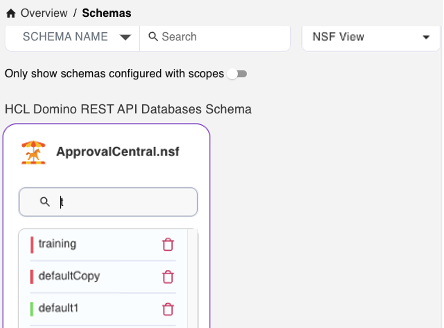
-
Click the
trainingschema to edit. -
Under the Database Forms, configure only the form
Training.Field Type Access Form string read-write from names read-write Training string read-write -
Set the Formula for Write Access to
@false - Click Save.
- Go to Databse Views, and then activate views
(TrainingApprovals)and(PendingApprovals).
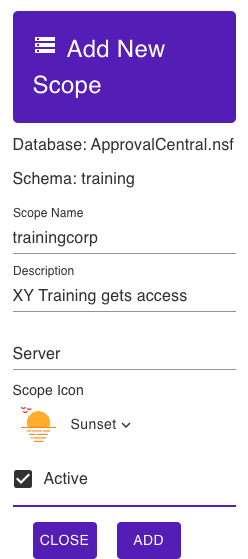
Create scope
- Click Scopes from the navigation pane.
- Click Add Scope on the Scope Management page.
- Select the schema
trainingunder theApprovalCentral.nsffrom the Available Schema. -
Fill in the Scope Name as
trainingcorp, and enter details in the Description.Leave the Server and Maximum Level Access as they are.
-
Click Add. The new scope is added to your scopes list.
Alternatively, you can use POST to /api/setup-v1/admin/scope
{
  "apiName": "trainingcorp",
  "createSchema": false,
  "description": "Subset Training for XY Training Inc",
  "iconName": "handshake",
  "isActive": true,
  "nsfPath": "ApprovalCentral.nsf",
  "schemaName": "training",
  "server": "*"
}
How to verify
- Retrieve the list of schemas for
ApprovalCentral.nsf. - Retrieve the list of scopes.
- Check the Admin UI.
- Login with limit to scope
trainingcorpand look at data in Postman.
Next step
Proceed to Lab 05 - Create an application.