Create OpenAPI 3.0.x specification
You will create an OpenAPI 3.0.x specification. It can be done using Notepad, but you want to use available tooling. You can use Swagger Editor, Redhat's Apicurio (Apicurito will suffice in most cases), or APIGit.
The idea
The approval extension implements a simplified approval system that works with any compliant database. A database is compliant when it has a view pendingApprovalsByApprover and a set of specified items in the document to be approved.
A base function is implemented to give you an idea. The example can be easily extended to add notification, communication with external systems, etc. You can even implement approvals for users who don't have write access to the document.
Note
- The OpenApi's 3.0.x JSON format is the only supported format. YAML or 3.1.x are not supported.
- The name of the file has to start with
openapi.and end with.json.
End Points
The extension shall allow you to retrieve a list of pending approvals, to approve or reject a request, or to delegate the decision.
Data formats
In a typical development cycle, you would start with the URLs and leave the data format unspecified a JSON object for an initial iteration. In a later iteration, the schema gets specified in detail and locked down.
Note
OpenAPI does NOT require extensive upfront design, but supports convenient and ever refining iterations.
For this tutorial, the final structure is presented.
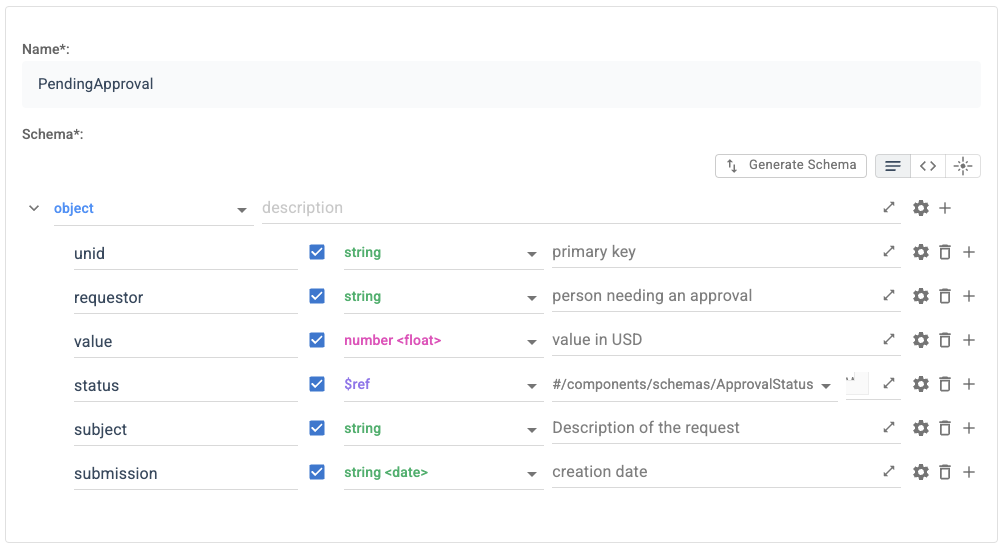
Pending approvals
The Schema looks like the following. The URL (see below) will return an array of them.
Note
It's good practice to compose the object definitions. In this example, status is a referenced definition.
{
  "type": "object",
  "properties": {
    "unid": {
      "type": "string",
      "description": "primary key",
      "readOnly": true,
      "minLength": 32,
      "maxLength": 32
    },
    "requestor": {
      "type": "string",
      "description": "person needing an approval",
      "readOnly": true
    },
    "value": {
      "type": "number",
      "description": "value in USD",
      "readOnly": true,
      "format": "float"
    },
    "status": {
      "$ref": "#/components/schemas/ApprovalStatus",
      "description": "Where are we"
    },
    "subject": {
      "type": "string",
      "description": "Description of the request",
      "readOnly": true
    },
    "submission": {
      "type": "string",
      "format": "date",
      "readOnly": true,
      "description": "creation date"
    }
  },
  "required": ["unid", "requestor", "value", "status", "subject", "submission"],
  "additionalProperties": false
}
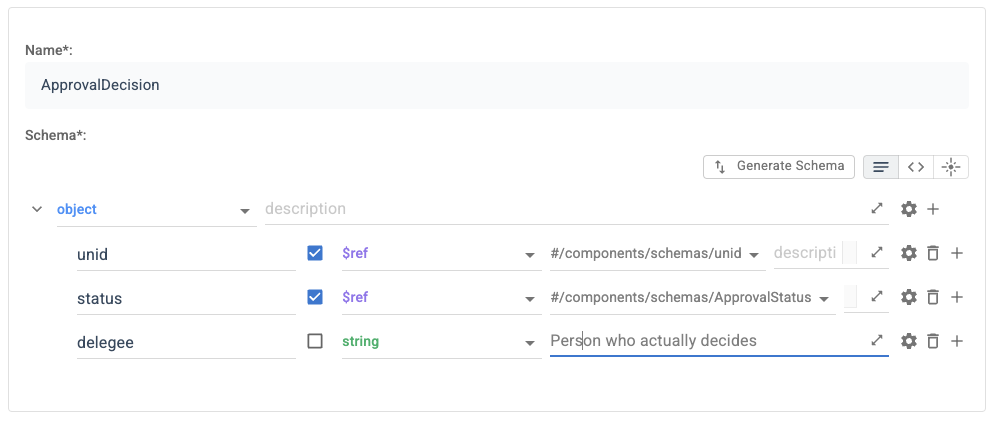
Decision
A decision submission needs the unid, the new status, and in case of a delegation, the delegee. The approval status is reused. In a production level application, you probably would have more fields.
{
  "type": "object",
  "properties": {
    "unid": {
      "$ref": "#/components/schemas/unid"
    },
    "status": {
      "$ref": "#/components/schemas/ApprovalStatus"
    },
    "delegee": {
      "type": "string",
      "description": "Person who actually decides"
    }
  },
  "required": ["unid", "status"],
  "additionalProperties": false
}
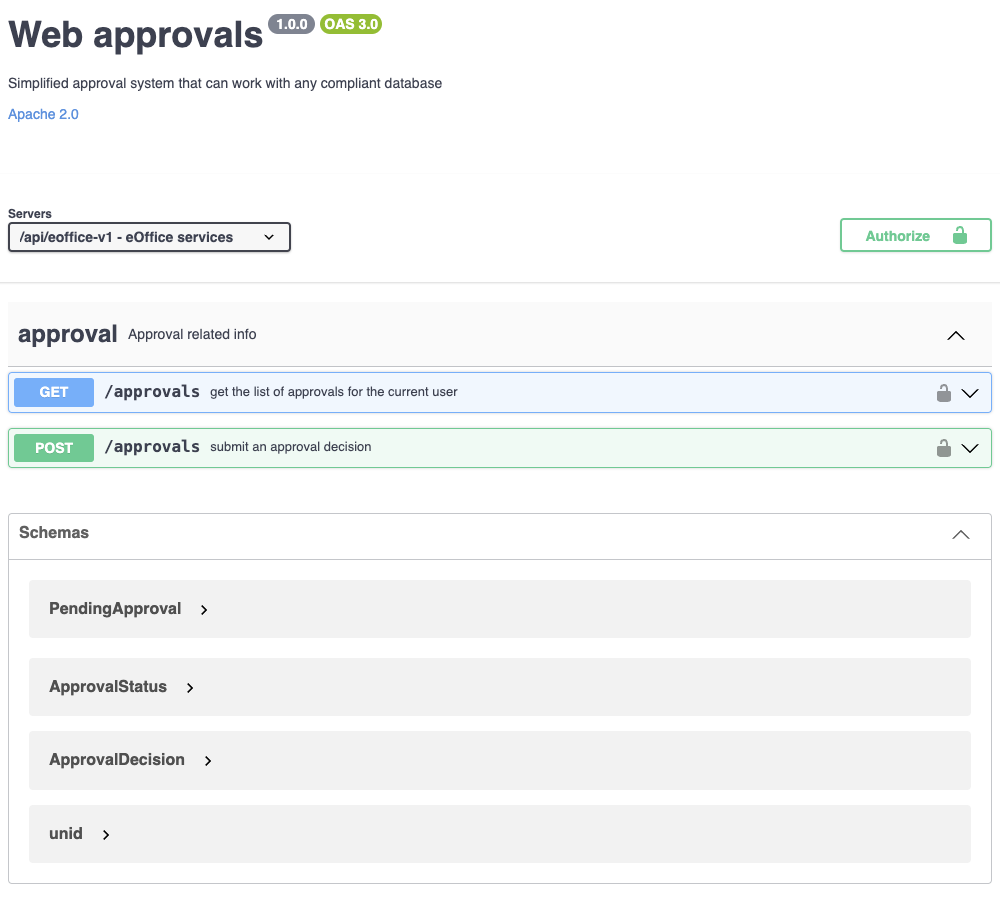
URLs
For this tutorial project, a single URL /appovals with GET for the list and POST for the decision is sufficient.
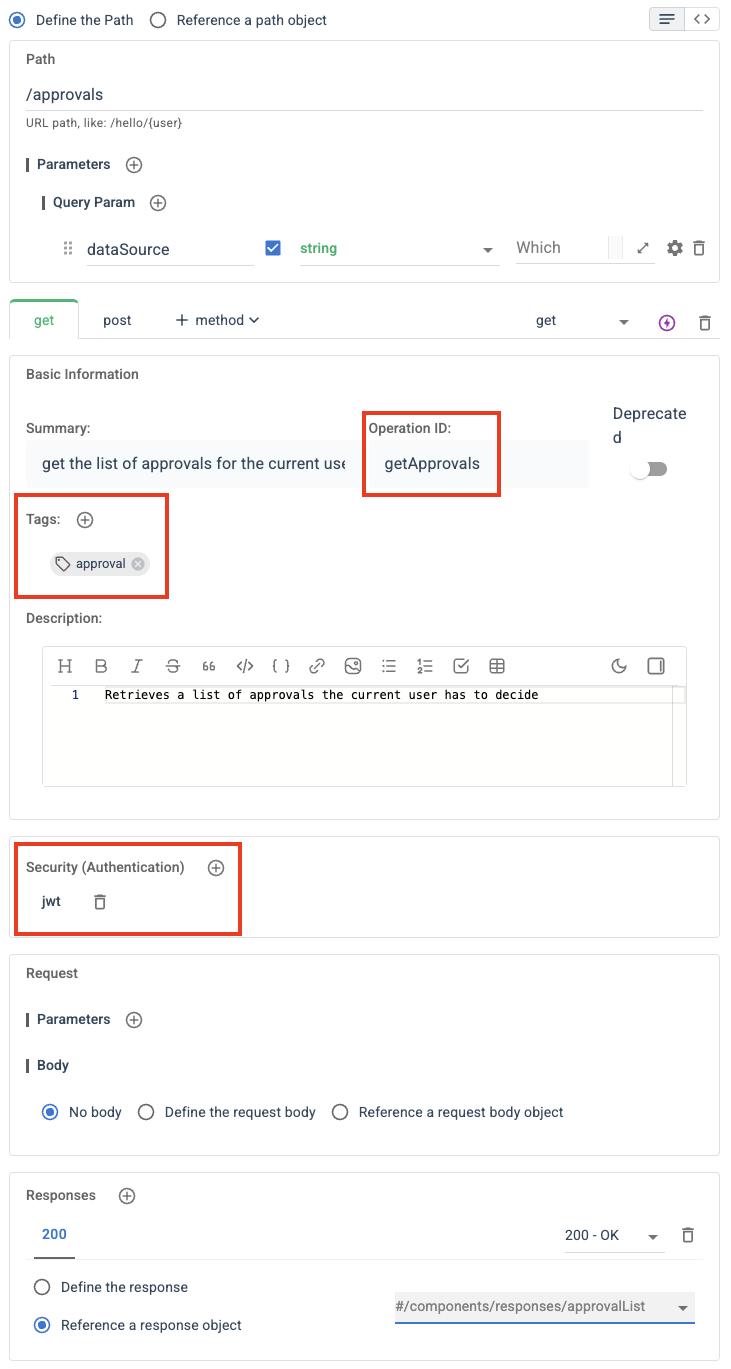
Important elements are:
- Security: jwt
- Tags
- Operation ID
Tags and OperationId will form the package and class name later on.
{
  "get": {
    "summary": "get the list of approvals for the current user",
    "description": "Retrieves a list of approvals the current user has to decide",
    "operationId": "getApprovals",
    "tags": ["approval"],
    "parameters": [],
    "responses": {
      "200": {
        "$ref": "#/components/responses/approvalList"
      }
    },
    "security": [
      {
        "jwt": []
      }
    ]
  },
  "post": {
    "summary": "submit an approval decision",
    "description": "Submisssion of approval, rejection or delegation",
    "operationId": "submitDecision",
    "tags": ["approval"],
    "parameters": [],
    "responses": {
      "200": {
        "$ref": "#/components/responses/status"
      },
      "400": {
        "$ref": "#/components/responses/status"
      }
    },
    "security": [
      {
        "jwt": []
      }
    ],
    "requestBody": {
      "$ref": "#/components/requestBodies/DecissionBody"
    }
  },
  "parameters": [
    {
      "in": "query",
      "name": "dataSource",
      "description": "Which database to check",
      "schema": {
        "type": "string"
      },
      "required": true
    }
  ]
}
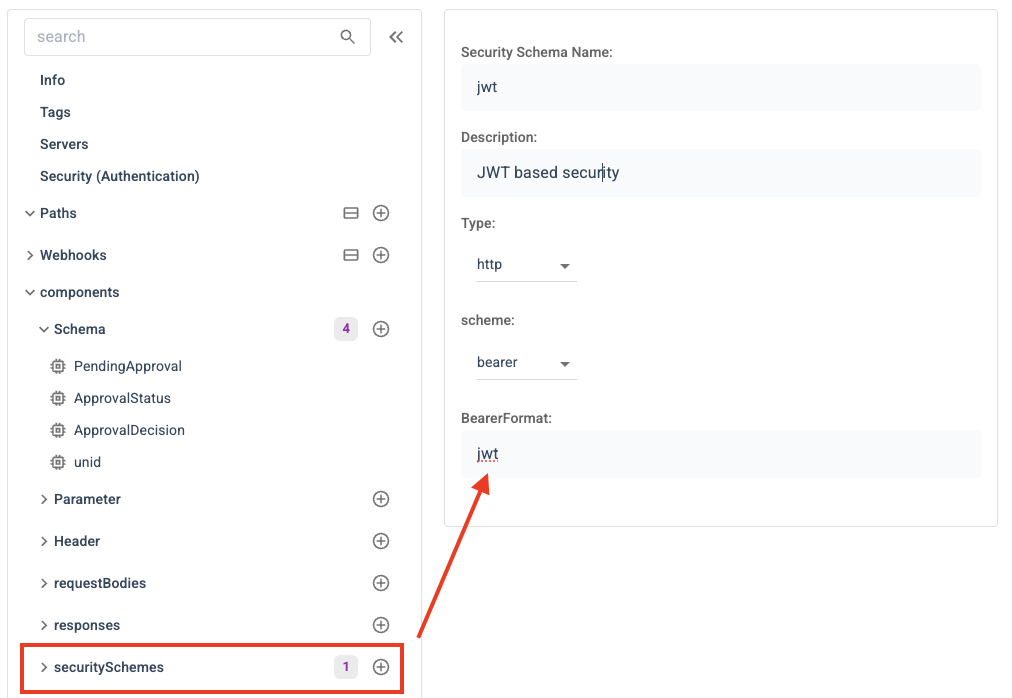
Security
You need to specify what authentication is available. It needs to match the security spec from DRAPI. The only supported value is jwt.
Extensions
There are several extensions defined in DRAPI that can be used to further refine the schema. The result looks like this:
 .
.
You can reference the full file here as openapi.eoffice.json.
Next
Proceed to provide the config.json.